Tunnels for IPv6
520
Managed Switches
CLI: Create a 6in4 Tunnel on Switch 2
Web Interface: Create a 6in4 Tunnel
You must configure Switch 1 and Switch 2.
Web Interface: Create a 6in4 Tunnel on Switch 1
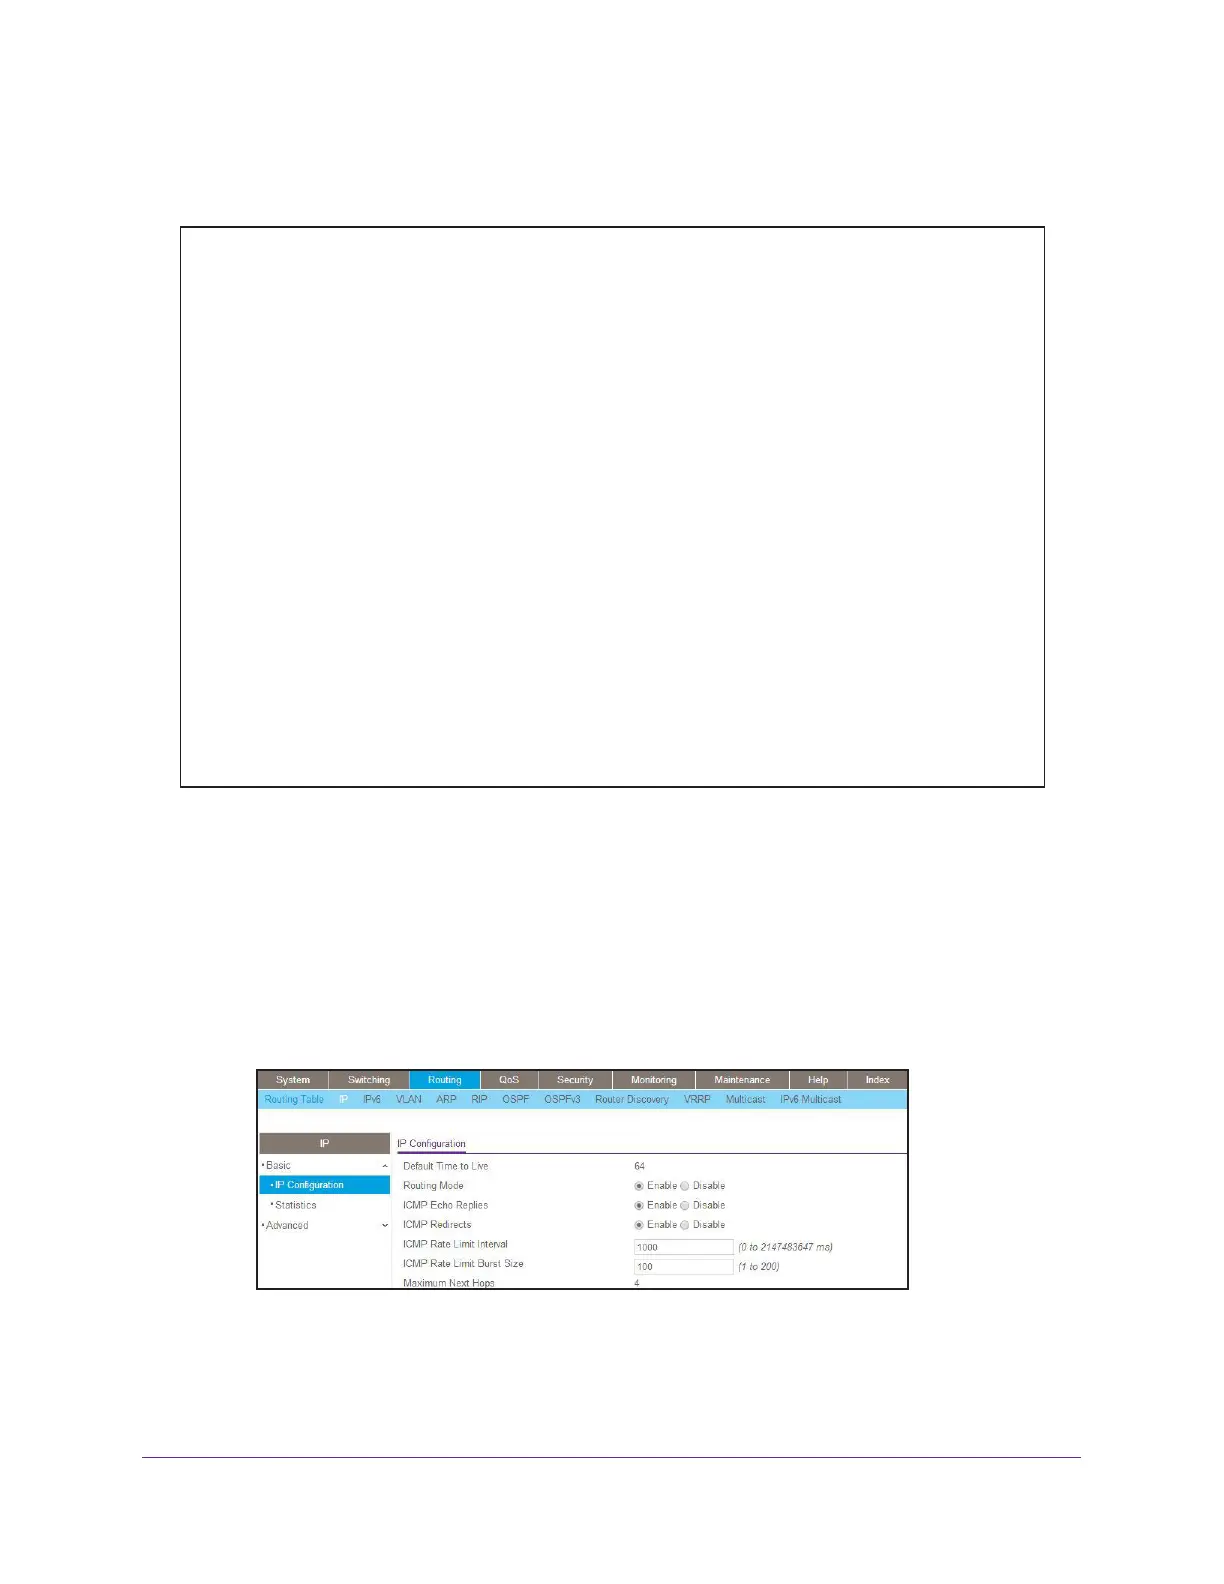
1. Enable IP routing on the switch.
a. Select Routing > IP > Basic > IP Configuration.
A screen similar to the following displays.
b. For Routing Mode, select the Enable radio button.
c. Click Apply.
(Netgear Switch) #config
(Netgear Switch) (Config)#ip routing
(Netgear Switch) (Config)#ipv6 unicast-routing
(Netgear Switch) (Config)#interface 1/0/13
(Netgear Switch) (Interface 1/0/13)#routing
(Netgear Switch) (Interface 1/0/13)#ip address 192.168.1.2 255.255.255.0
(Netgear Switch) (Interface 1/0/13)#exit
(Netgear Switch) (Config)#interface tunnel 0
(Netgear Switch) (Interface tunnel 0)#ipv6 enable
(Netgear Switch) (Interface tunnel 0)#ipv6 address 2000::2/64
(Netgear Switch) (Interface tunnel 0)#tunnel mode ipv6ip
(Netgear Switch) (Interface tunnel 0)#tunnel source 192.168.1.2
(Netgear Switch) (Interface tunnel 0)#tunnel destination 192.168.1.1
(Netgear Switch) (Interface tunnel 0)#exit
(Netgear Switch) (Config)#exit
(Netgear Switch) #show interface tunnel
TunnelId Interface TunnelMode SourceAddress DestinationAddress
-------- --------- ----------------- ------------- ------------------
0 tunnel 0 6 in 4 Configured 192.168.1.2 192.168.1.1