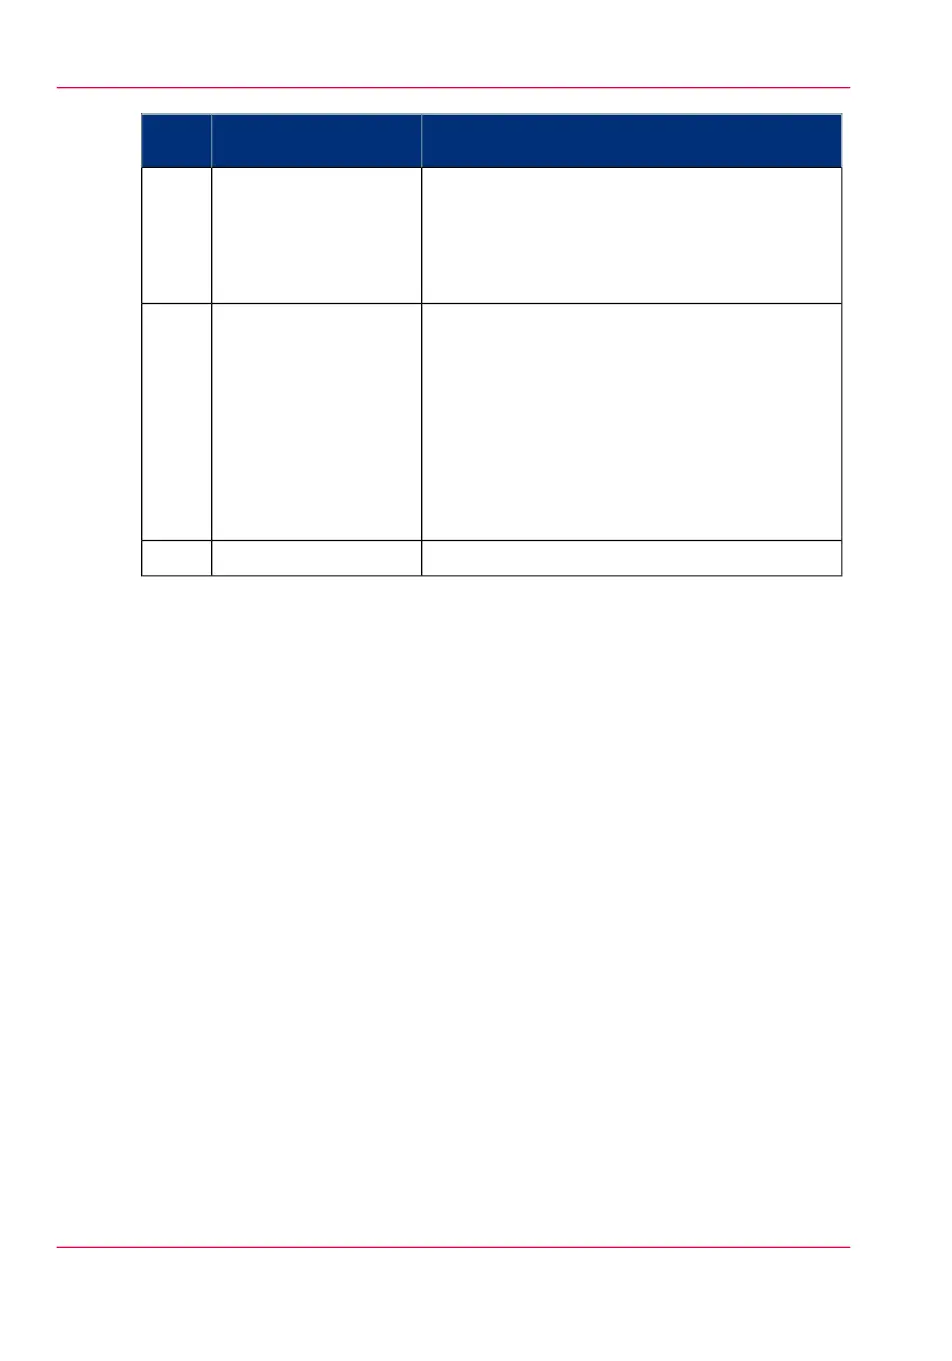
DescriptionNameNum-
ber
The exposure control is located on the left side of
the operator panel. The scale displays the current
exposure rate. Control the exposure with the keys.
Push the ‘down’ button to make the output darker.
Push the ‘up’ button to make the output lighter.
Exposure control12
Use the Job interrupt key to set high priority to
your copy job and to interrupt the printing of a
running print or copy job. Determine the high
priority of your copy job with the Job interrupt
key before you scan your originals. The job is
placed at the top of the printing queue in the
queue manager. The interrupt job will start run-
ning directly after the current printing page is
completed.
Job interrupt key13
Press this red key to stop the job.Stop key14
Section, Arrow and Function keys
The Océ PlotWave 900 scanner operator panel contains a number of special keys.
These include:
•
Section keys
•
Function keys
•
Arrow keys
The Section keys are the four keys located above the display.
These keys provide access to the ‘Custom’, ‘Original’, ‘Print’ and ‘File’ sections on the
display. Each section contains several function cards. These can be accessed with the help
of the function key farthest to the left.
The five function keys below the display allow you to select a function or a subfunction
within a card.
Finally, the arrow keys can be used like the numeric keys to define numeric settings.
The arrow keys can be used to increase or decrease the active value by 1. The left arrow
and right arrow keys can be used to increase or decrease the active value by 10. The ex-
ception to this rule is the selection of zoom values. Here, the left arrow key can be used
to browse through the predefined reduction steps and the right arrow key to browse
through the predefined enlargement steps .
The arrow keys are also used for selecting subfunctions.
Chapter 5 - Use the Océ PlotWave 900 scanner to copy146
Scanner operator panel