11
Features
This chapter explains the features and functions of each MPC model with a touchscreen: MPC X, MPC Live, MPC
Live II, MPC One, MPC Key 61, MPC Key 37, and MPC Touch.
Note: If you are using the MPC Studio mk2, the display does not function as a touchscreen but can be used in
conjunction with the software to select tracks, programs, and files, as well as edit samples or change project parameters.
To learn more about how to use the MPC software, consult the MPC software User Guide. This can be accessed by
clicking the Help menu in the MPC software, selecting MPC Help, and selecting MPC User Manual.
Touchscreens
Here is some general information about how to use the touchscreen on your MPC:
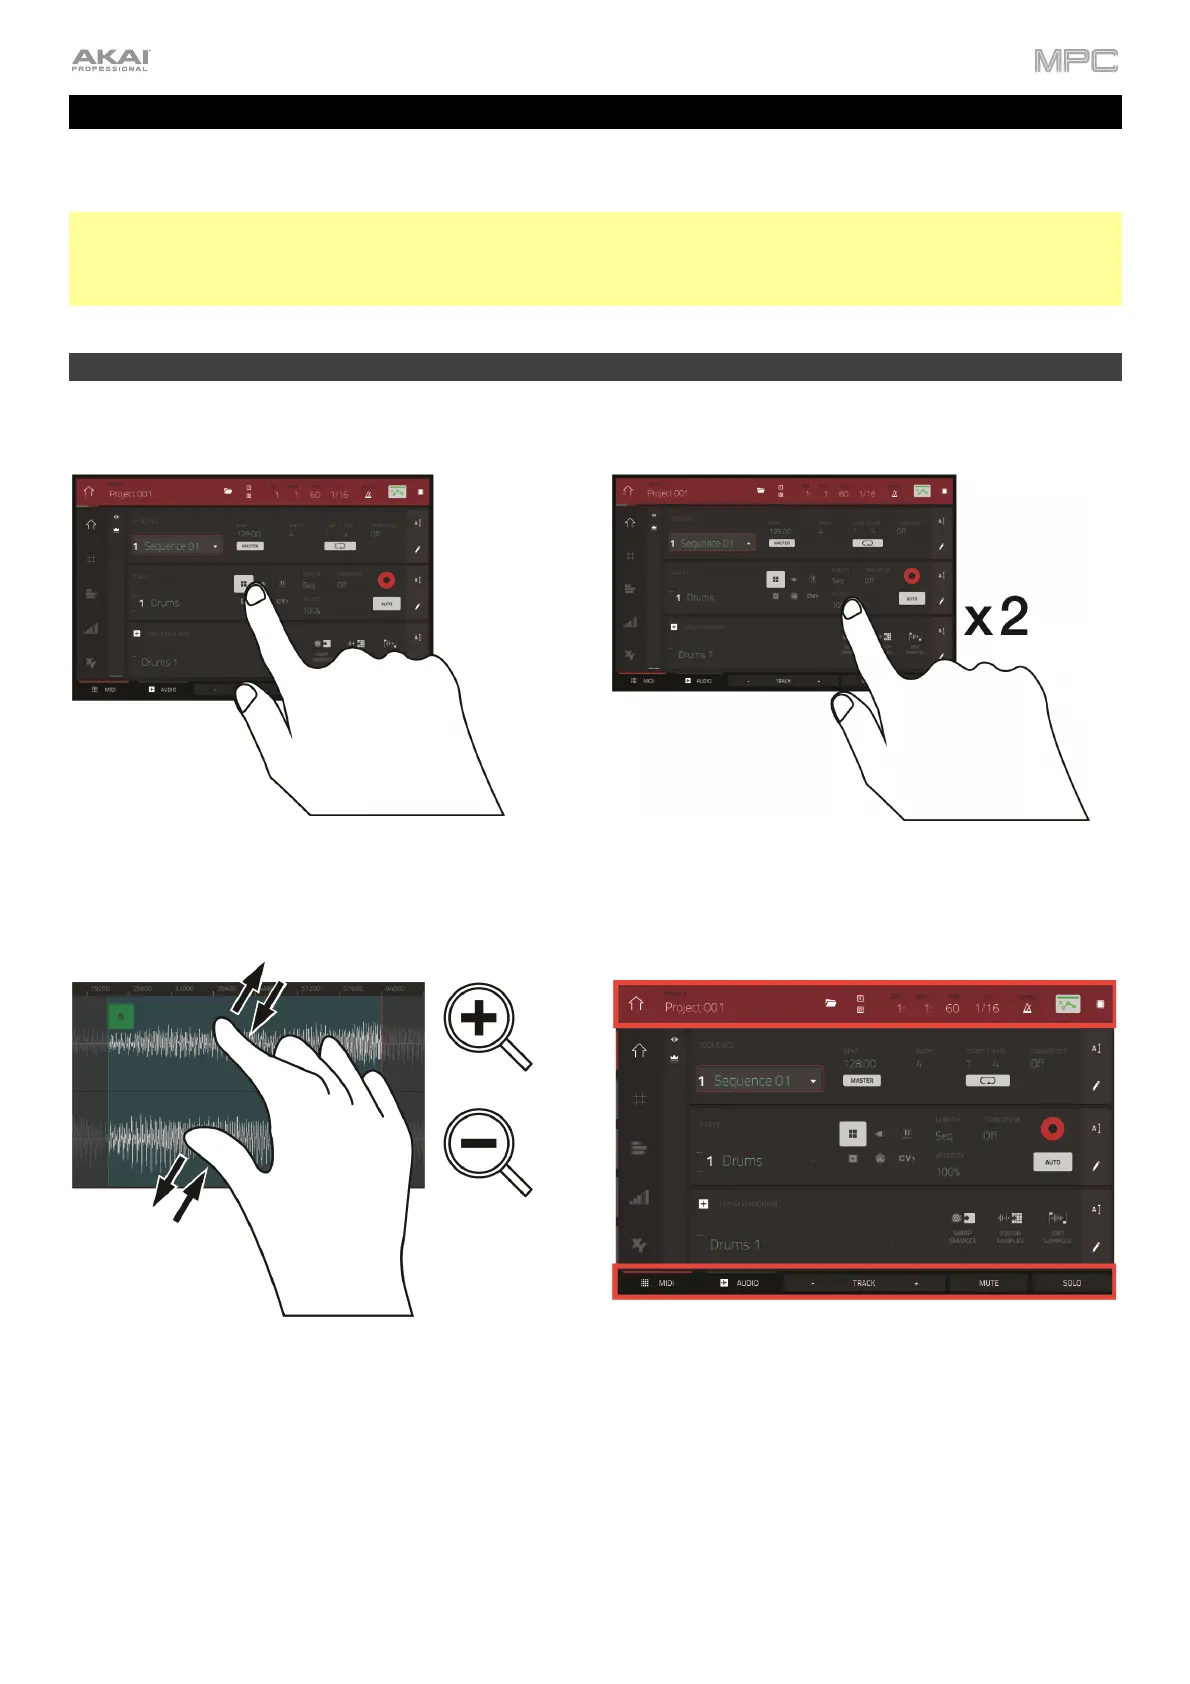
Tap a button or option to select it. Use the data dial or
–/+ buttons to change its setting or value.
Double-tap a button to access advanced editing options.
In some cases, this will show a numeric keypad that you
can use to enter a value (an alternative to the data dial
or –/+ buttons). Tap the upper-left part of the screen to
retu
n to the previous view.
Spread two fingers to zoom in (into a section of a
waveform, for example). Pinch two fingers to zoom out.
The top of the screen shows the toolbar, which contains
information about the current view (often the name o
the current track, sequence, playhead position, etc.).
Tap an item to select it.
The bottom of the screen shows various buttons that
you can use in the current view. Tap a button to press it.
To return to a previous view, either tap outside of the
window currently on the screen or tap the left arrow ()
in the upper-left part of the screen.