34
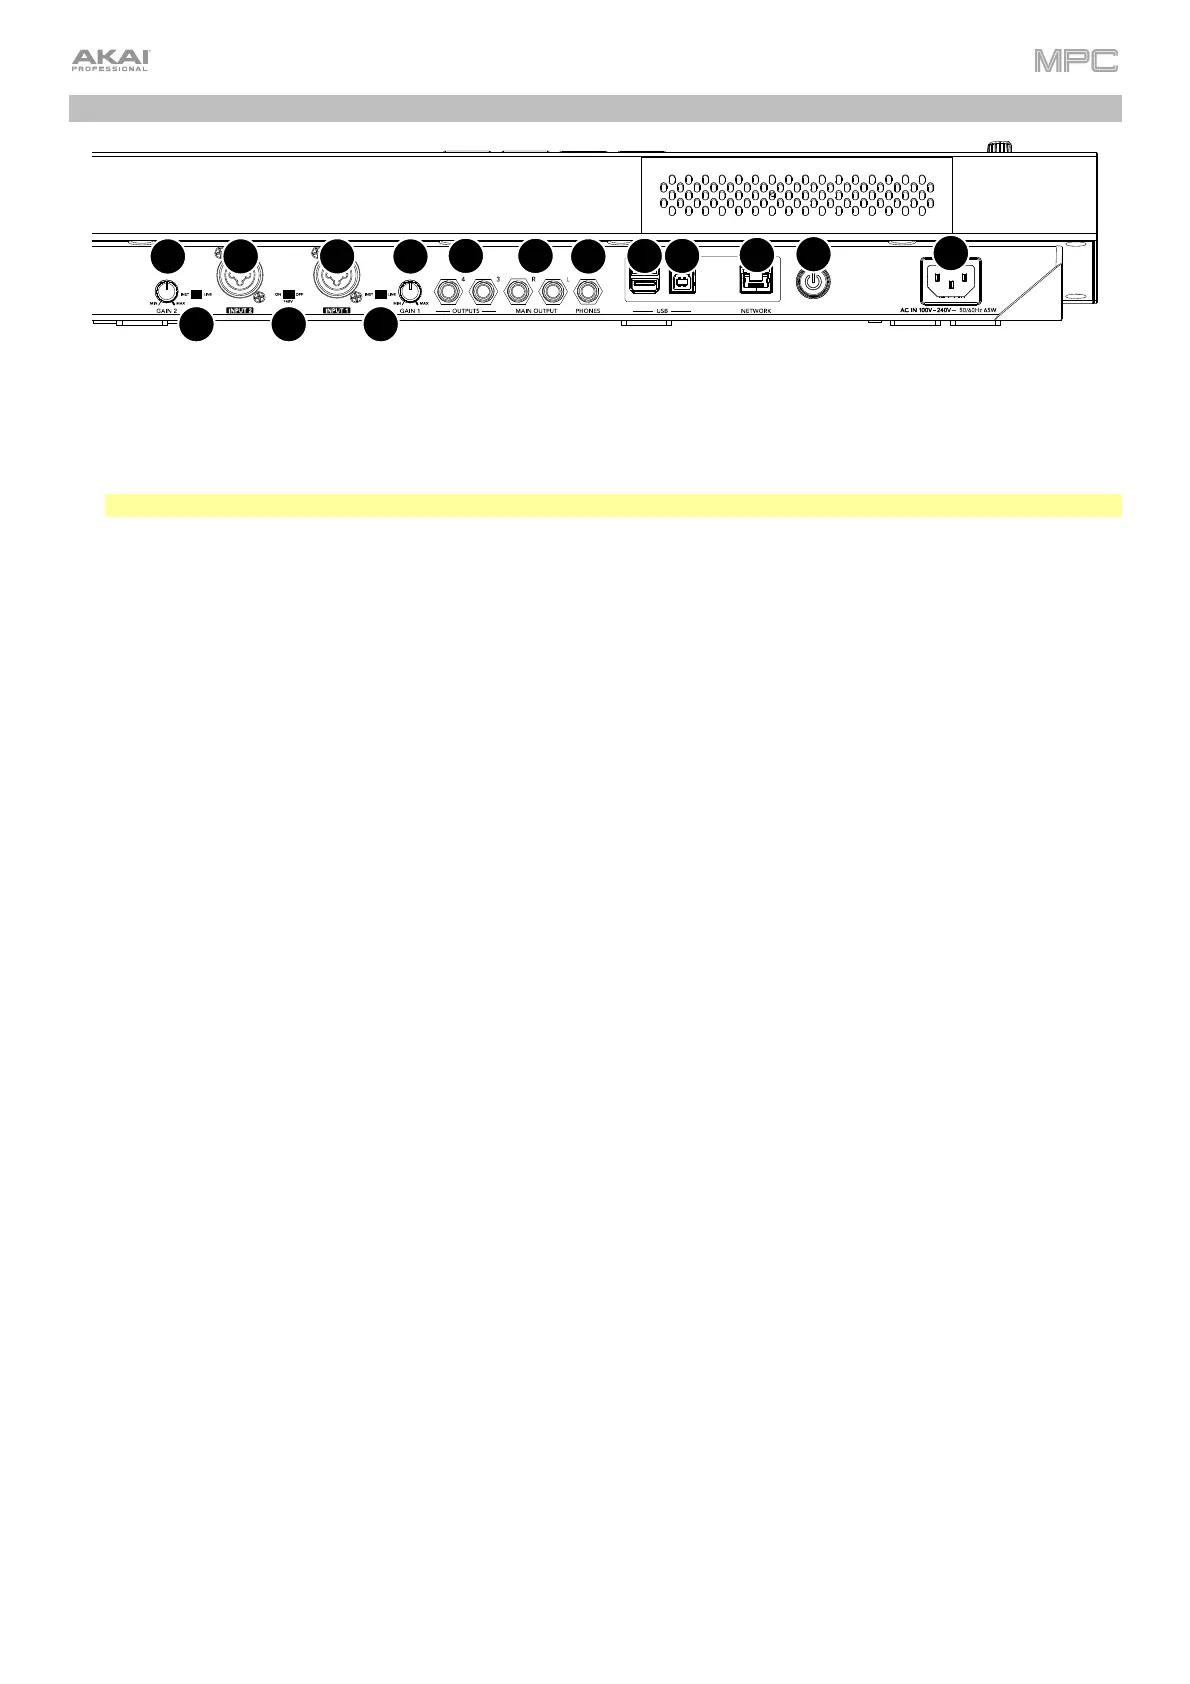
Rear Panel
1
2
3
4
56
7
89
9
1010
11
7
8
1. Power Input: Use the included power adapter to connect MPC Key 61 to a power outlet.
2. Power Switch: Turns MPC Key 61’s power on/off.
3. Network: Connect a standard Ethernet cable to this port to use Ableton Link and other compatible devices with
MPC Key 61. See Operation > General Features > Menu > Sync
for more information.
Note: You can also use Ableton Link wirelessly over a Wi-Fi connection.
4. USB-B Port: Use the included USB cable to connect this high-retention-force USB port to an available USB port
on your computer. This connection allows MPC Key 61 to send/receive MIDI and audio data to/from the MPC
software on your computer.
5. USB-A Ports: Connect a USB flash drive to these USB ports to access its files directly using MPC Key 61. You
can also connect any class-compliant MIDI device to these ports.
6. Phones (1/4” / 6.35 mm): Connect standard stereo headphones to this output.
7. Outputs (1/4” / 6.35 mm): Use standard TRS cables to connect these outputs to your monitors, mixer, etc.). The
Main L/R outputs are the same as Outputs 1,2.
8. Gain: Use these knobs to adjust the gain of the incoming signal from Input 1/2 on the rear panel. Be careful
when setting this knob at higher levels, as this can cause the signal to distort.
9. Inputs 1/2 (XLR or 1/4” / 6.35 mm): Use standard XLR or TRS cables to connect these inputs to audio sources
(microphone, mixer, synthesizer, etc.). When using a 1/4" cable, the Mic preamp is removed from the circuit, and
the Line/Inst switch can be used to set the impedance.
Turn the Gain knobs to set the input level of each one.
10. Line/Inst: Use these switches to set Inputs 1/2 to accept either a Line-level or Instrument-level sound source
when using a 1/4" connection.
11. Phantom Power (+48V): This switch activates and deactivates phantom power for Inputs 1/2 when using an
XLR connection. When activated, +48V of phantom power will be supplied to both inputs. Note that most
dynamic microphones do not require phantom power, while most condenser microphones do. Refer to your
microphone’s documentation to check if it needs phantom power.