73
Recording Automation with the XY Pad
Automating various parameters is a good way to add some motion and dynamism to your sequences.
1. Press Menu, and then tap XYFX to enter XYFX Mode. Alternatively, press XYFX (MPC X), press Shift+Next
Seq/XYFX (MPC Live II, MPC One), or press Shift+Edit/XYFX (MPC Key 61, MPC Key 37).
2. Double-tap the XYFX Location field, and select Program.
3. When you first enter this mode in a project, you will be prompted to “load” XYFX to the program. Tap Insert
XYFX to do this.
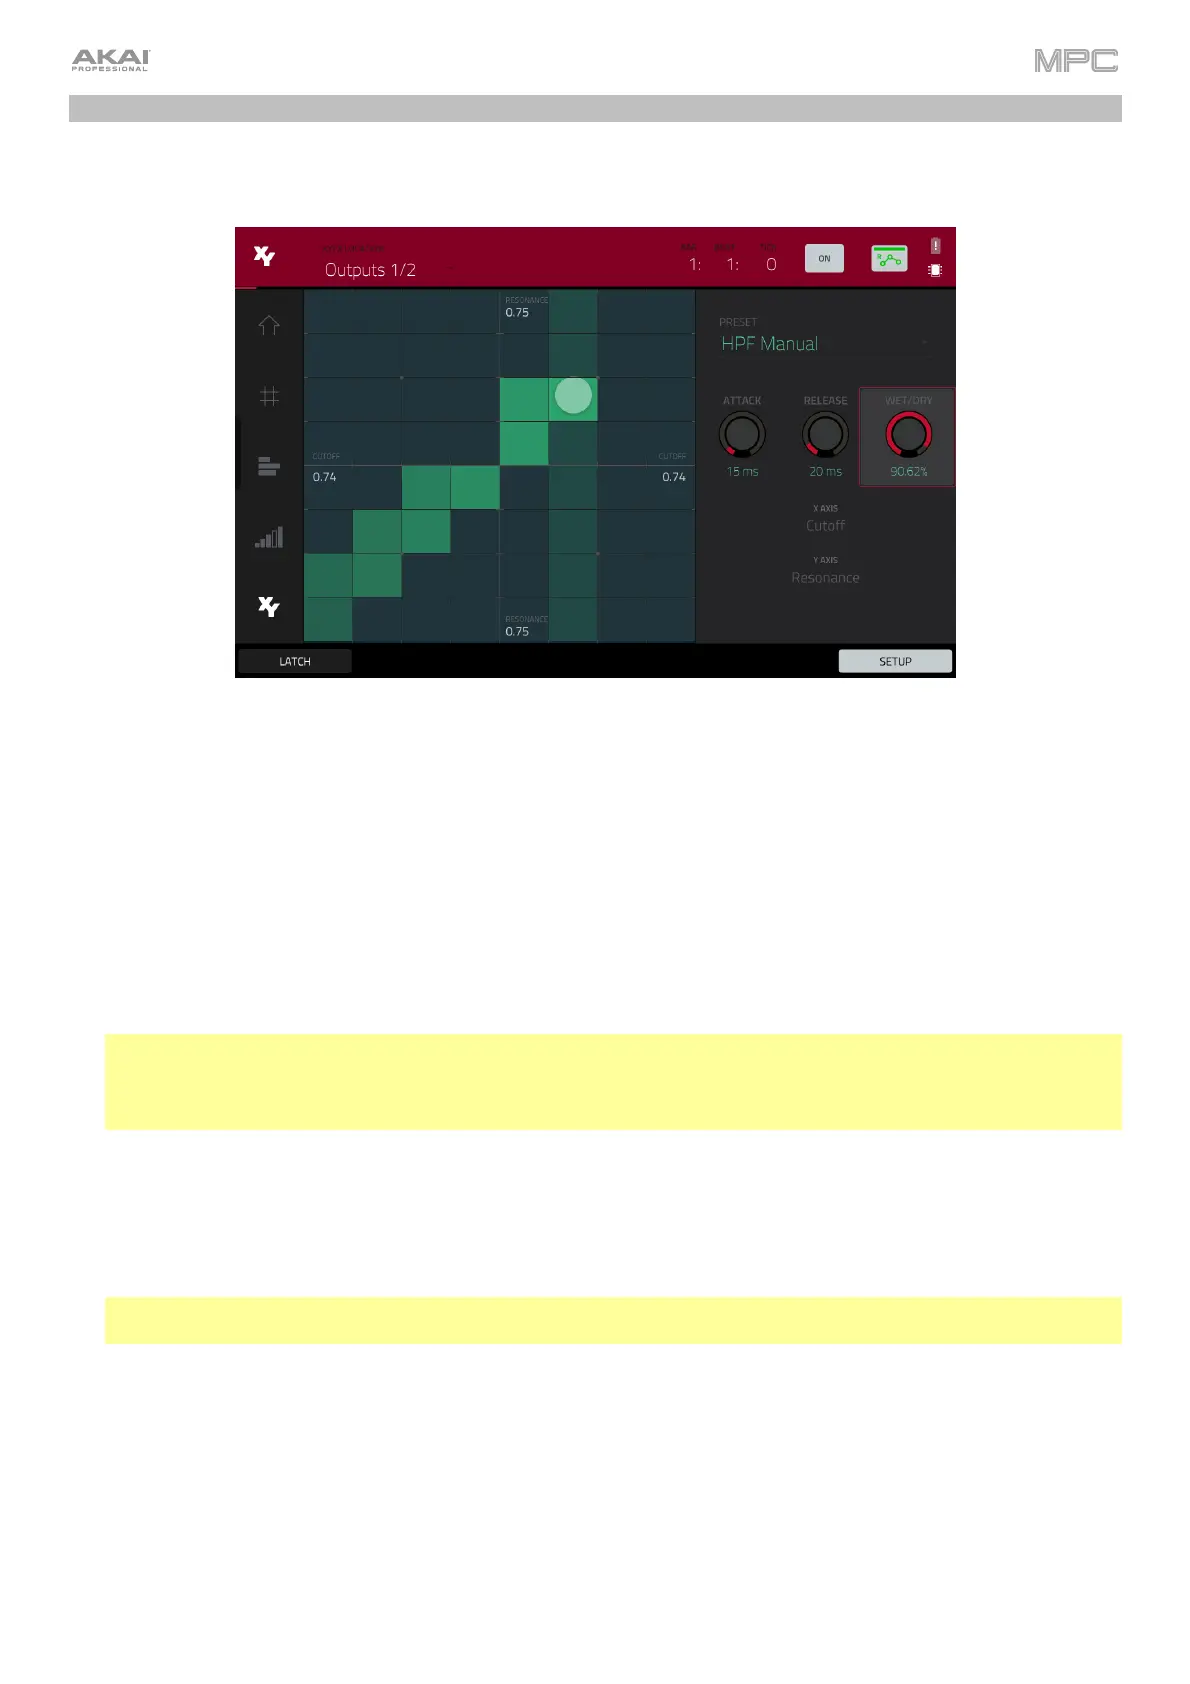
4. Tap Setup to show the Setup panel, which controls how the XY pad behaves.
5. Double-tap the Preset field, and tap an effect to select it. (These are just the effects available in XYFX Mode, not
all MPC effects.) Swipe up or down to view the entire list.
6. Tap and drag any of the knobs (Attack, Release, or Wet/Dry) up or down to set their values as desired. Below
them, you can see what parameter the X axis and Y axis control.
Note: XYFX uses an envelope to control how quickly the effect crossfades between the dry signal and wet signal.
The Attack knob determines how long it takes the completely dry signal to reach the wet signal (determined by
the Wet/Dry knob) after you touch the XY pad. The Release knob determines how long it takes the wet signal
(determined by the Wet/Dry knob) to return to the completely dry signal after you touch the XY pad.
7. Tap the automation button to cycle through the available automation modes; alternatively, press Read/Write
(MPC X, MPC Key 61) or Automation (MPC Key 37). Make sure the button is red (the Write (W) option).
8. Press Play Start to start recording.
9. As you record, move your finger over the XY pad on the screen. The changes in the sound are being recorded as
automation of both the X axis and Y axis parameters.
Tip: While touching the XY pad, tap Latch in the lower-left corner to keep the marker on the XY pad even after
you release it. The marker will remain there until you touch another part of the XY pad or until you tap Latch again.
10. When you are done recording, press Stop.
11. Tap the automation button to select the green Read (R) option; alternatively, press Read/Write (MPC X, MPC
Key 61) or Automation (MPC Key 37). This ensures your track uses the automation you just recorded when you
play it back.
See Operation > Modes > XYFX Mode to learn more about using this feature.