92
Save
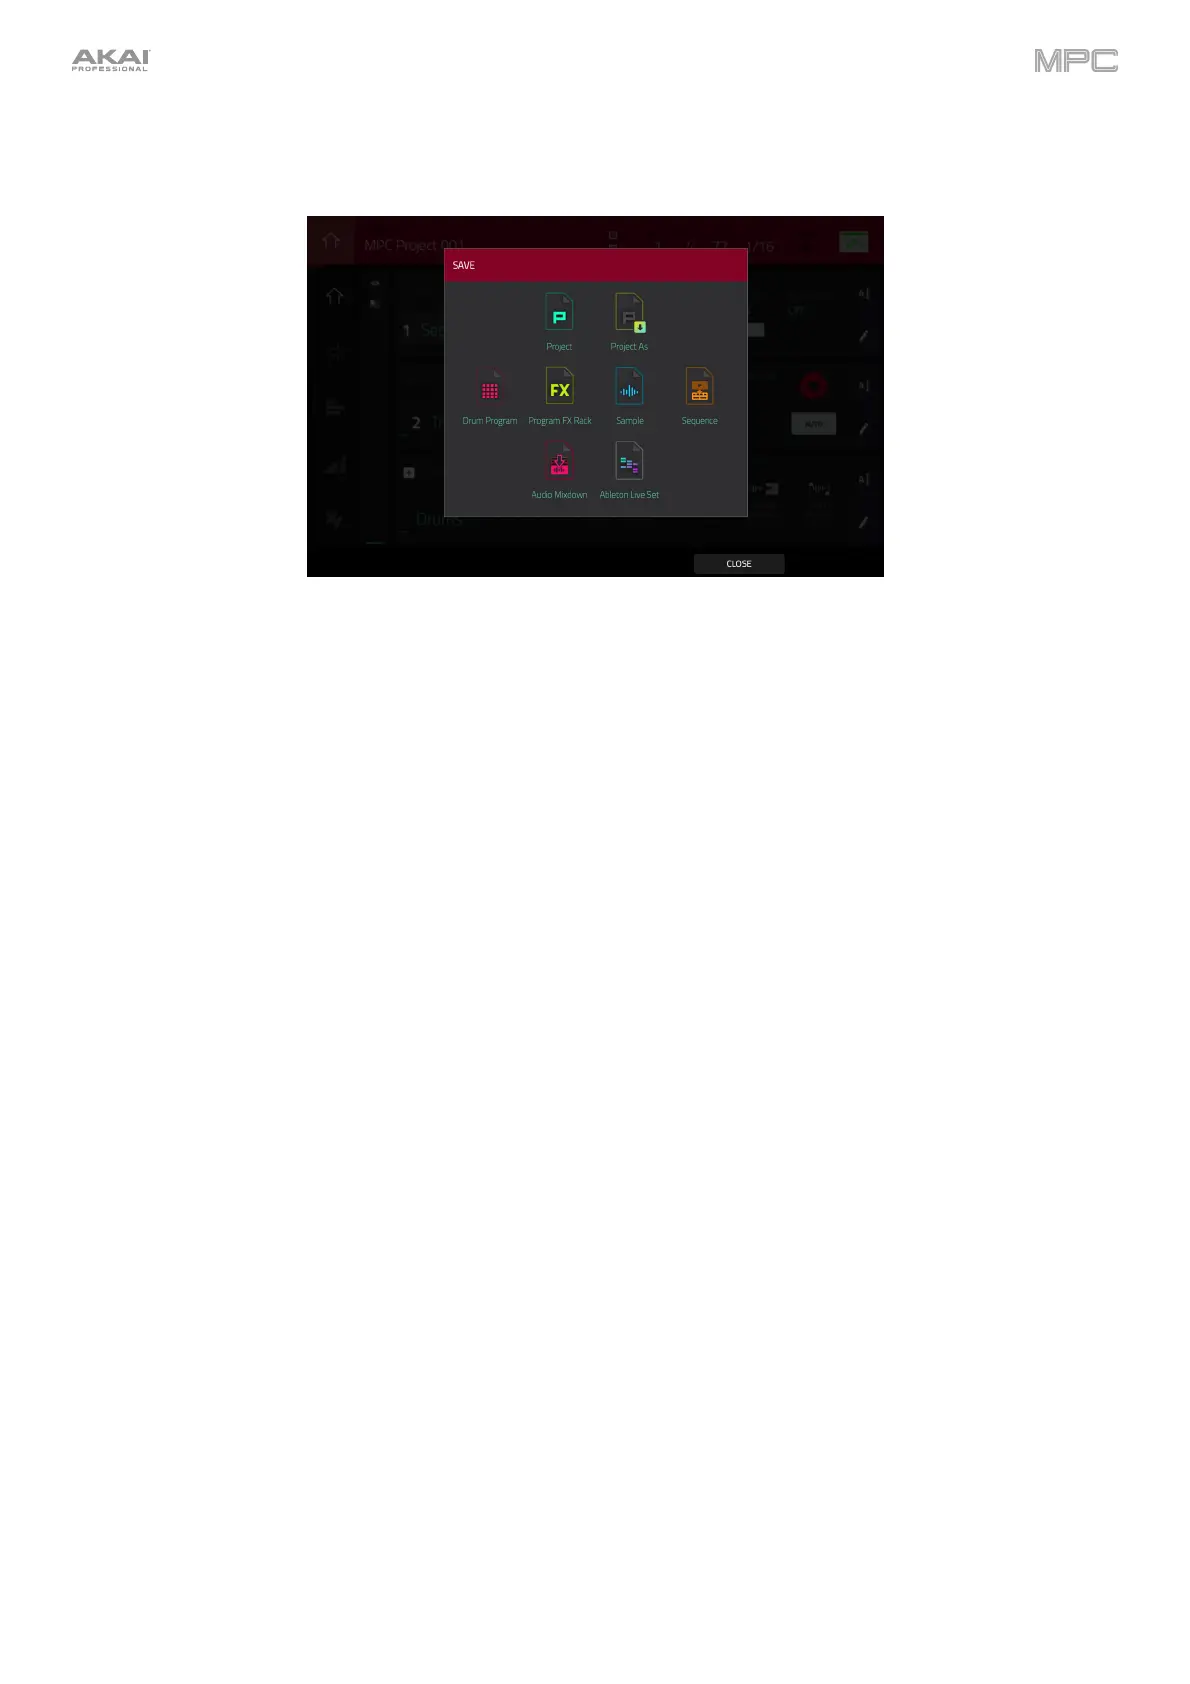
To open the save selector window, tap the Save button at the bottom of the screen.
To save a project, tap Project or Project As. If a project has not been saved before, both options will open the
save path window, described below. If a project has been saved before, tapping Project will automatically
overwrite the most recently saved version.
To save the current drum program, tap Drum Program when a Drum program is selected.
To save the current plugin program, tap Plugin Program when a Plugin program is selected.
To save the current keygroup, tap Keygroup when a Keygroup program is selected.
To save the current MIDI program, tap MIDI Program when a MIDI program is selected.
To save the current clip program, tap Clip Program when a clip program is selected.
To save the current CV program, tap CV Program when a CV program is selected.
To save the current program inserts, tap Program FX Rack.
To save the currently selected sample, tap Sample when the sample’s pad is selected. If a pad has multiple
layers, the sample currently selected for the pad in Sample Edit mode will be saved.
To save the current sequence, tap Sequence.
To save the project as an audio mixdown, tap Audio Mixdown.
Use the Start Bar and End Bar fields under Audio Length to set the time range that you want to mix down.
You can add a number of seconds to the end of the mixdown to capture any ringing notes or effects (such as
a reverb tail) by adjusting the Audio Tail field.
Use the fields under Render Source and Render Options to set the parameters for the audio mixdown.
Check the Separate Tracks box to render each track of the arrangement as stems.
Use the fields at the bottom of the screen to configure the audio mixdown settings. You can set the File
Format, Bit Depth, and Sample Rate.
To save the project as an Ableton Live set, tap Ableton Live Set.
Use the Export MIDI As settings to choose how MIDI tracks and clips are exported, either as Audio files or
MIDI files. When using Plugin, Drum or Keygroup programs, you can render clips as Audio to preserve the
sound of the instruments, or render clips as MIDI data.
Check the
Include Program Volume/Pan Settings box to include these settings in the export. When
disabled, the volume and pan settings will be set to 0 dB and center (C), respectively.
Check the Bypass Program Effects Plugins box to deactivate any third-party effect plugins used with the
program for the export. When disabled, those effects will be activated.
Use the Audio Tail field to set the amount, in seconds, of extra time added to the end of the resulting audio
files.
Use the Bit Depth field to set the bit depth to 8, 16 or 24.
Use the Sample Rate field to set the sample rate to 44.1, 48, 88.2 or 96 kHz.
To close the window and return to the menu, tap Close or anywhere outside the window.