202
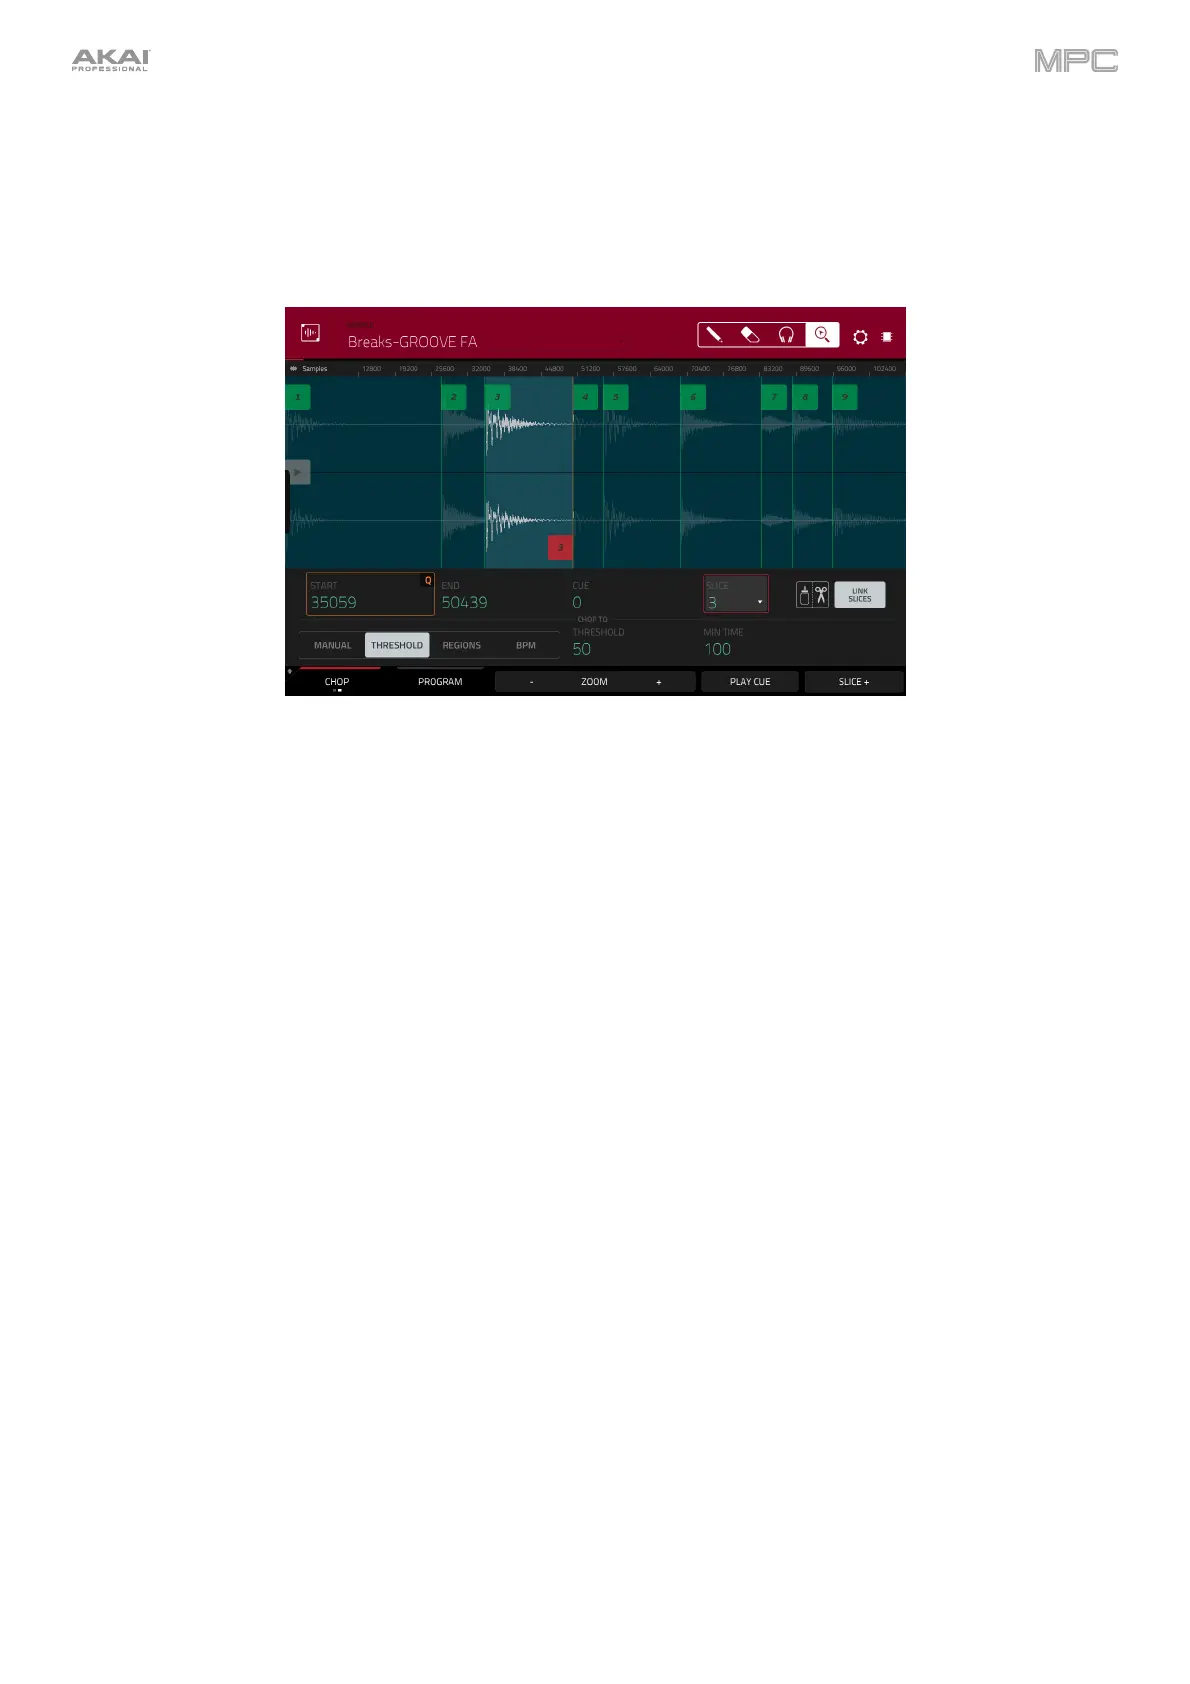
Chop Mode
Whereas Trim Mode crops only the start and/or end off of a sample, Chop Mode divides the sample into multiple
regions called slices. We recommend using Chop Mode when working with a long sample with different sounds
throughout (e.g., a drum loop or a long melodic or harmonic passage).
To enter Chop Mode, tap the Trim/Chop button in the lower-left corner so it says Chop.
Use the Start and End fields to set the position of the start point and end point (respectively) of the currently selected
slice. Alternatively, tap and drag the start (S) or end (E) marker left or right, or use the first column of Q-Link knobs
(Start X1__) to adjust the start point or the second column of Q-Link knobs (End X1__) to adjust the end point.
Use the selector in the lower-left corner of the screen to choose how you want to use Chop Mode:
Manual
This method lets you insert slices at locations you select.
Threshold
This method uses an adjustable detection algorithm that derives the number of slices created from the
volume levels present in the sample.
Use the Threshold field to set the threshold level. Alternatively, turn Q-Link Knob 11 (Threshold on MPC X)
or the second Q-Link knob in the third column (MPC Live/Live II/One/Key 61/Key 37/Touch). The higher the
selected value, the more slices will be created.
Use the Min Time field to set the minimum length of a slice in milliseconds.
Regions
This method divides a sample into several slices of equal length.
Use the Regions field to set how many regions the sample will be divided into. Alternatively, turn Q-Link
Knob 11 (Num Regions on MPC X) or the second Q-Link knob in the third column (MPC Live/Live
II/One/Key 61/Key 37/Touch). The higher the selected value, the more slices will be created.
BPM
This method divides a sample into several slices based on the tempo (beats per minute).
Use the Bars field to set how many bars are in the sample. Alternatively, turn Q-Link Knob 11 (Bars on MPC X)
or the second Q-Link knob in the third column (MPC Live/Live II/One/Key 61/Key 37/Touch).
Use the Beats field to set how many beats are in each bar. Alternatively, turn Q-Link Knob 7 (Beats on MPC X)
or the third Q-Link knob
in the third column (MPC Live/Live II/One/Key 61/Key 37/Touch).
Use the Time Div field to set a note division. Alternatively, turn Q-Link Knob 3 (Time Div on MPC X) or the
fourth Q-Link knob in the third column (MPC Live/Live II/One/Key 61/Key 37/Touch). The slice markers will
be placed according to this setting. You can select 1/4, 1/8, 1/16, or 1/32. (In most cases, you should set this
parameter to 1/16.)