447
Updates in MPC 2.7
New Features
Ableton Live Control
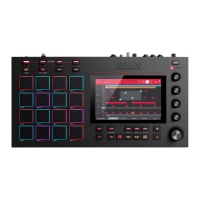
Your standalone MPC X and MPC Live are now pre-mapped to control Ableton Live 10.1.2 or later for instant
performance and production setup, providing an unparalleled level of integration with Ableton Live from a standalone
device. MPC's Live Control Mode has been carefully designed to allow you to instantly switch between using MPC in
standalone mode and Live Control mode without ever stopping playback. You can control Ableton Live over a Wi-Fi
network for cableless operation, or connect standalone MPC X or MPC Live to your computer using a USB-to-
Ethernet adapter for a more tightly controlled setup.
To get started with Ableton Live Control, you will need to follow the directions in the sections below download,
install and configure the necessary software.
Akai Network Driver
The Akai Network Driver will allow your MPC X or MPC Live to seamlessly communicate with and control Ableton
Live.
1. Download the Akai Network Driver from akaipro.com and install it by following the directions.
2. Once the installation has completed, restart your computer.
3. Power on your MPC.
4. Press Menu and tap the gear icon to open the Preferences menu.
5. Tap Wi-Fi to open the Wi-Fi settings. Make sure Wi-Fi is set to On, and then connect to your local wireless
network.
Alternatively, you can connect MPC to your network using a USB-to-Ethernet adapter. In this case, select
Ethernet from the Preferences menu and make sure the Enabled option is checked.
6. Open the Akai Network Driver application.
7. In the Configured Remote Device field, locate the IP address and Serial Number of your MPC and select it. If
you need to verify you are selecting the correct unit, you can view network information on your MPC in the Wi-Fi
menu by holding Shift and tapping Info.
8. If you still do not see your unit's Serial Number and IP, click the Add a Device button to manually enter your
unit's IP address.
9. Once your unit has been successfully configured, you can rename it by pressing the Rename a Selected Device
button. When you are finished, you can close the Akai Network Driver application and open Ableton Live.
Configuring Ableton Live
1. Important: To use MPC v2.7 to control Ableton Live, you will need to download and install version 10.1.2 or
later.
2. Open Ableton Live 10.1.2 or later.
3. Open the Preferences menu by selecting Live > Preferences.
4. Make sure you have selected your preferred Audio Device in the Audio tab.
5. In the Link / MIDI tab, click the first available Control Surface field and select Akai Force MPC.
6. In the same row, select Akai Network – DAW Control as the Input and Output.
7. Under the MIDI Ports section, set Remote for the Akai_Force_MPC Input and Akai_Force_MPC Output to
On.
Once the previous steps have been completed, you can begin controlling Ableton Live with your MPC.

 Loading...