36
MPC Key 37
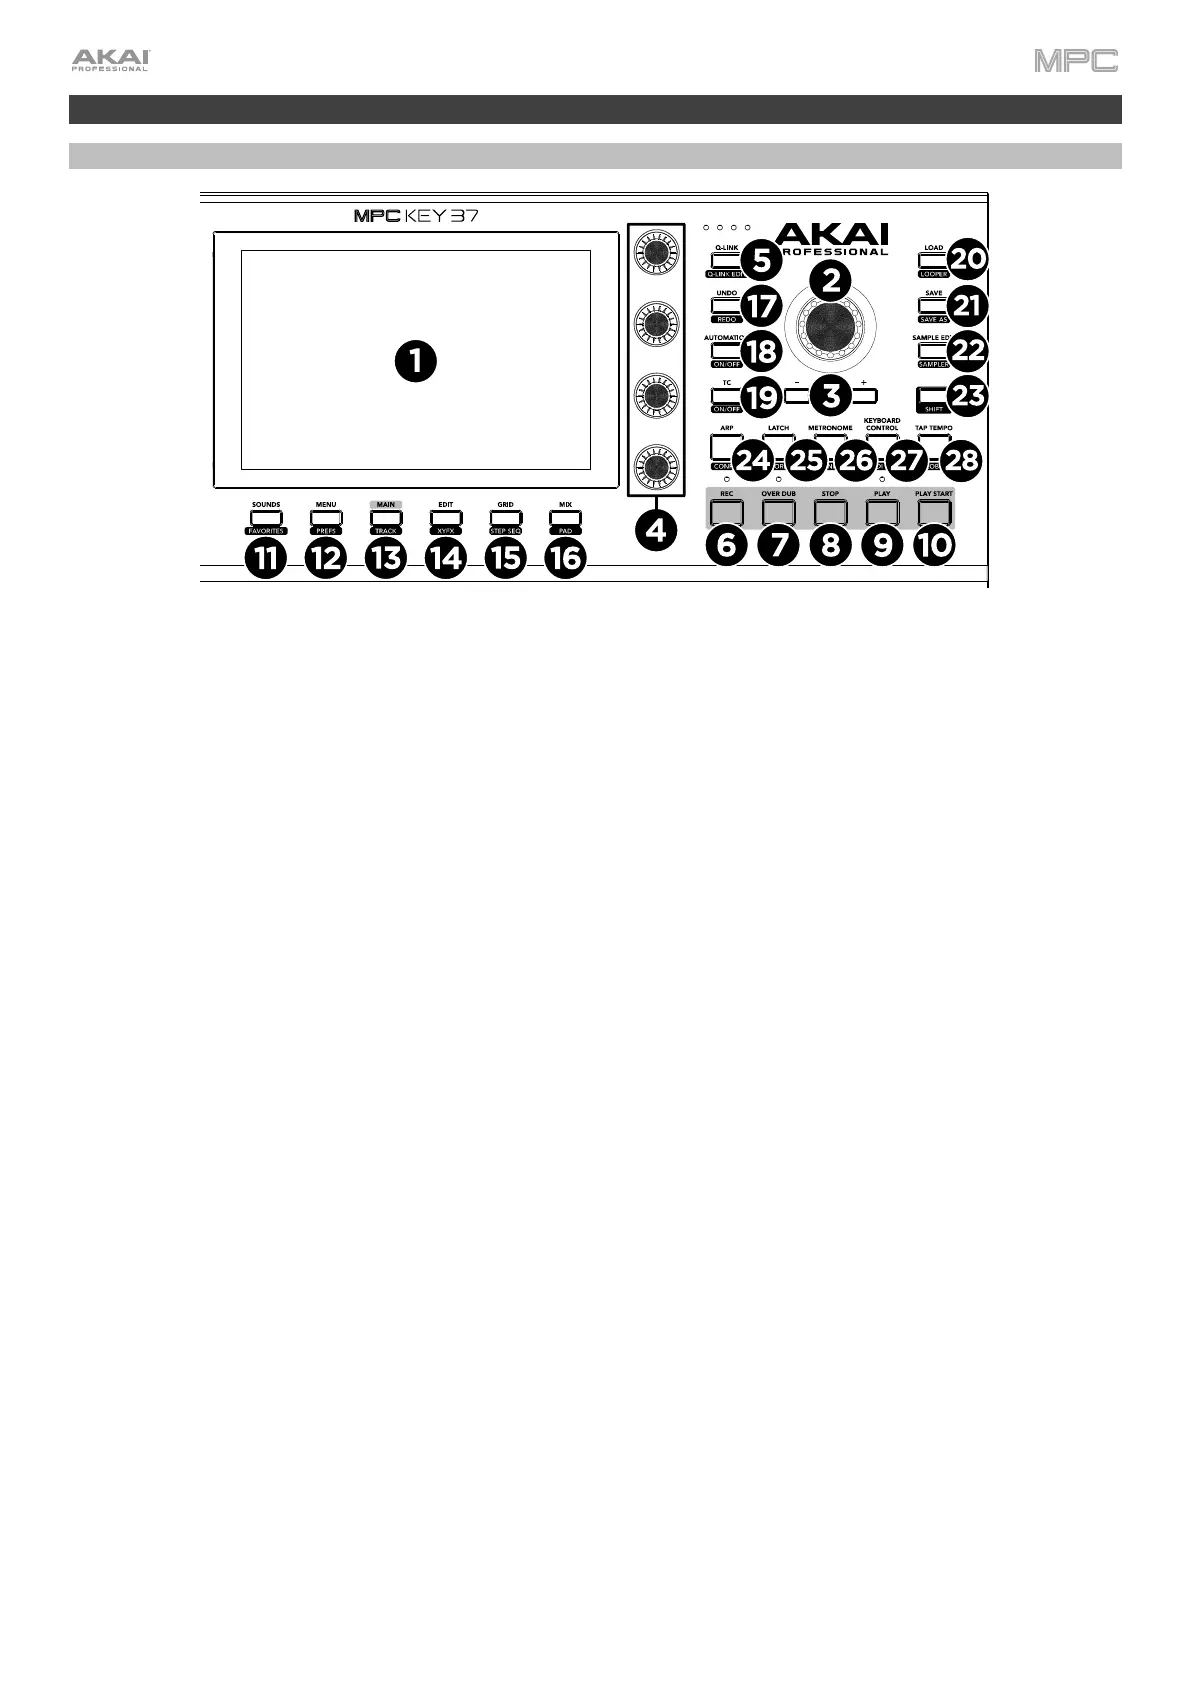
Top Panel
1. Display: This full-color multi-touch display shows information relevant to MPC Key 37’s current operation. Touch
the display (and use the hardware controls) to control the MPC interface. See the previous Touchscreens
section to learn how to use some basic functions.
2. Data Dial: Use this dial to scroll through the available menu options or adjust the parameter values of the
selected field on the display. Pressing the dial also functions as an Enter button.
3. –/+: Press these buttons to increase or decrease the value of the selected field on the display.
4. Q-Link Knobs: Use these touch-sensitive knobs to adjust various parameters and settings. The knobs can
control one column of parameters at a time. The lights above the Q-Link button indicate the currently selected
column. Press the Q-Link button to change which column of parameters they currently control.
5. Q-Link Button: Press this button to change which column of parameters the Q-Link Knobs currently control
(indicated by the lights above the button). Each press will select the next column.
Press and hold Shift and then press this button to view the Q-Link Configuration window. Press and hold Shift
and then press this button again to return to the Main page.
6. Rec: Press this button to record-arm the sequence. Press Play or Play Start to start recording. Recording in this
way (rather than using Overdub) erases the events of the current sequence. After the sequence plays through once
while recording, Overdub will be enabled.
Press and hold Shift and press this button to recall recently played MIDI note events when recording was
disabled and insert them into the current sequence.
7. Overdub: Press this button to enable Overdub, which allows you to record note events in a sequence without
overwriting any previously recorded note events. You can enable Overdub either before or during recording.
8. Stop: Press this button to stop playback. Double-press this button to immediately stop all sound.
Press and hold Shift and press this button to stop playback and return the playhead to the Loop Start value.
9. Play: Press this button to play the sequence from the playhead’s current position.
10. Play Start: Press this button to play the sequence from its start point.
11. Sounds / Favorites: Press this button to view Sounds Mode, where you can browse MPC Key 37's built-in
instruments and presets.
Press and hold Shift and press this button to view Favorites, where you can quickly select instruments and
presets that you have defined as your favorites.
12. Menu / Prefs: Press this button to open the Mode Menu. You can tap an option on the Menu screen to enter
that mode, view, etc.
Press and hold Shift and then press this button to open the Preferences page in the Menu.
13. Main / Track: Press this button to view Main Mode.
Press and hold Shift and press this button to view Track View Mode, an overview of the tracks of each sequence.
You can also set key ranges in this mode.