189
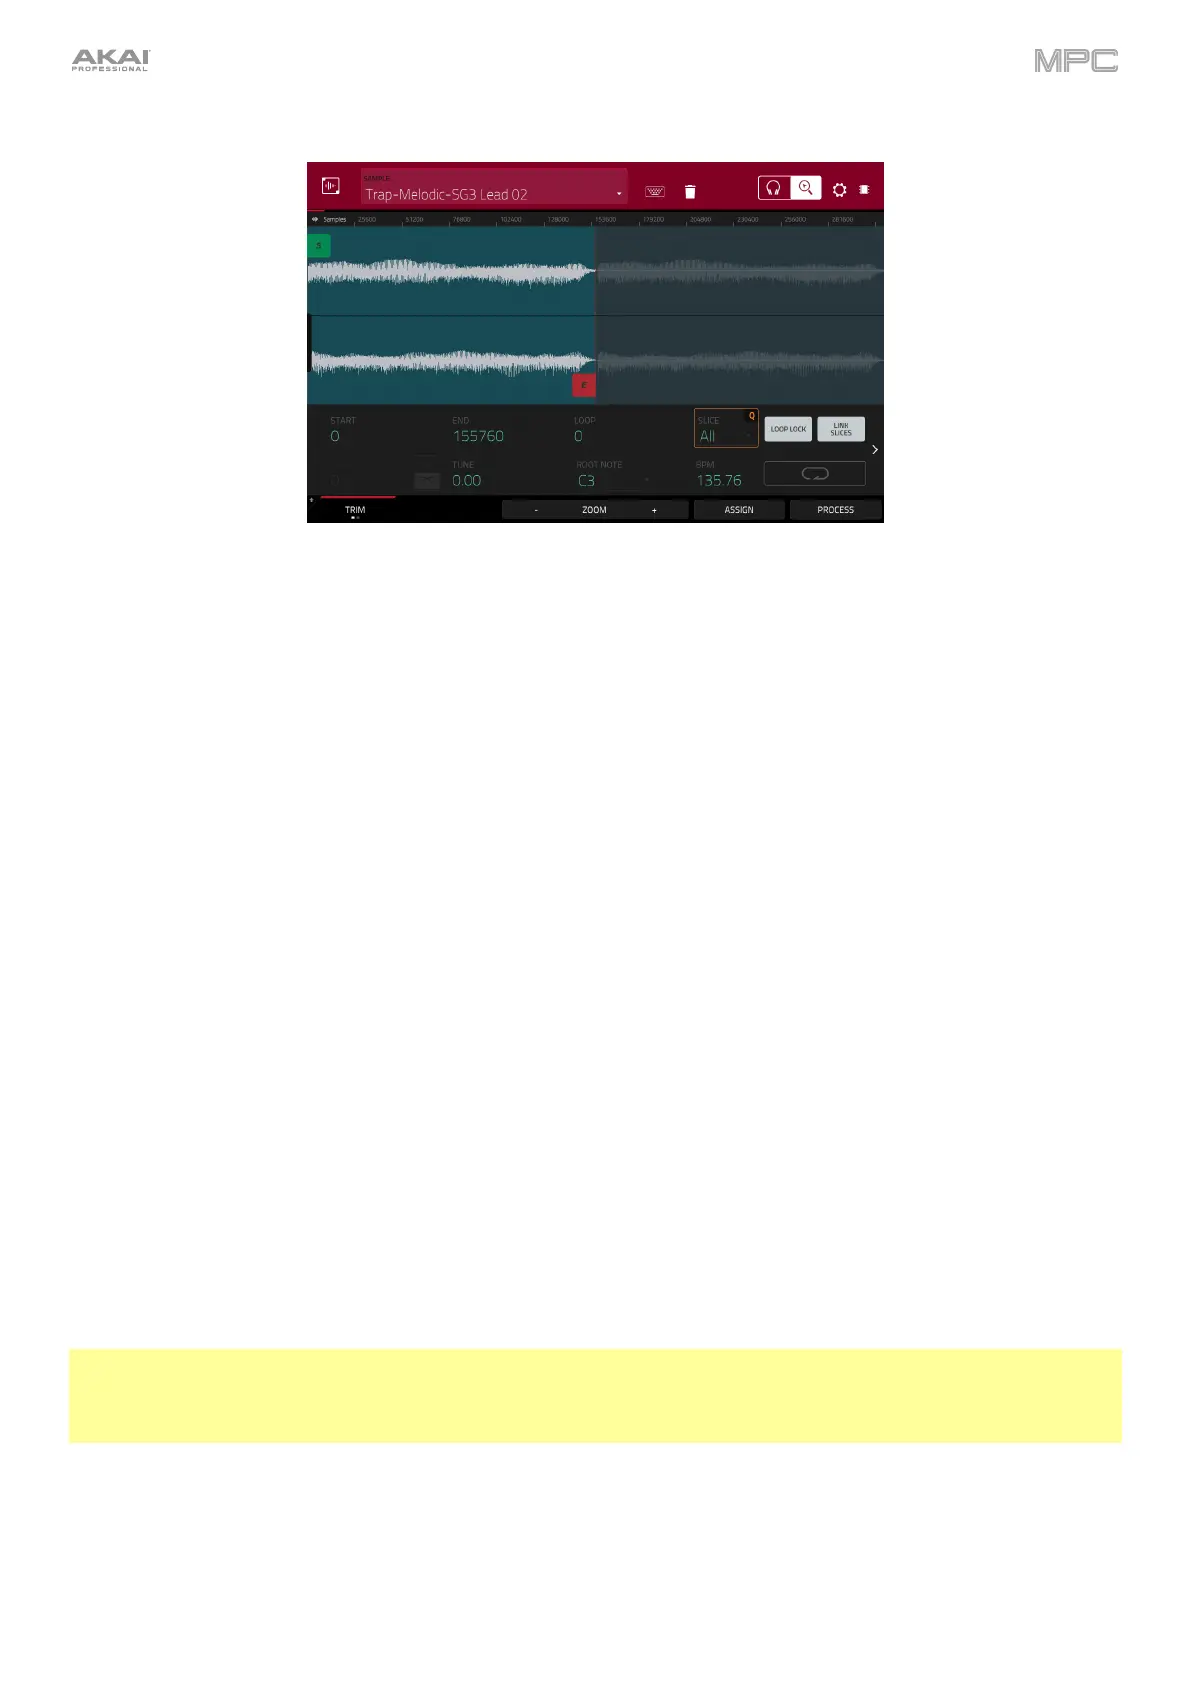
The upper half of the screen shows the waveform. The lower half shows the editing controls.
The waveform display shows the “active” section of the sample waveform. Swipe left or right on the waveform to
move through it.
Above the waveform is the timeline, shown in Samples, Time (in seconds and milliseconds), or Beats. You can
select the measurement units you want to show in the Settings.
To zoom in or out, do any of the following:
• When the magnifying-glass icon (in the upper-right corner) is selected, spread or pinch your fingers
(respectively) on the waveform.
• Tap the Zoom + or Zoom – buttons (respectively) at the bottom of the screen.
• Turn Q-Link Knob 4 (Zoom on MPC X) or the fourth Q-Link knob in the fourth column (MPC Live/Live II/One/
Key 61/Key 37/Touch).
• Press Zoom and use the data dial or -/+ buttons (MPC Studio).
To scroll through the waveform, do either of the following:
• When the magnifying-glass icon (in the upper-right corner) is selected, swipe the waveform left or right.
• Turn Q-Link Knob 8 (Scroll on MPC X) or the third Q-Link knob in the fourth column (MPC Live/Live II/One/
Key 61/Key 37/Touch).
The green marker and red marker are the start point and end point (respectively). These two points define the region
of the sample that will be played.
To move the start point or end point of the selected region, do any of the following:
• Tap and drag its marker left or right.
• Use the Start or End fields shown below the waveform.
• Use the first column of Q-Link knobs (Start X1__) to adjust the start point or the second column of Q-Link
knobs
(End X1__) to adjust the end point. The top-most Q-Link knobs (13 and 14) provide coarse
adjustment. The bottom-most Q-Link knobs (1 and 2) provide fine adjustment.
• Press Sample Start or Sample End and use the data dial or -/+ buttons (MPC Studio).
Tip: A recorded sample may have some silence at the beginning or end, which makes it difficult to time it correctly in
a musical context. Fix this by adjusting the start point. You can also adjust end point to remove any extra silence or
unwanted audio at the end. In addition to making your workflow easier, having a “tight,” well-edited sample can
enhance your production or performance.
You can use Sample Edit Mode in three different ways: Trim Mode, Chop Mode, or Program Mode. The options for
each mode are slightly different. Please refer to the following Trim Mode, Chop Mode, and Program Mode parts of
this chapter to learn how each works. Before using these modes, though, you may want to configure your settings—
see the following Settings chapter to do this.