ESAB Cutting Systems
CROSSBOW Page 146
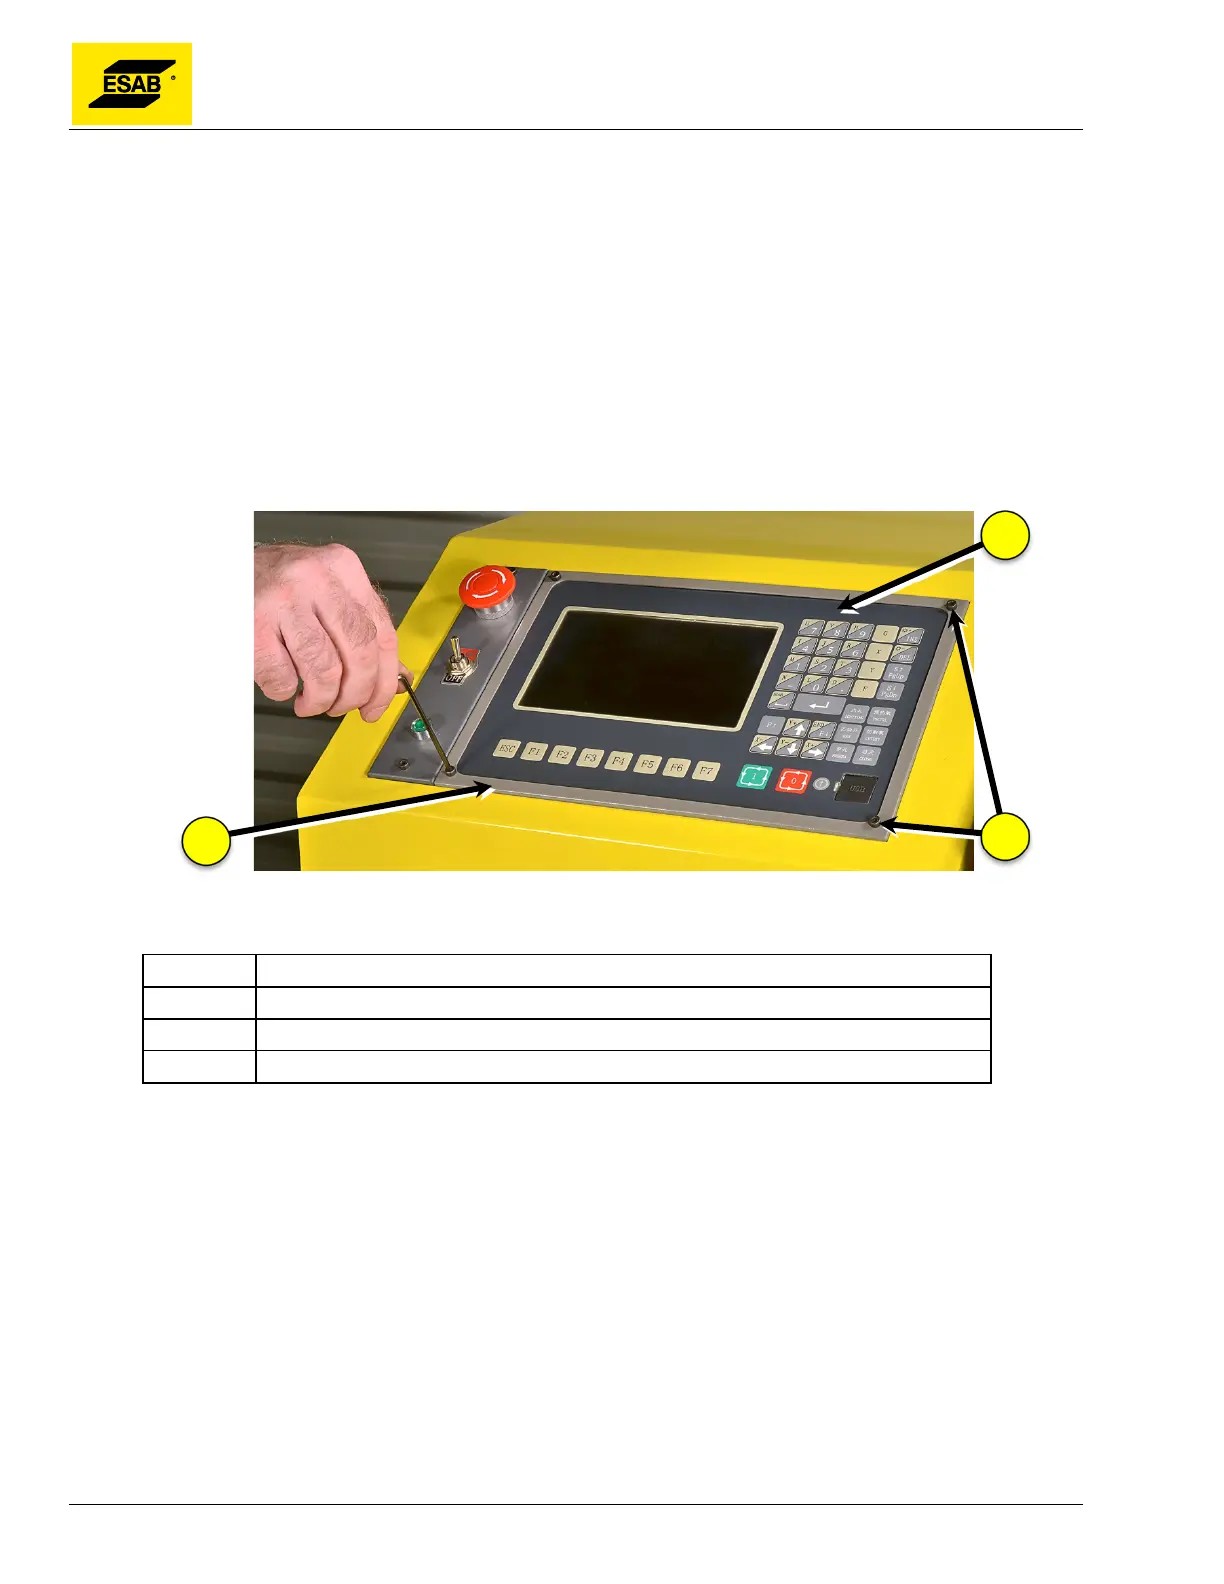
5.6.2 Removing the CNC
If the CNC unit needs to be replaced or removed for servicing, it is easily removed from the front of the
unit. The Central Unit cover does not need to be removed.
1) Remove all incoming power from the unit.
2) Place a towel or other soft material in front of the Central Unit to avoid scratches or damage to
the CNC.
3) Remove the CNC bezel by removing the four screws at the corners of the CNC panel. Set it
aside.
4) Carefully remove the CNC from the Central Unit, turn it over, and set it face-down in front of
the Central unit.
Figure 112: Removing CNC Bezel
Number Description
1 CNC Unit
2 CNC bezel
3 Retainer Screws
5) Carefully unplug green connectors from XS1 socket by gently pulling on the connector. Do
not remove the wires from the plugs.
6) Using a small flat-head screwdriver, loosen the anchor screws and un-plug connectors XS3
and XS12.
7) Disconnect the wires connected to the Power Supply Terminals mounted to the back of the
CNC. Be careful not to lose the screws, replace them in the power supply connector after
removing the wires.