6.5 Making Printer Settings
96
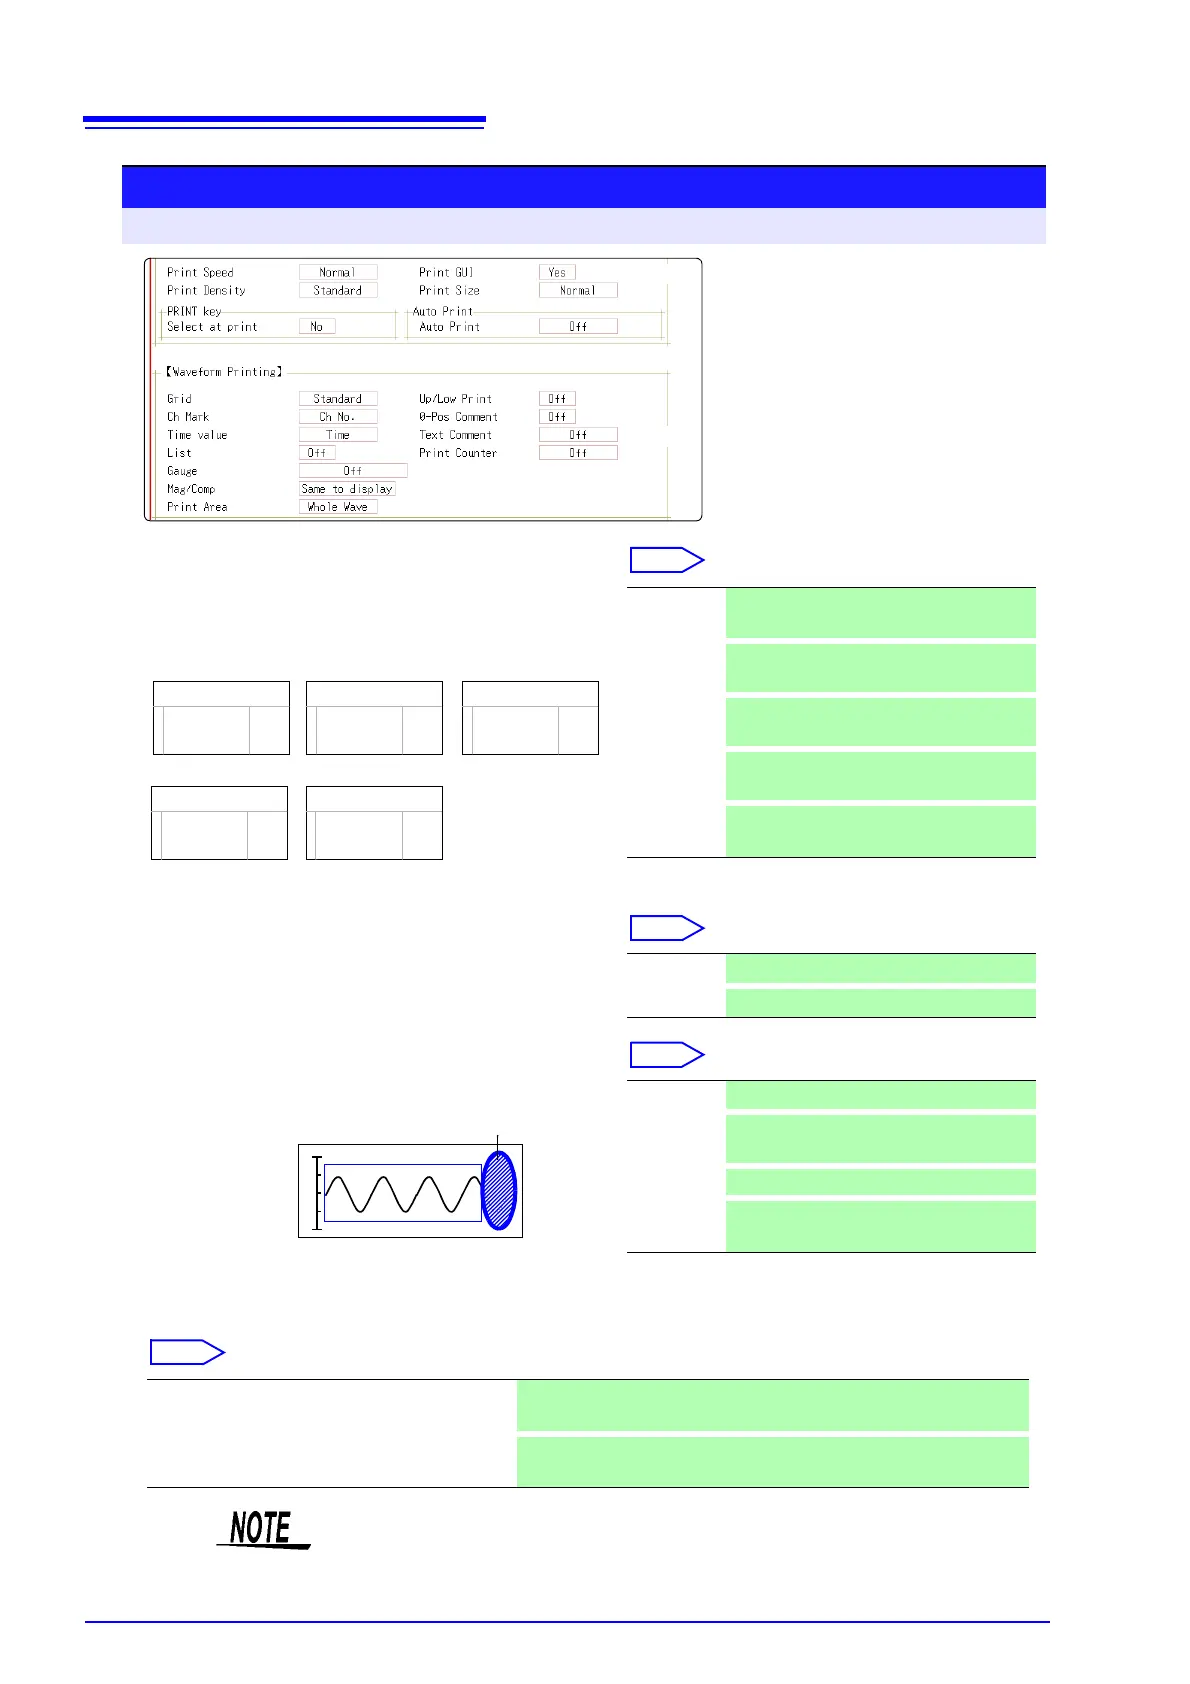
Printer settings
To open the screen: Press the SYSTEM key → [Printer] sheet
6
Select the horizontal axis (time axis) display
value.
Move the cursor to the [Time Value] item.
* Printing for external sampling is done according to the
[Sample] setting.
7
Print a list of settings
Move the cursor to the [List] item.
8
Select the type of gauge.
Move the cursor to the [Gauge] item.
9
Set the horizontal axis (time axis) magnification and compression.
Move the cursor to the [Mag/Comp] item.
Time
Time (60)
div
Date
-2.000000 s
1m40 s
5
’04-10-30 10:20:30
Sample Num
500
<Print Example>
Time* Print the time from trigger event (unit is
fixed). (default setting)
Time (60)*
Print the time from trigger event (unit is
modulo 60).
div
Print the number of divisions from trigger
event.
Date*
Print the date and time when waveform
was acquired.
Sample
Num
Print the number of samples from trigger
event.
Off Do not print a list. (default setting)
On
Print list after waveform.
Off Do not print a gauge. (default setting)
Before
Wave
Print gauge before waveform.
After Wave
Print gauge after waveform.
Before&Aft
Wave
Print gauge before and after waveform.
x10 to x1/10000 (Memory Function case)
x1 to x1/20000 (Recorder Function case)
Print using the magnification or compression ratio set here.
Same to display
Print using the magnification or compression ratio set for the waveform
screen. (default setting)
Horizontal axis (Time axis) zoom
When time axis zoom has been set, printing will be carried out using this zoom
setting, regardless of the zoom setting on the Waveform screen.


 To Next Page