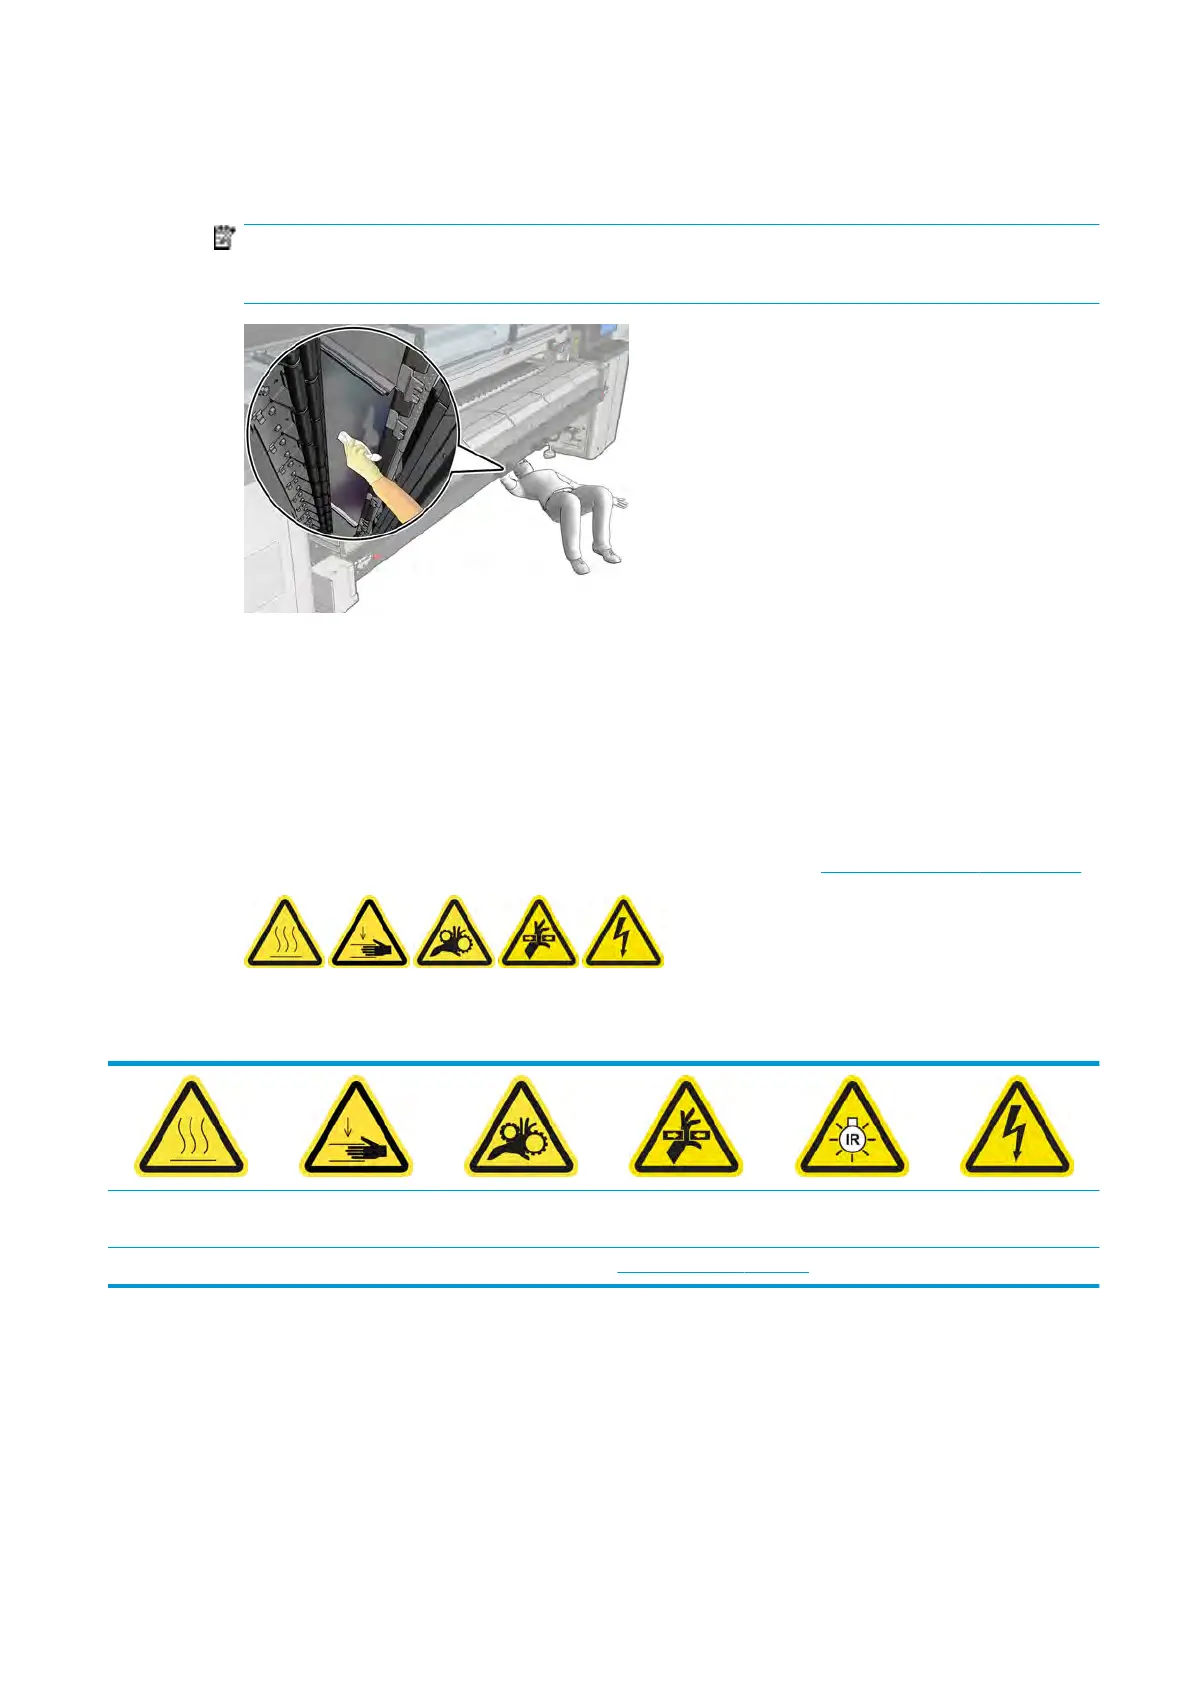
Clean the perforated plate
▲
Lying on the oor as shown in the picture, clean the perforated plate of the curing modules with a lint-
free cloth dampened with isopropyl alcohol.
NOTE: If you are in an area (such as California) that regulates VOC cleaning and maintenance uids,
instead of isopropyl alcohol use a VOC-certied cleaner such as a properly diluted Simple Green All-
Purpose Cleaner.
Finish o cleaning the perforated plate
1. Push the curing assembly back to its working position.
2. Close the curing latches.
3. Put the spindle back in position.
4. Ensure that the cleaned parts are completely dry and all vapor has completely evaporated.
5. Turn on the printer in the correct way for maintenance operations: see Turn the printer on on page 160.
Replace the drying lamps
Risk of burns Crush hazard Risk of trapped
ngers Hazardous moving
part
Light radiation hazard Electric shock hazard
For more safety information, see
Safety precautions on page 2
Prepare to replace the drying lamps
1. Ensur
e that you have the Drying Filter Lamps Kit (CZ056-67322), which is included in the Printer
Maintenance Kit (CZ056-67391 or CZ056-67470 or D9R11A or L2D95A) and in the Standard Uptime Kit
(D4J02A).
2. Ensure that the printer is not printing.
3. Ensure that all windows, covers, and doors are closed and remain in their original position.
ENWW Replace the drying lamps 211
 Loading...
