5. Put back the screw that you removed earlier.
6. Reconnect the drying fans array connector.
7. Reinstall the drying lter.
Reinstall the drying module
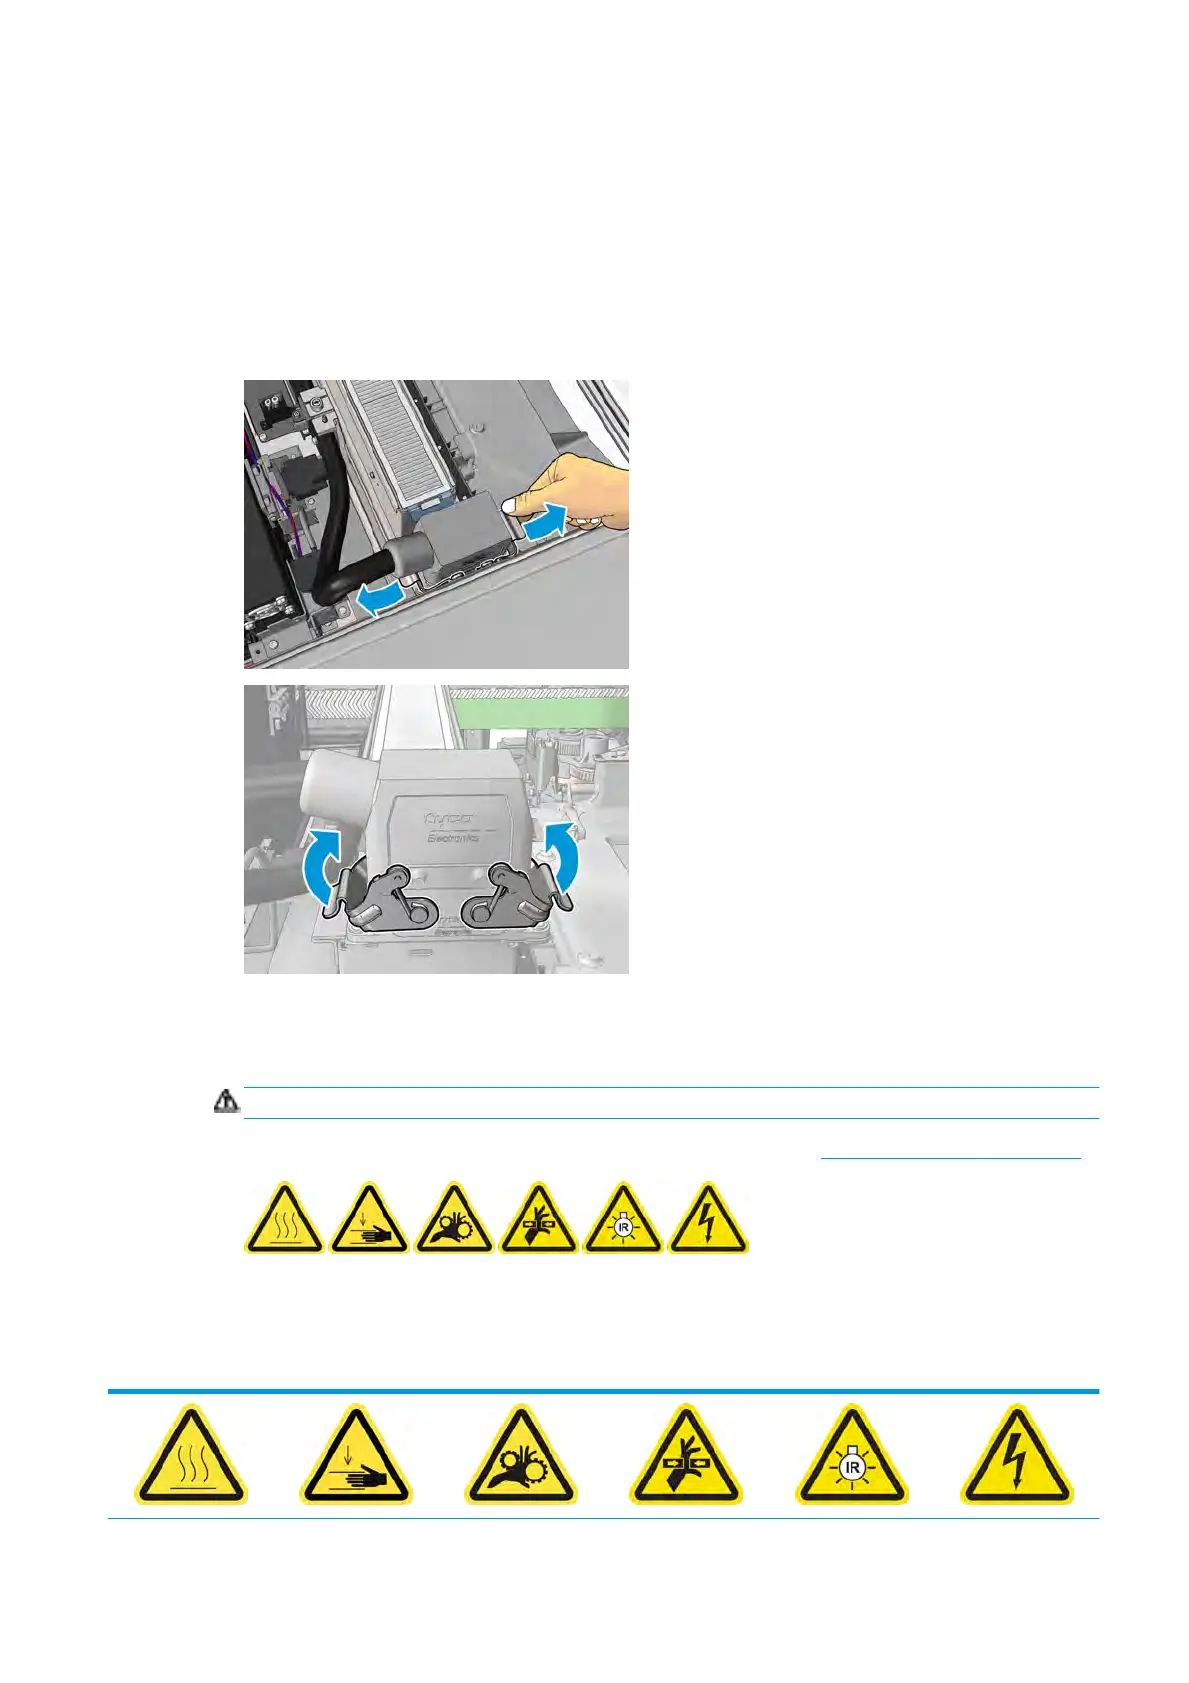
1. Reinstall the drying module into the carriage and tighten the three screws that attach it to the carriage.
2. Reconnect the electrical connector and close the latches.
Finish o replacing the drying fans array
1. Close the service position window.
CAUTION: Do not leave anything in the way of the carriage.
2. Turn on the printer in the correct way for maintenance operations: see Turn the printer on on page 160.
3. Dispose of the old drying fans array according to local regulations.
Replace the drying quartz glass
ENWW Replace the drying quartz glass 247
 Loading...
