104
Song operating mode
Event Edit procedure
EVENT EDIT PROCEDURE
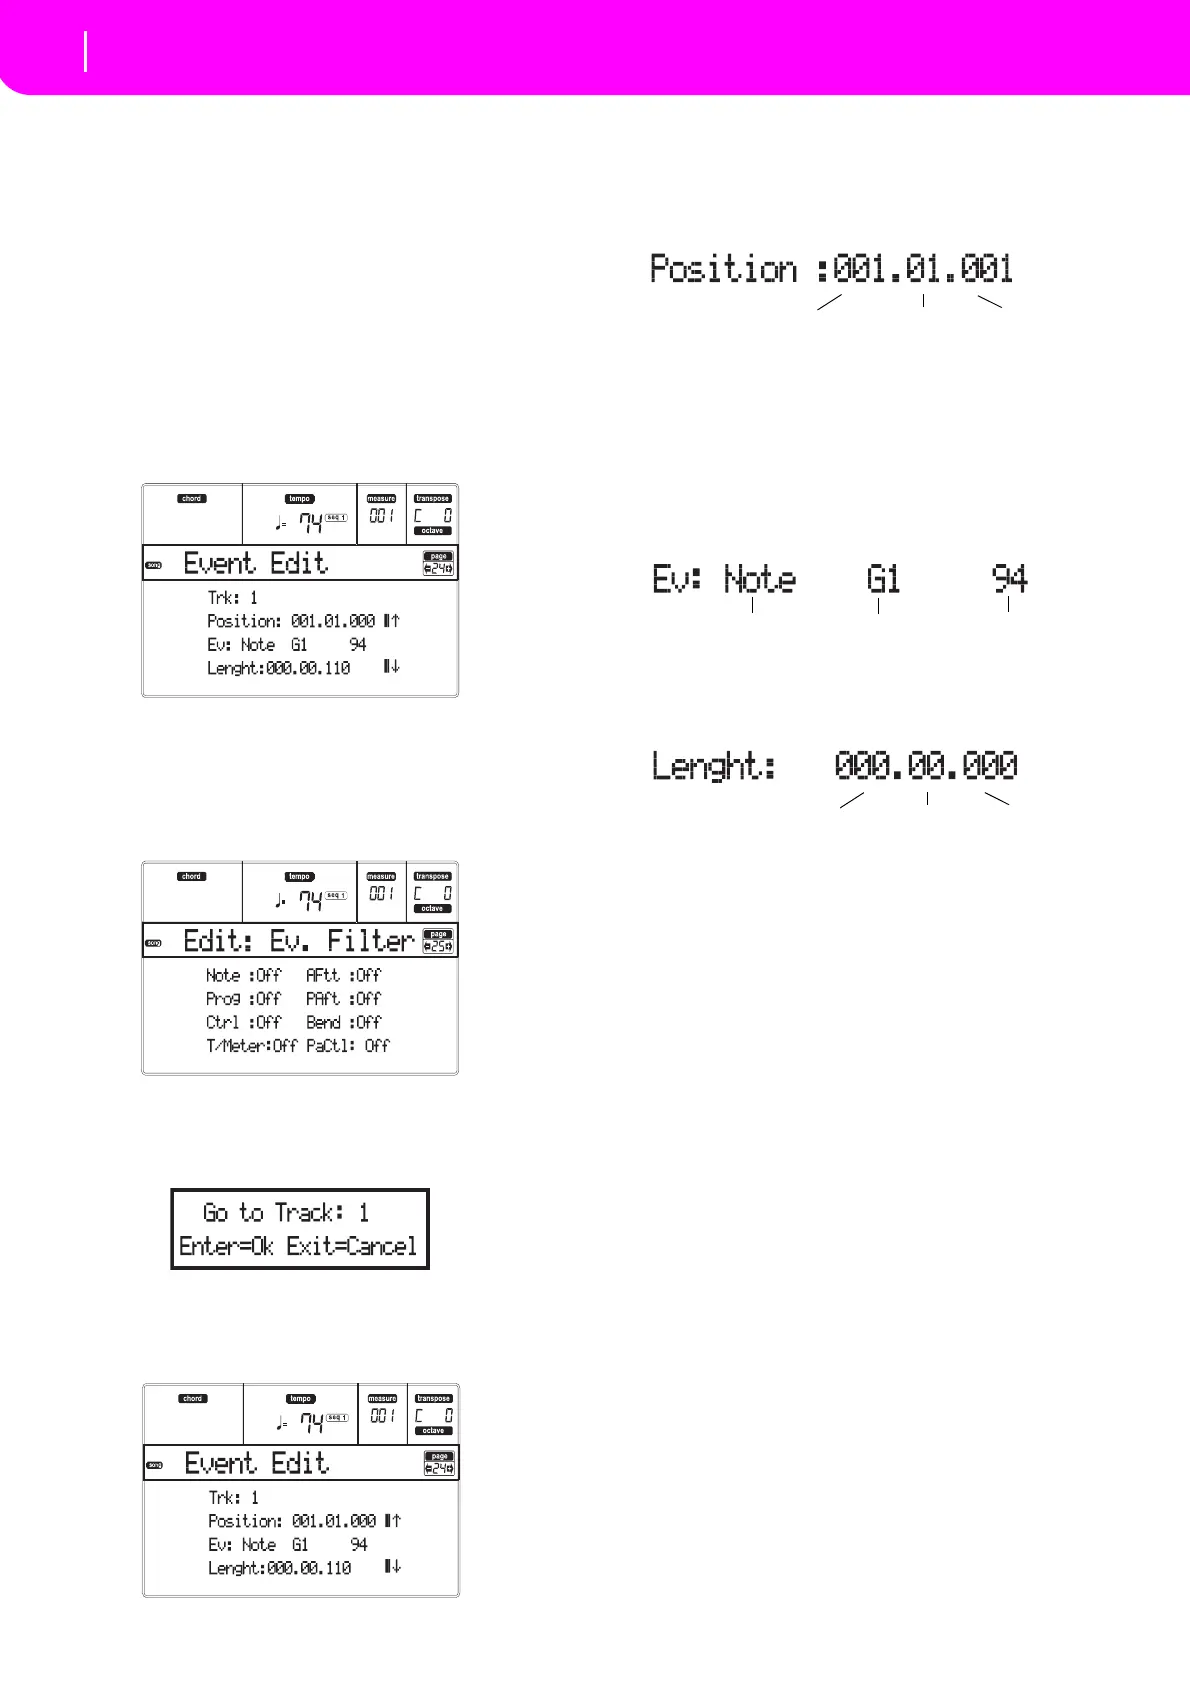
TheEventEditisthepagewhereyoucanediteachsin‐
gleMIDIeventoftheselectedtrack.
Youcan,forexam‐
ple, replace a note with a different one, or change its
playingstrength.Here
isthegeneraleventeditingpro‐
cedure.
1. WhileintheMainpageoftheSongmode,loadthe
Song to edit (see “M
ain page” on page88). If a
Songisalreadyloadedorjustrecorded,thisstepis
notneeded.
2. Press MENU, and use one of the H VOLUME/
VALUE buttons to select the Ev
ent Edit section.
TheEventEditpageappears(see“Page24‐Event
Edit”onpage102formoreinformation).
3.
PressSEQ1PLAY/S
TOPtolistentotheSong.Pr
ess
SEQ1PLAY/STOPagaintostopit.
4. Press PAGE+ to go to the Event Filter page, and
tu
rn“Off”thefilterfortheeventtypesyouwishto
seeinthedisplay(see“Page25‐EventFilter
”on
page103formoreinformation).
5. PressPAG
E‐togobacktotheEventEditpage.
6.
Press the A VOLUME/VALUE button (Trk), to
select the track to edit. The Go To T
rack window
appears.
UsetheTEMPO/VALUEcontrolstoselecta
track,
andpressENTERtoconfirm(orEXITtoabort).
7. The list of events contained in the selected track
willappearinthedispl
ay.
Formoreinformationontheeventtypesandtheir
val
ues,see“Page24‐EventEdit”below.
8. Us
e the B VOLUME/VALUE buttons to select the
Position line. Use these buttons or the TEMPO/
VALUEcontrolstochangetheevent’sposition.
9. Use the C VOLUM
E/VALUE buttons to select the
Ev
ent line. You may use the C VOLUME/VALUE
buttonsortheTEMPO/VALUEcontrolstochange
the event type. Use the G VOLUME/VALUE but‐
tons,andtheF‐3 andF‐4function key
storespec‐
tively select the firs
t and second valu
e of the
parameter. Use the G VOLUME/VALUE buttons
or the TEMPO/VALUE controls to modify the
selectedvalue.
10. In the case of a Not
e event, use the D VOLU
ME/
VALUE buttons to select the Length line, and use
thesamebuttons, ortheTEMPO/VALUEcontrols,
tochangetheevent’slength.
•After having mo
dified the shown
event, you
mayscrolltothenexteventwiththeHVOLUME/
VA L UE buttons(Scrolltonext),ortotheprevious
event with the E/F VOLUME/VALUE buttons
(Scrolltoprevious).
•YoumayusetheSHIFT+<<or>>shortcuttogo
toadiffe
rentmeasure(see “SHIFT +<<or >>”on
page103)
•Whilethesequencerisrunning,youmayusethe
SHIFT +
PAUS
E shortcut to move the current
event in the display (see “SH IFT + PAUSE” on
page103).
•As desc
ribed in step 3, you may press SEQ1
PLAY/
STOPtolistento theSong,andpressSEQ1
PLAY/STOPagaintostopthesequencer.
11. Use the INSERT button to insert an event at the
Position shown inthe display (a Note event with
default values will be inserted). Use the DELETE
buttontodeletetheeventshowninthedisplay.
12. Whentheeditingiscomplete,
youmayselectadif‐
ferenttrack(gotostep6).
13. Whenfinishededitin
gthewholeSong,pressEXIT
togobacktotheMainpageoftheSongmode,and
selecttheSaveSongcommandtosavetheSongthe
card. See “Save Song page” on page90 for more
in
formationonsavingaSong.
Event Type
First value
Second value