58
Style Record mode
Style Record procedure
STYLE RECORD PROCEDURE
Therearetwodifferentmethods forrecordingaStyle:
RealtimeandStep.
• RealtimeRecordingallowsyoutorecordStylepat‐
ternsinrealtime.
•
Step Recording allows youtocreateanewStyleby
enteringthesinglenotesorchordsineachtrack.This
isveryusefulwhentranscribinganexistingscore,or
needingahigher gradeofdetail,and isparticularly
suitabletocreatedrumandpercussiontracks.
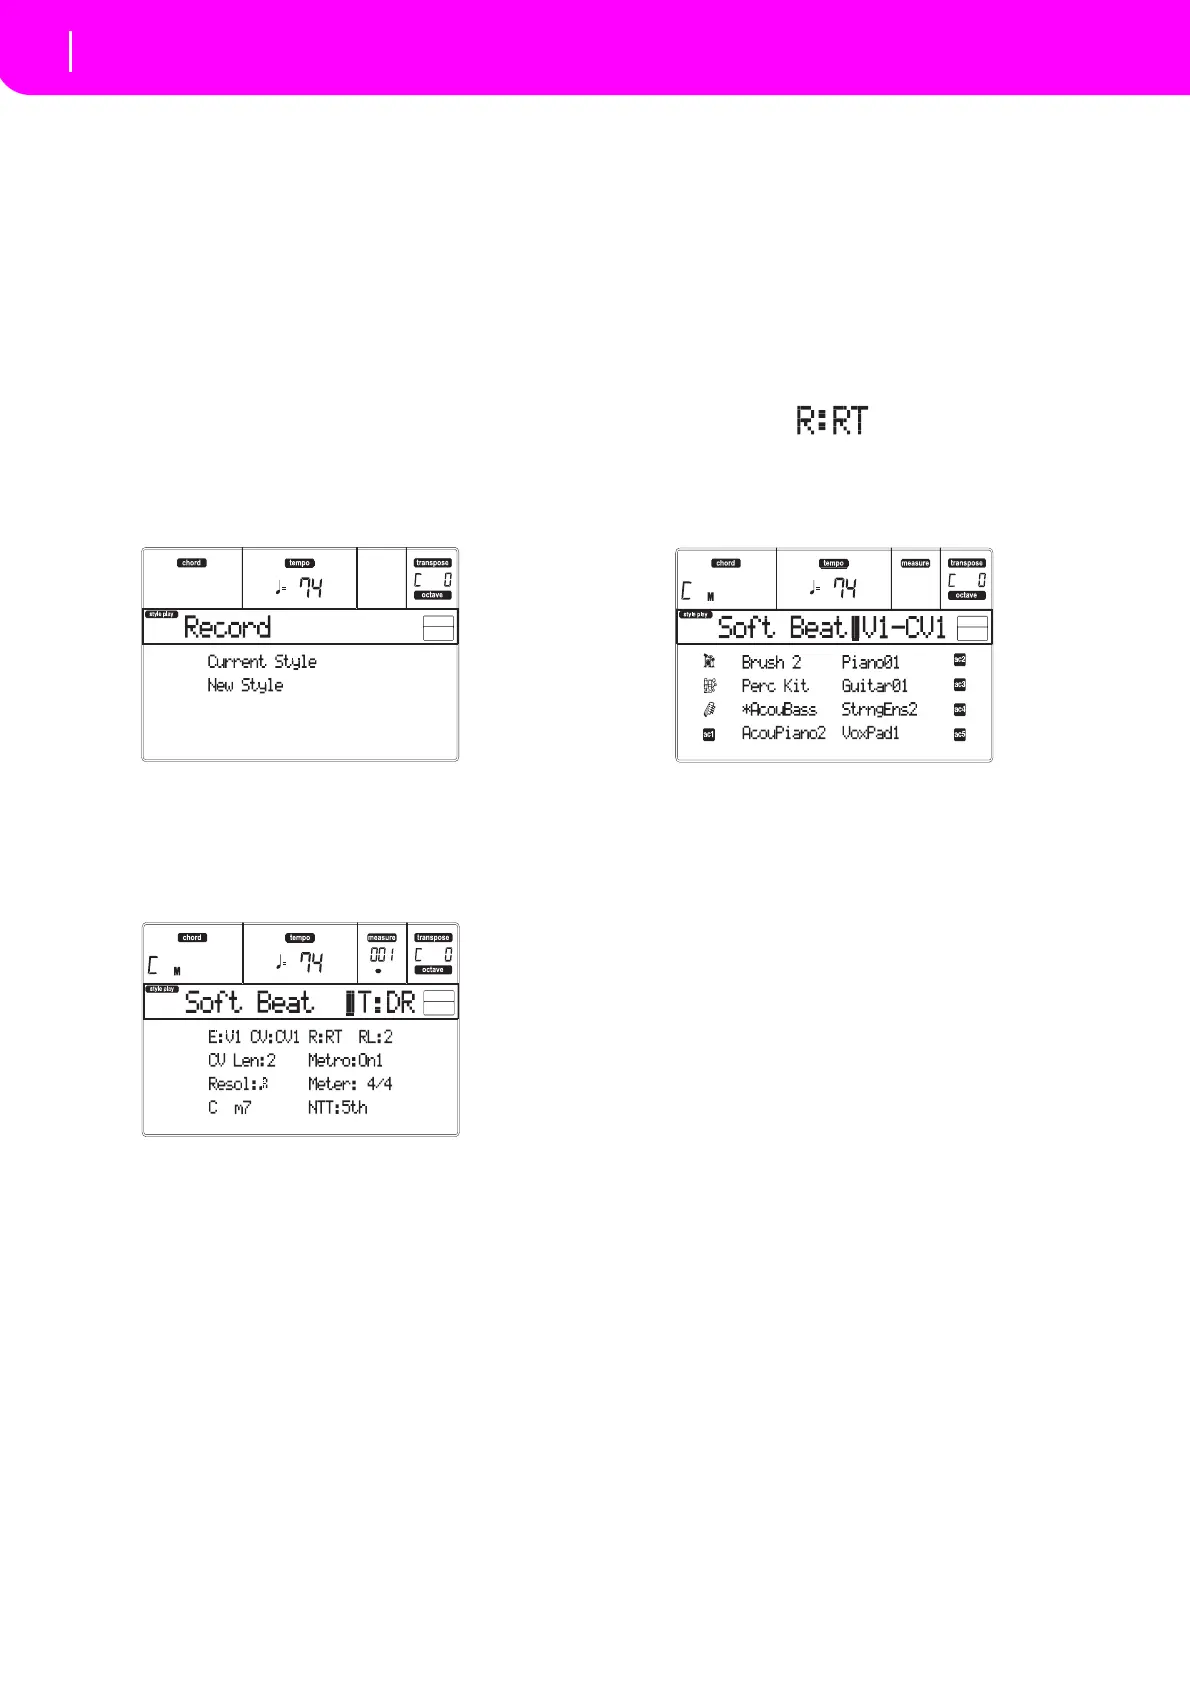
Preparing to record
1. IfyouliketoeditanexistingStyle,selectthatStyle.
2. Press RECORD to enter the Style Record mode.
You are prom
pted to select either the Current
Style,oraNewStyle.
Select“Curre
ntStyle”ifyouwanttoeditthe cur‐
ren
t Style, or make a new Style
starting from an
existing one. Select “New Style” if you want to
startfromscratchwithanemptyStyle.
3. After you select your preferred option, the Ma
in
pageoftheStyleRecordmodewillappear.
4. UsetheAVOLUME/V
ALUEbuttons,andtheF‐1
and F‐2 function keys to select the E (Style El
e‐
ment)andCV(ChordVariation)parameter.
Note:Formor
einformationontheSt
yleElementsand
ChordVariations,andtheStylestructureingeneral,see
“TheStyle’sstructure”onpage52.
5. Us
e the RL (Recording Length) parameter to set
the length (in measures) of the pattern to step‐
record.
Select this parameter using the E VOL‐
UME/VALUEbuttonsandtheF‐4functionbutton.
Us
etheTEMPO/VALUEcontrolstose
tthevalue.
6. Use the Meter parameter to set the Style’s meter.
Youcaned
itthisparameteronlyifyouselectedthe
NewStyleoptionwhenenteringtheRecordmode.
7. Set the tempo. Keep the SHIFT button pressed,
andusetheTEMPO/VALUEcontrolstochangethe
tempo.
8. Atthispoint,ifyouwanttodoaRealtimeRecord‐
ing go on reading “Realtime Record procedure”
below.Otherwise,ifyouprefertodoaStepRecord,
jumpto“StepRecordprocedure”onpage59.
Realtime Record procedure
1. When still in the Main page of the Style Record
mode, press one of the E VOLUME/VALUE but‐
tons, to select the “R” parameter. Use these but‐
tons,ortheTEMPO/
VALUEcontrols,
toselectthe
“RT”(Realtime)recordingmode.
2. Press TRK SELECT to switch to the Style Tra
cks
page. Here you can assign the right Program to
each Style track. (For more details, see “Style
Trackspage
”onpage56).
3. Ifyoulike
,you cansetthetempoagain from
this
page:justusetheTEMPO/VALUEcontrols.
4. AssignaProgramtoeachtrack,byusingthePRO‐
GRAM/PE
RFORMANCEsection.
5. Ifneeded,settheOctaveTransp
oseforeachtrack.
Note: The Octave Transpose will affect only the notes
comingfromthekeyboard,andnotfromthearranger.
6. Selectthetracktoputinrecord.Itsstatu
siconwill
beginflashing.
Note: When entering the Record mode, the last
selectedtrackisalreadyinrecord.Whenyou
press
START/STOPafterenteringtheRecordmode,you
canimmediatelystartrecording.
Ifyoulike,youcantryyourpartbefore
recording:
•Set the track in mute, by pressing both corre‐
sponding VOLUME
/VALUE buttons; the status
icondisappear
s.
•PressSTART/STOPtoplayback theothertracks,
ifalreadyrecorded,andpracticeonthekey
board.
•When you have finished practicing, press
START/
STOPtostopthearranger,andunmutethe
trackbypressingbothVOLUME/VALUEbuttons;
thetrackwillbeinrecordagain.
7. While the status icon is flashing, press START/
STOP to begin recording. Depending on the
“Metro”(metronome)option youselected,a1‐ or
2‐bars precount may play before the recording
actually begins. When it begins, play freely. The
pattern will last for some measures, according to
theRecLenvalue,thenrestart.
Since the recor
ding will happen in overdub, you
can add notes on any fol
lowing passage. This is