30
Tutorial
Recording a Song (Simultaneously recording the Style and realtime performance)
RECORDING A SONG
(Simultaneously recording the Style and
realtime performance)
TheBackingSequencemodeisafastandeffectiveway
of recording a new Song, making full use of the fea‐
tures of the Style Play mode. So, arm your rec
order,
andplaylive with theStyles—asongwill be readyin
seconds!
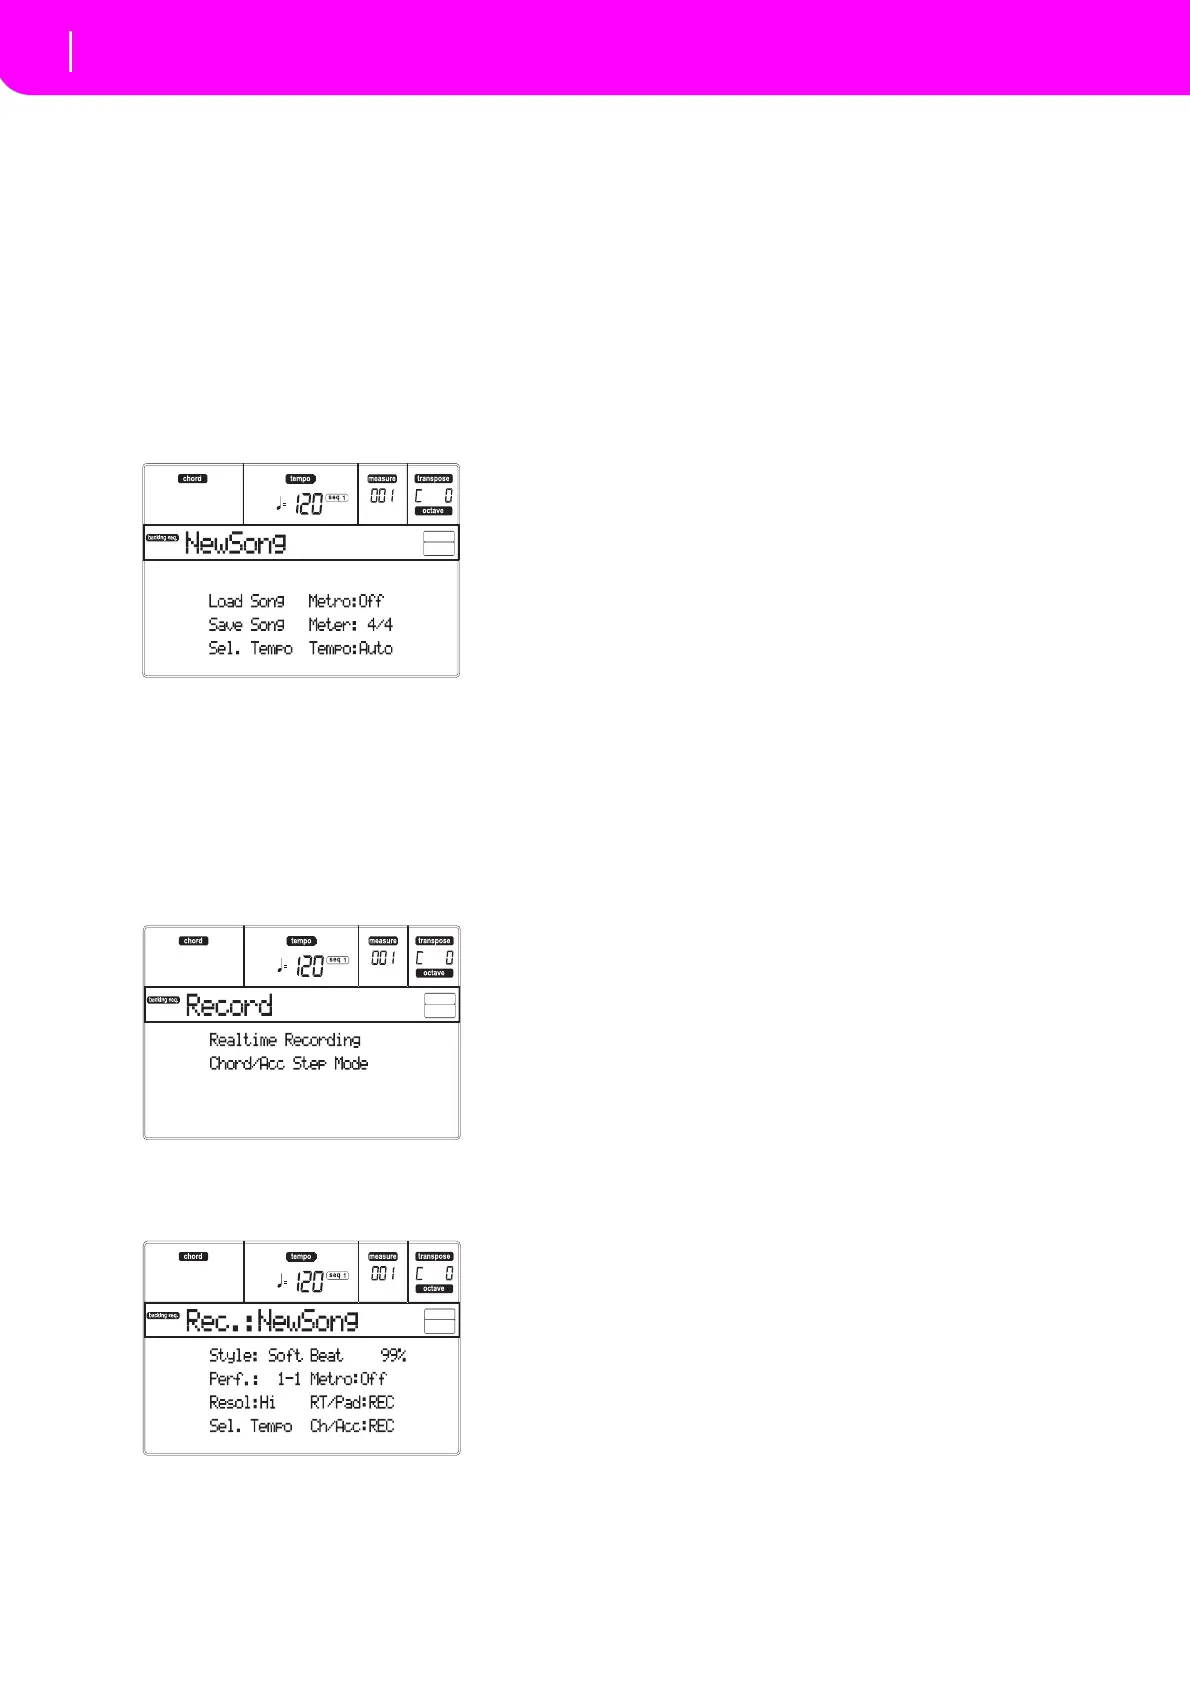
1 First, enter Backing Sequence mode
PressB.SEQtoaccesstheBackingSequencemode.The
Realtime
tracks,onthekeyboard,willremainthesame
asyouselectedintheStylePlaymode.
Don’t wo
rry about this disp
lay: it’s something you
don’t need to learn at this point. You may find more
information on it, going to the Reference Guide (see
“BackingSequ
enceoperatingmode”onpage82).
ThisistheBackingSequencePl
aypage,whereyoucan
load,playorsavea
Song.
2 Now, press RECORD.
YouarepromptedtoselecteithertheRealtimerecord‐
ingmode,or
theChord/AccSteprecordingmode.
3 Selec
t the Realtime recording mode.
Simply pr
ess one of the A VOLUME/VALUE
buttons.
TheRecordpageappears.
4 If you think the selected Style is not what you
lik
e for your backing
tracks, select a different
one.
(see “Selecting a Style” on page26). Here is a fast
reminder:
1. Se
lectoneof the Style rowsinthe STYLE section,
usingtheleftmostbutton.
2.
Select one of the Style Banks, by pressing one of
thebuttonsoftheSTYLEsection.
3. Se
lectoneofthepages,usingthePAGEbuttons.
4. Select a St
yle, using the VOLUME/VAL
UE (A–H)
buttons.
The Style Bank and number appear after the “Styl
e”
parameterinthedisplay.
5 And what about changing the Performance or
Single Touch Setting?
(s
ee “Selecting a Performance” on page25, or “Select‐
ingaSingleTo
uchSetting(STS)
”onpage26).Hereisa
shortrecapforthePerformances:
1. PressthePERFORMbuttontosetthePROGRAM/
PER
FORMANCE section act as a Performance
selector.
2. Select one of the Performance Banks, by press
ing
one of the buttons of the PROGRA M/PERFOR‐
MANCEsection.
3. SelectaPerformance,usingtheVOLUME/VALUE
(A–H)buttons.
…andforthe
SingleTouchSettings(S
TS):
•Press one of the SINGLE TOUCH SETTING but‐
tons.
6 Ok, now we ca
n go.
Asyousee,boththeRTtrackandtheCh/Acctrackare
in RECord mode. This means you can start recording
ev
erythingyouplayinarealtimeperformancewiththe
Styles.
PRESS START/STOP
WAIT FOR THE PRECOUNT TO REACH BAR 1
AND BEGIN PLAYING!
7 Play as if you were playing live.
Youcandoexactlywhatyoudowhenplayingwiththe
Styles:selectadifferentSt
yle,Performance,STS,differ‐
entVariation,aFill,andEndi
ng…
You can even start your recording with an Intro: just
press one of the INTRO buttons before
pressing
START/STOPtostartrecording.
8 Stop the Song.
To stop the Song, press either START/STOP or
one of
the ENDING buttons. The Song will stop, but the
Recording will still be on. So, you can start with
another Song to be recorded in the same session (go
backtostep6,ifyo
ulike).
Otherwise,finis
hthe Recording.Nowforgoin
gto the
nextstep.