36
MIDI
The Chord 1 and Chord 2 channels
transmissionshouldtakeplaceovertheGlobalchannel
ofthemicroARRANGER.
The MIDI messages received over a Global channel and
notoverastandardchannelareaffectedbythebuttonsof
the KEYBOARD MODE section, as well from the split
point. Therefore, if the SPLIT button LED is lit up, the
notesthatarrivetothe microARRANGERoverthischan‐
nelwillbedi
videdbythesplitpointintotheUpper(above
thespli
tpoint)andLower(belowthesplitpoint)parts.
The notes that arrive to a Global channel are used for
thechordrecognitionoftheautomaticaccompaniment.
If the KEYBOARD MODE is SP LIT, only the notes
belowthesplit pointwillbeused.Thesenoteswillbe
combined with the ones of the special Chord 1 and
Chord2channels.
THE CHORD 1 AND CHORD 2 CHANNELS
YoucansettwospecialChordchannels(seepage128)
to send to the microARRANGER notes for the chord
recognition.Thenotes willbecombinedwiththenotes
thatgothroughthechannelsetasGlobal(Gl o balnotes
arerecognizedonlyunderthesplitpoint, iftheSPLIT
LEDislitup).
TheCh
ordchannelsarenotaffected bythesplitpoint
an
d the KEYBOARD MODE section of the control
panel. All the notes – both above and below the split
point–willbesenttothechordrecognition.
ThebuttonsoftheCHORDSCANNINGsectionhav
ea
particulareffectontheChordchannels:
•
ifyouhaveselectedLOWER,thechordrecognition
modewillbesetbythe“ChordRecognition Mode”
parameterintheStylePlaymode(seepage51);
•if you have selected UPPER or FULL, the chord
recognition mode will always be Fingered 2 (you
need to play at least three notes in order for the
chordtobedetected).
Thesetwochannelsareespeciallyusefulforaccordion
players to assign a d
ifferent Chord channel to the
chords and the bass playedwith the left hand. In this
way,chordsandbasswillparticipatetothecreationof
chords for the chord recognition of the a utomatic
accompaniment.
THE CONTROL CHANNEL
You can set a MIDI IN channel as the Control channel
(seepage128),toselectStylesandPerfo
rmancefroman
externaldevice.SeetheAppendixforalistofmessages
correspondingtomicroARRANGERinternaldata.
MIDI SETUP
YoucanplaymicroARRANGERwithanexternalcon‐
troller,anduse itsimplyas agorgeoussoundgenera‐
to
r.TohelpyouconfiguretheMIDIchannels,wehave
provided a set of MIDI Set
ups. Go to Global mode to
selecttheonethatfitsyourMIDIneeds.(See“Page4‐
MIDISetup”onpage126formore
information).
We recommend
youto considereachMIDI Setu
pasa
starting point you can freely tweak. Once you have
selectedthemostapp ropriate MIDISetup forthe con‐
nectiontobemade,youcanmodifytheparametersas
necessaryandsave
theGlobalinthememorywiththe
Writefunction(see“TheWritewindow”onpage125).
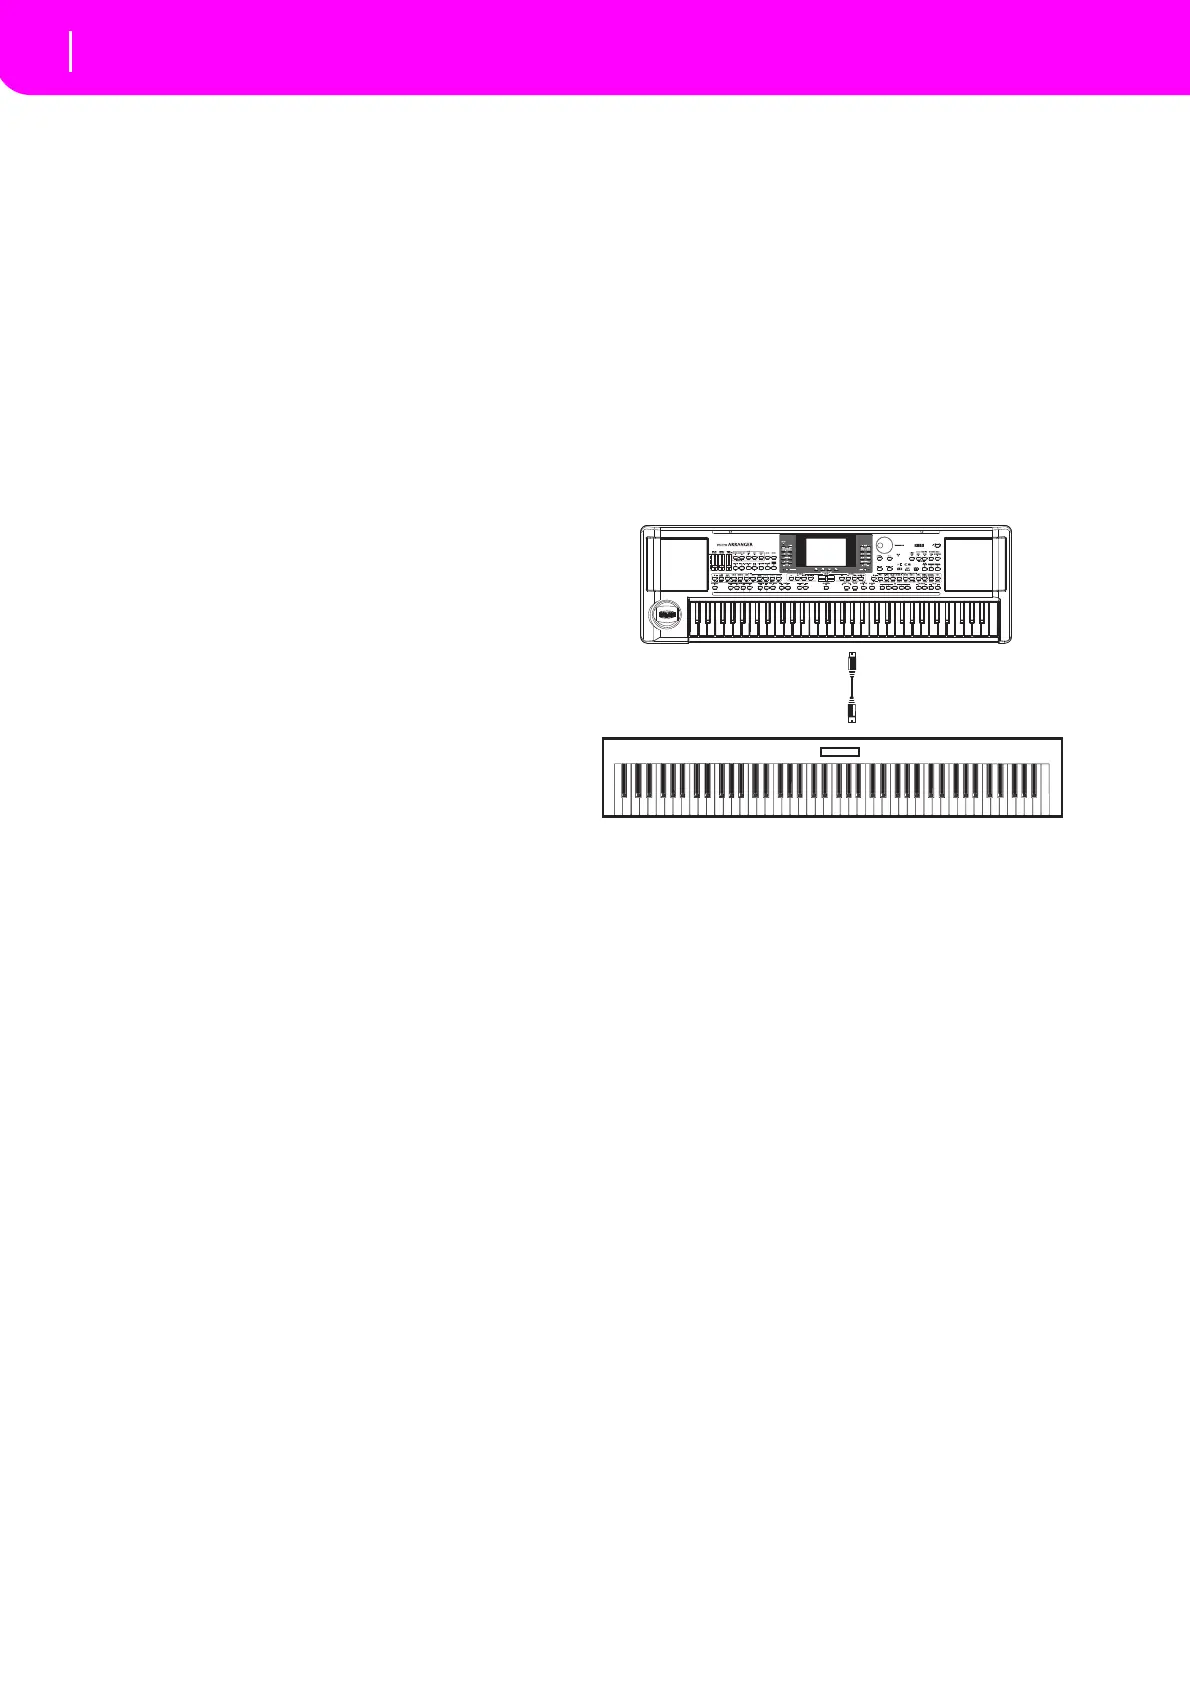
CONNECTING microARRANGER TO A
MASTER KEYBOARD
You can control the microARRANGER with a master
keyboardoranyotherMIDIkeyboard.You onlyneed
toconnecttheMIDIOUTconnectorofthemasterkey‐
boardtotheMI
DIINconnectorofthemicro
ARRANG‐
ERmicroARRANGER. The master keyboard will
become the integrated
keyboard of the microAR‐
RANGER if it transmits over the same channel pro‐
grammedasGlobalinthemicroARRANGER.
IfthemasterkeyboardtransmitsovertheGlobalchannel
ofthemicroARRANGER,thesplitpointandthestatusof
theKEYBOARDMODEsectioninthecontrolpanelwill
affectthenotesreceivedfromthemasterkeyboard.
Connections and settings
To connect the master keyboard to the microAR‐
RANGERfollowthisprocedure:
1. Connect the MIDI OUT connecto
r of the master
keyboard to the MIDI IN connector
of the micro‐
ARRANGER.
2. Programthemasterkeyboardtotransmitover
the
Global channel of the microARRANGER (s ee
“Page6‐MIDIINChannels”onpage127).
For information on the master keyboard program‐
ming,seetheuser’smanualofthemasterkeyboard
.
3. PressGLOBALto enterthe Globalmode,thengo
to“Page4‐MIDISetup”(seepage126).
4.
SelecttheMasterKeyboardSetup.
Note:Thesettingscanchangewhennewdat
aisloaded
fromacard.Toprotectthesettingsfr
omloading,usethe
Global Protect function (see “Global Protect” on
page142).
5. Press WR
ITE, select Global, and press ENTER to
savetheGlobal.The“A r
e yousure?”messagewill
appear.PressENTERtoconfirm,orEXITtoabort.
6. PressoneofthebuttonsintheMODEsectiontogo
tothedesire
doperativemode.
MIDI IN
MIDI OUT