4-38 Service Manual
5061
Cartridge drive assembly removal
See “Cartridge drive assembly (one drive assembly per package) Also order cable tie parts packet (P/N
40X1648).” on page 7-29 for the part number.
1. Remove inner system board shield. See “Inner system board shield removal” on page 4-48.
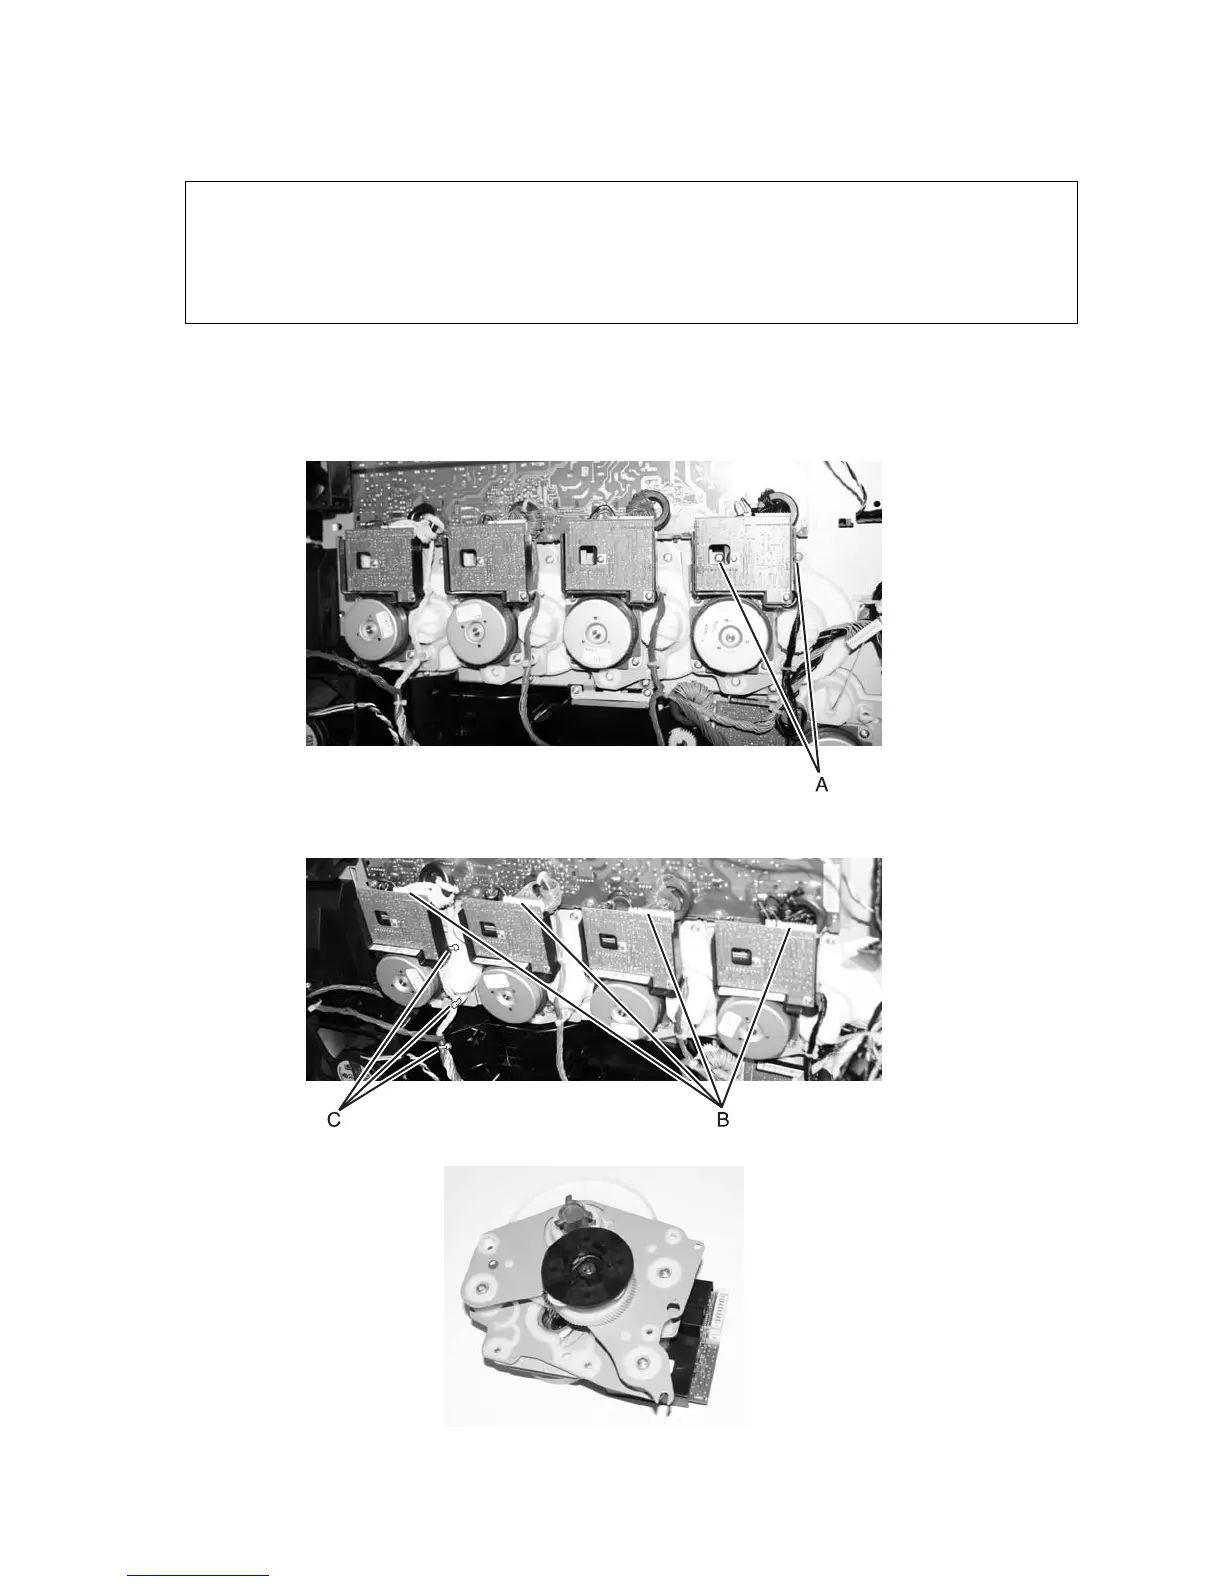
2. Remove the cartridge drive assembly mounting screws (A). Black is shown.
3. Disconnect the cable (B) from the cartridge drive assembly.
4. Note the location of the cable ties (C), and cut them. Yellow is shown.
5. Remove the cartridge drive assembly.
Installation note: Be sure to replace all the cable ties.
Note: Drive assemblies must be removed in the following order until the desired assembly can be removed:
1. Black
2. Magenta
3. Cyan
4. Yellow