Repair information 4-83
5061
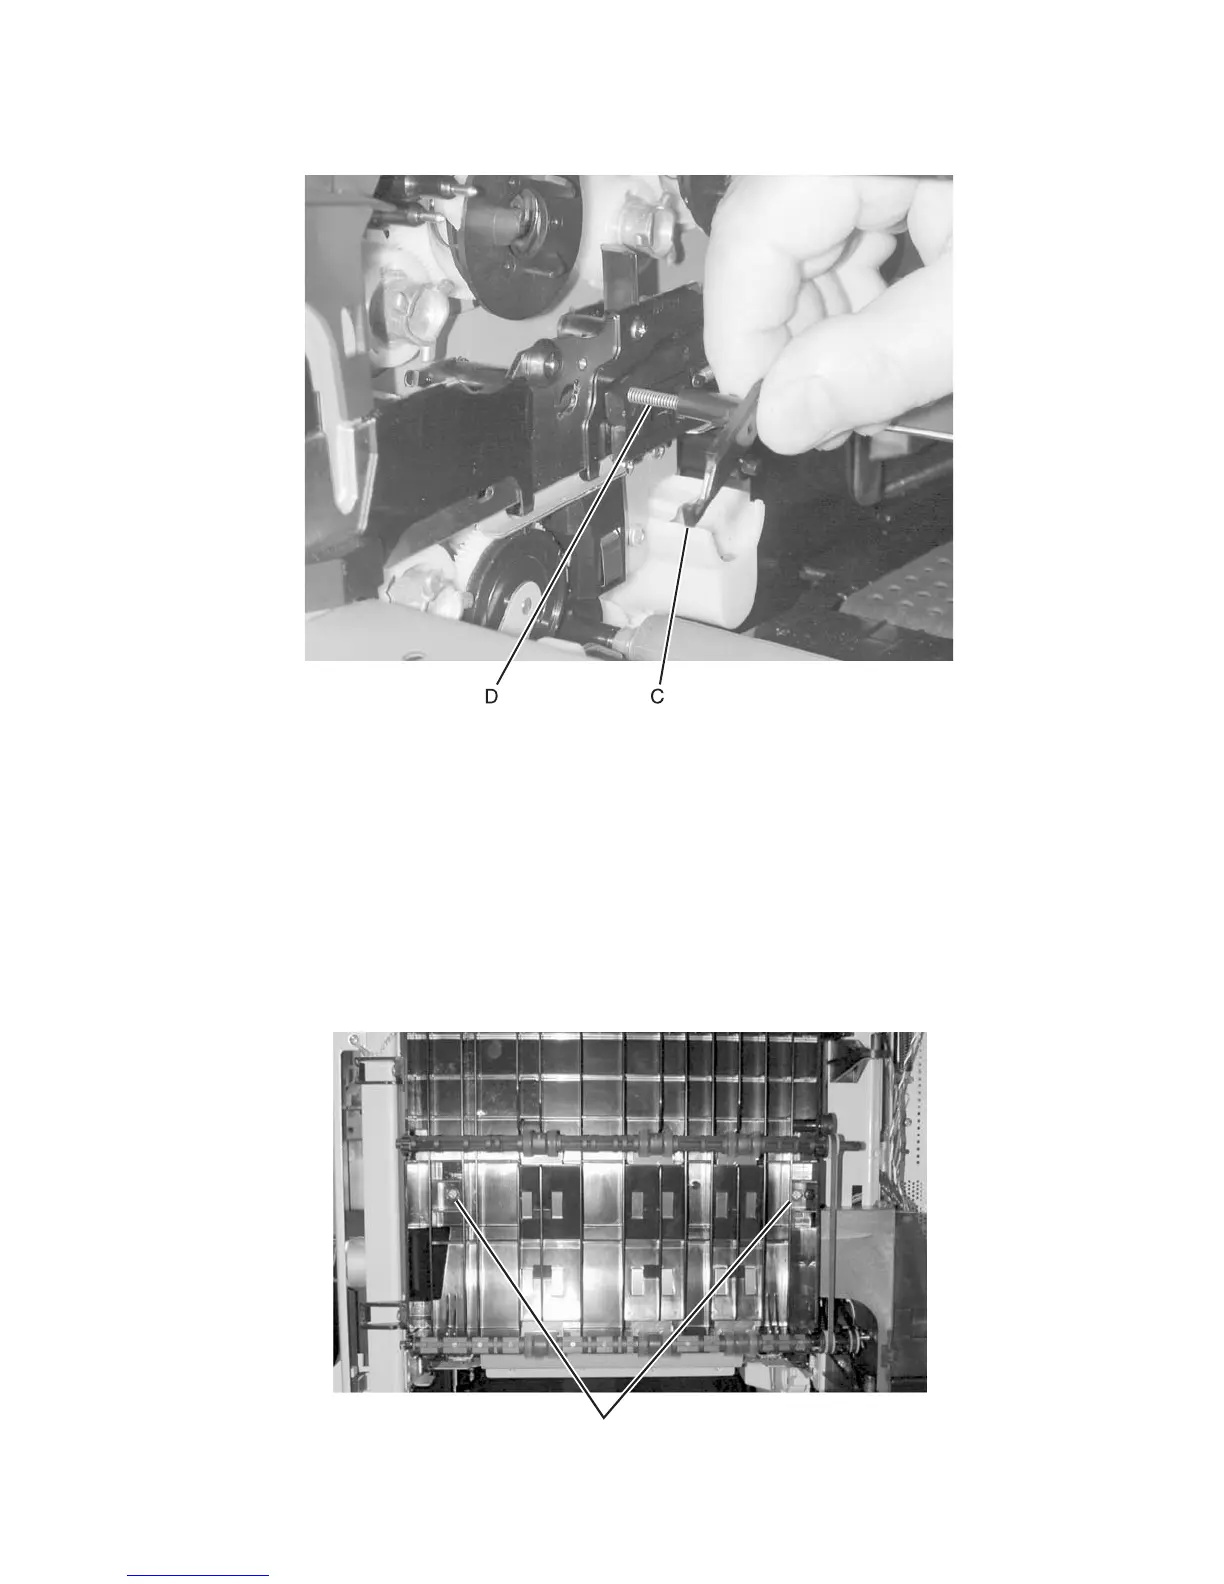
7. Rotate the contact end of the bellcrank down (C) and remove. Be careful not to lose the spring (D).
Installation note
Replace the bellcranks by using reverse order of removal.
Note: Test the color coverage by running the Print Quality Pages in the Diagnostics or Configuration Menu.
Redrive assembly removal
See “Redrive assembly” on page 7-14 for the part number.
1. Remove the redrive door. See “Redrive door removal” on page 4-26.
2. Remove the fuser bottom duct. See “Fuser bottom duct removal” on page 4-46.
3. Remove the redrive assembly screw (A) type “323” on page 4-3.
 Loading...