INJECTION NEEDLE
. . . .. . . ... .... .... .... ..... ..
Sievers TOC-R3 Operation and Maintenance Manual
DLM 95000-01 EN Rev. A 204 © Veolia 2023
11. Reinstall the Injection Needle and Furnace Head Assembly unit back on top of the
Furnace.
• Lower the Injection Needle [15] slightly into the Furnace Head Cover [6] and then
tighten the red Furnace Head Compression Fitting [10A].
• Insert the Furnace Head Assembly (with attached Injection Needle) into the
central hole inside the Furnace.
• Rotate the Furnace Head Z-Brackets to clamp down on the Furnace Head
Assembly and tighten the three Thumb Screws to be finger-tight. Important!
Ensure that the metal Furnace Head Z-Brackets only touch the High Temperature
Gasket [7]! If needed, slide the slotted Furnace Head Z-Brackets farther away
from the center fitting before tightening the Thumb Screws.
12. Carefully tilt the Furnace back into its vertical, upright position.
13. Secure it in place using the Wing Screw that was removed earlier.
14. While holding the Injection Needle [15] in one hand, carefully loosen the Compression
Nut [10A] with the other. Important! Do not let go of the Injection Needle! It will fall
into Furnace Cartridge!
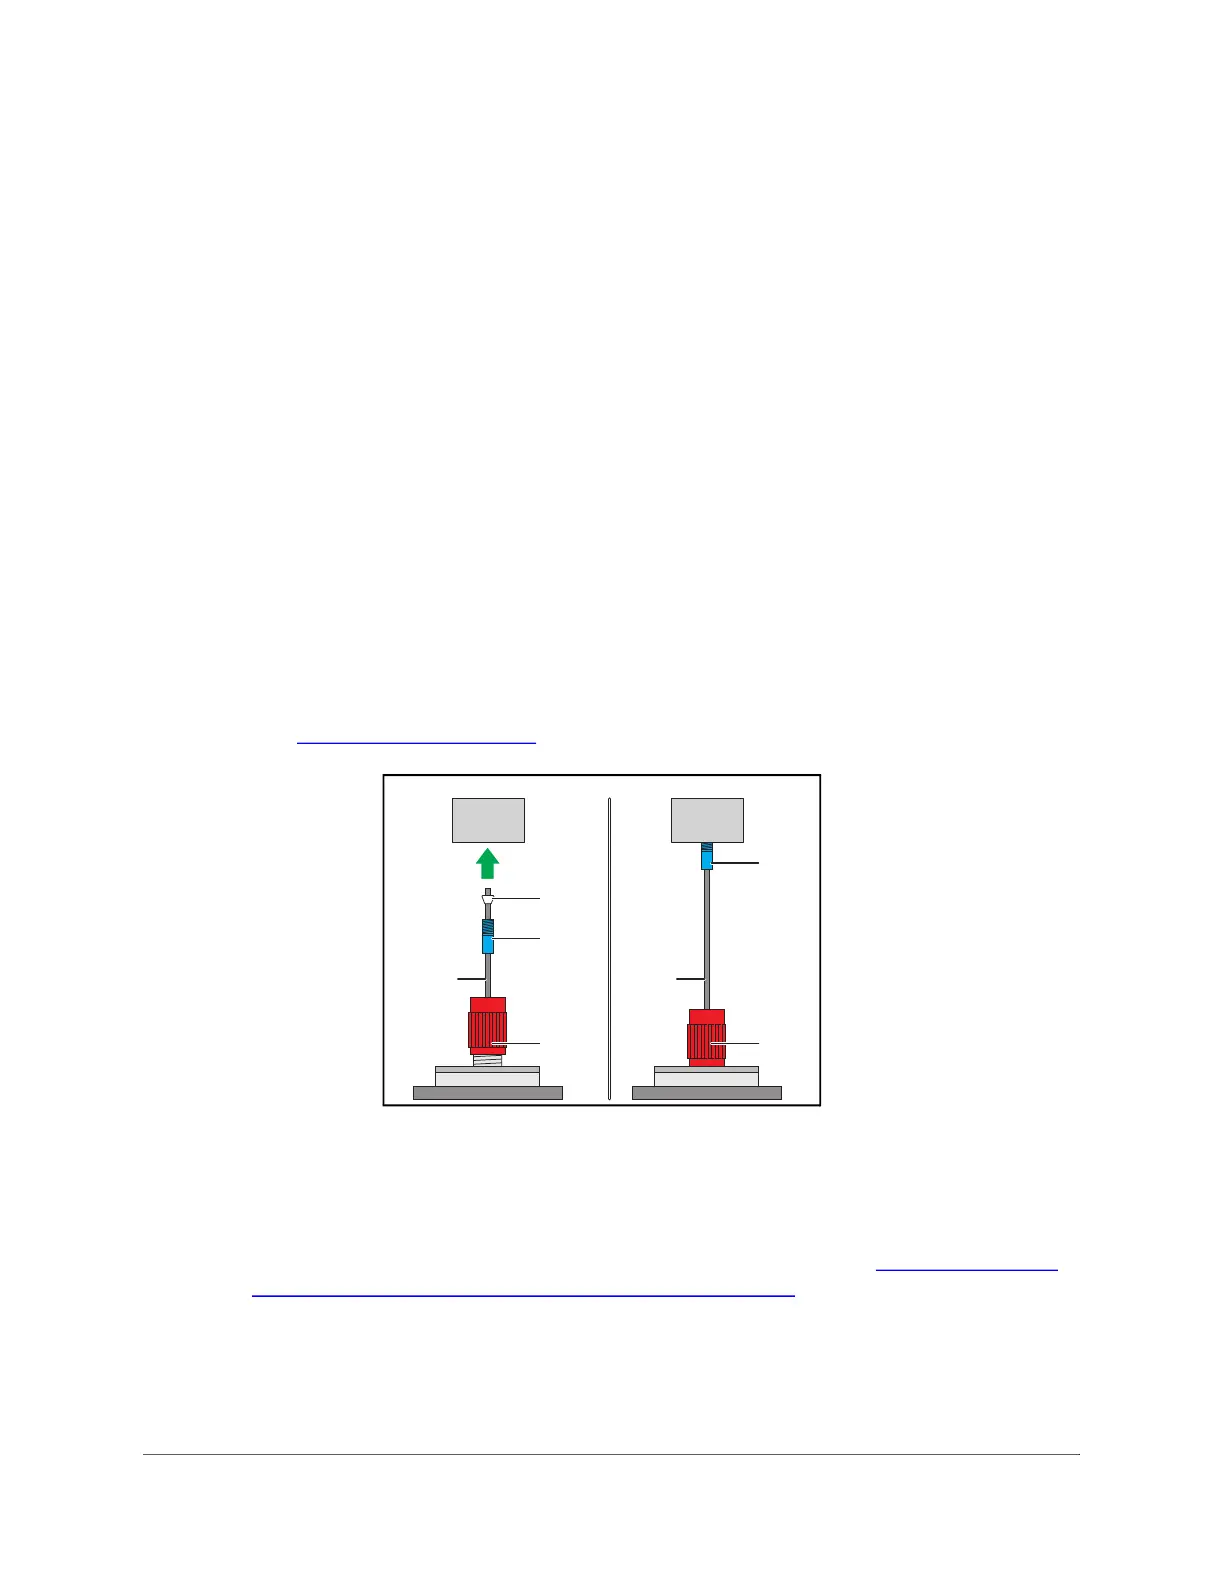
15. Carefully slide the Injection Needle [15] up and insert it into the Injection Block port.
Ensure that the Ferrule [14B] seats into the Injection Block and then tighten the
Injection Block Compression Fitting [14A] over the Ferrule [14B] to be finger-tight.
See Figure 6-11 on page 204
.
Figure 6-11: Connect Injection Needle to Injection Block
16. Next, re-tighten the Compression Nut [10A] to be finger-tight to secure the Injection
Needle in place.
17. Navigate to the Menu → Service → Sensors screen. Check the “Carrier Gas Flow
In” Sensor reading for adequate flow. For more information, see “Important Sensor
Values — Analyzer On, Analysis Stopped” on page 196.
18. If planning to perform more maintenance, follow the procedures listed in the
appropriate sections of this chapter. Otherwise, you may turn the Furnace Power
back “On” and close the Analyzer door. The Analyzer will require at least two hours to
reach operating temperature.
[15]
[14A]
[14B]
[10A]
[15]
[14A]
[10A]
 Loading...