FURNACE CARTRIDGE
. . . .. . . ... .... .... .... ..... ..
Sievers TOC-R3 Operation and Maintenance Manual
DLM 95000-01 EN Rev. A 208 © Veolia 2023
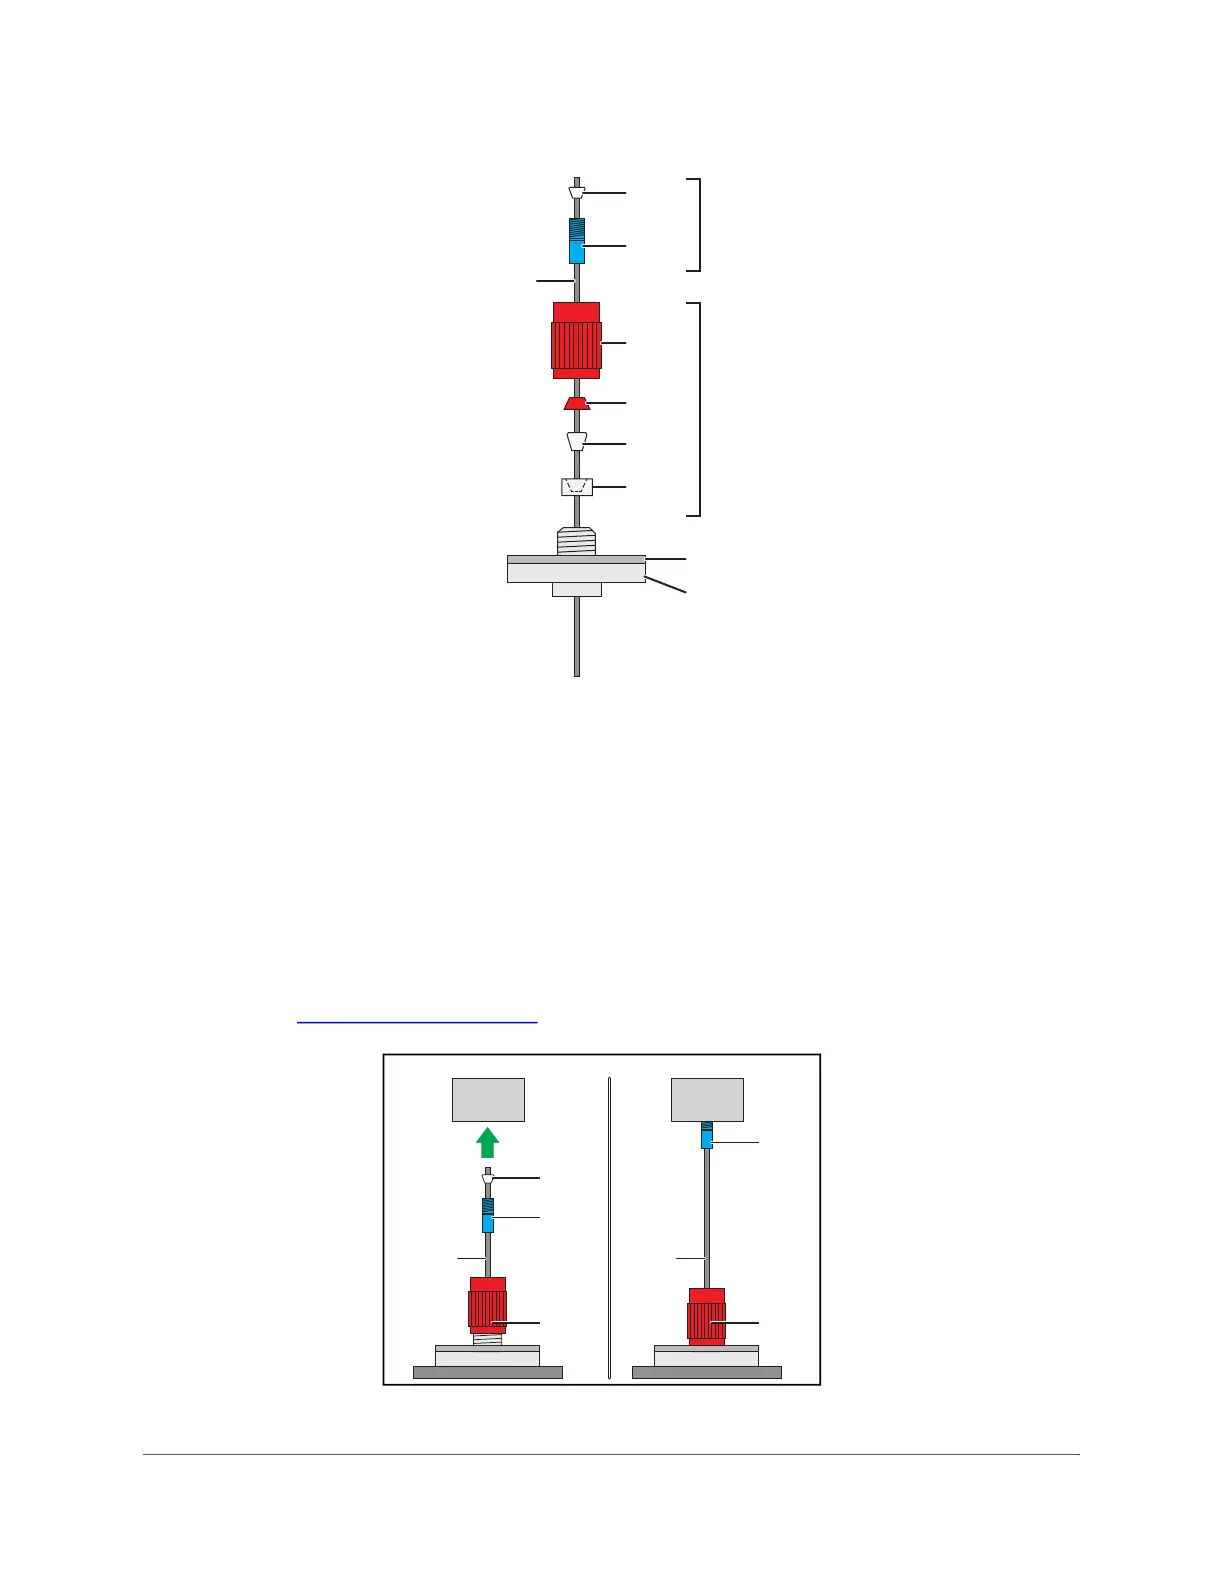
Figure 6-13: Furnace Head Assembly
12. Carefully tilt the Furnace back into its vertical, upright position.
13. Secure it in place using the Wing Screw that was removed earlier.
14. While holding the Injection Needle [15] in one hand, carefully loosen the Compression
Nut [10A] with the other. Important! Do not let go of the Injection Needle! It will fall
into Furnace Cartridge!
15. Carefully slide the Injection Needle [15] up and insert it into the Injection Block port.
Ensure that the Ferrule [14B] seats into the Injection Block and then tighten the
Injection Block Compression Fitting [14A] over the Ferrule [14B] to be finger-tight.
See Figure 6-14 on page 208
.
Figure 6-14: Connect Injection Needle to Injection Block
[15]
[14A]
[14B]
[7]
[10]
[6]
[10D]
[10C]
[10B]
[10A]
[14]
[15]
[14A]
[14B]
[10A]
[15]
[14A]
[10A]

 Loading...