5 Scan
174
Scan
5
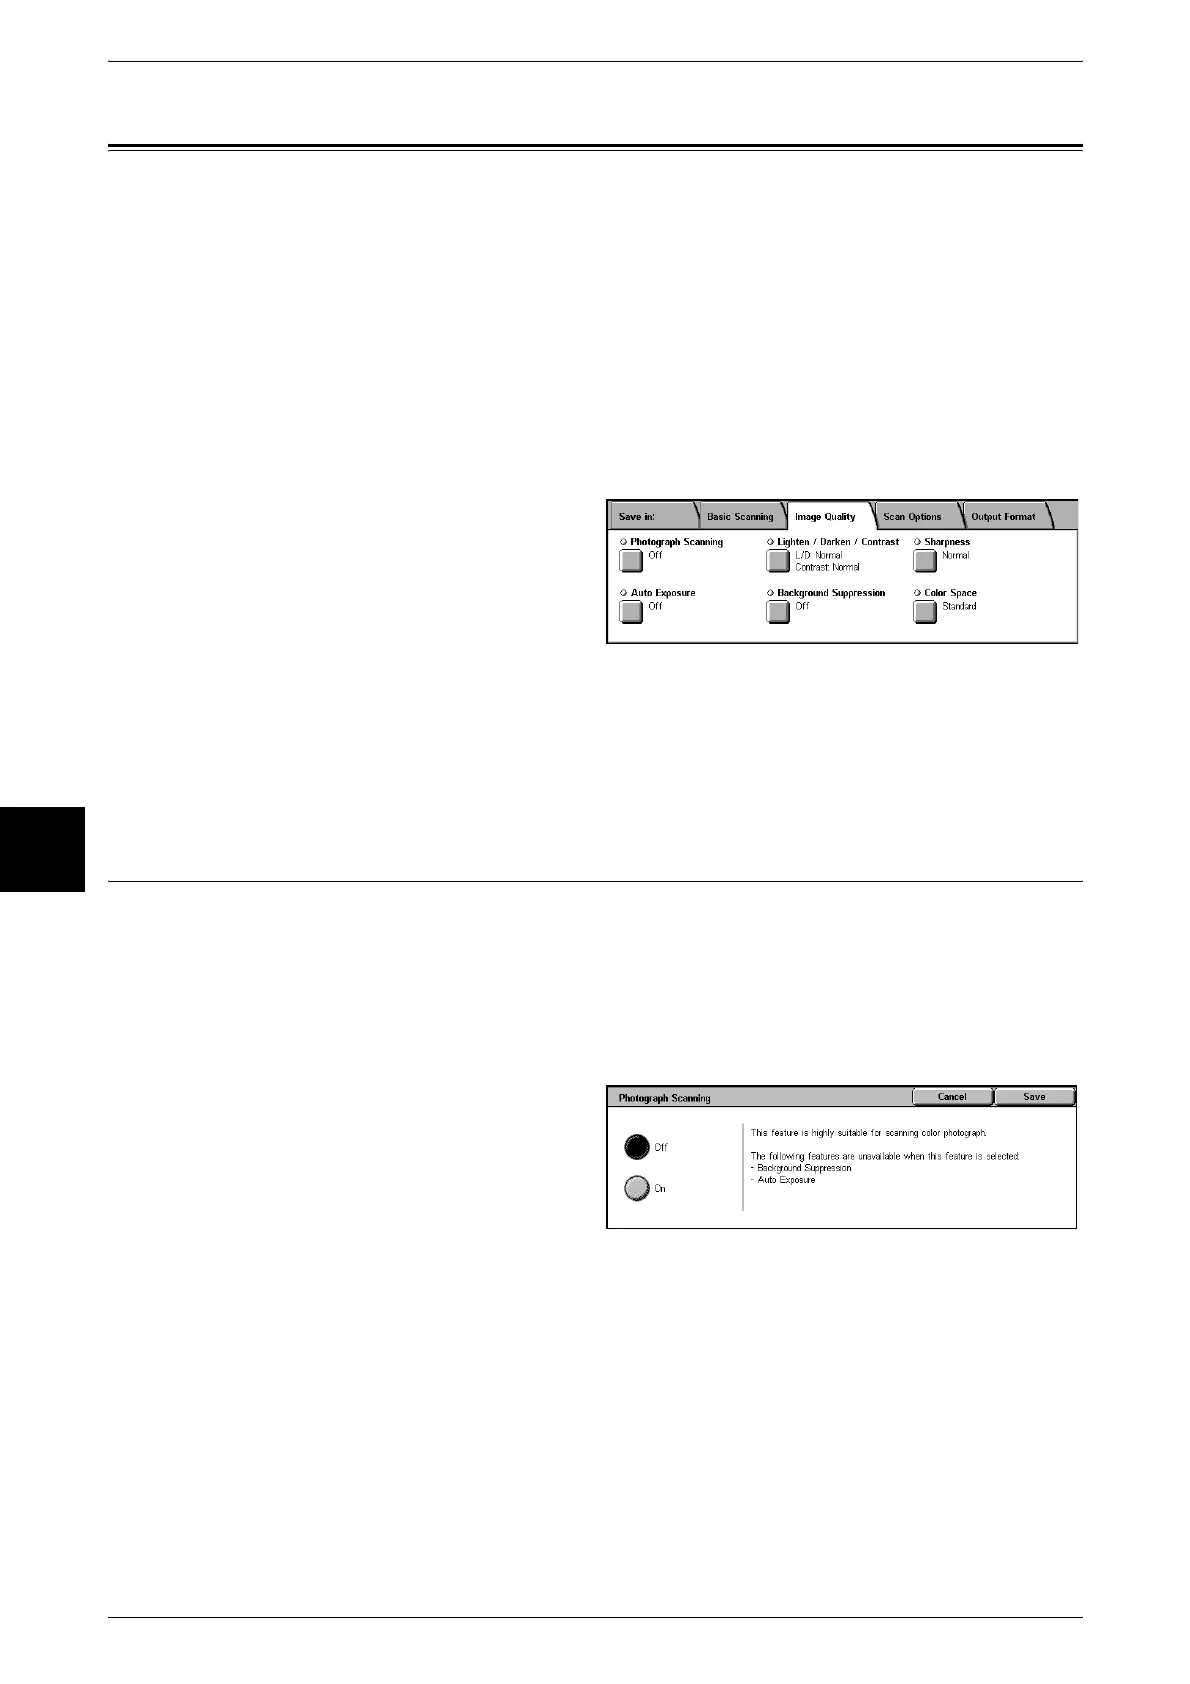
Image Quality
In the [Image Quality] screen under [E-mail], [Scan to Mailbox], [Network Scanning], or
[Scan to FTP/SMB], you can configure the image features. For more information, refer
to below.
Photograph Scanning (Scanning a Color Photograph) .............................................................174
Lighten/Darken/Contrast (Adjusting Scan Density and Contrast)............................................175
Sharpness (Adjusting Document Sharpness)............................................................................175
Auto Exposure (Erasing the Background Color of Documents)...............................................175
Background Suppression (Suppressing the Document Background) .......................................176
Color Space (Specifying Color Space) .....................................................................................176
1 From the [Menu] screen, select
either [E-mail], [Scan to Mailbox],
[Network Scanning], or [Scan to
FTP/SMB].
2 Select the [Image Quality] tab, and
configure each feature.
Note • [Color Space] is not available for some models. An optional package is necessary. For more
information, contact our Customer Support Center. A setting must be made in the System
Administration mode to activate [Color Space]. For information about how to set features,
refer to "Color Space" (P.297).
Photograph Scanning (Scanning a Color Photograph)
Configured when scanning a color photograph.
Only enabled when [Output Color] is set to [Full Color] in the [Basic Scanning] screen.
Important • Only available for documents placed on the document glass. Cannot be used for documents
placed on the document feeder.
• When [Photograph Scanning] is selected, [Background Suppression] and [Auto Exposure]
are not available.
1 Select [Photograph Scanning].
2 Select [On].