9 Computer Operations
218
Computer Operations
9
6 In the [Mailbox No.] field, input the
mailbox number (001~200) that
contains the document you wish to
import, and input a password (up to
20 digits) into the [Password] field.
Note • When you check the [Save Password] check box, you can skip steps 5~7 the next time you
select the same mailbox.
• Clicking [Change Scanner] returns to step 5, where you can reselect a scanner.
7 Click [Open Mailbox].
8 Select a document to import from
the list, and click [Import].
Note • You can select one or more
documents.
• [Import], [Update], and
[Delete] are available from the
menu that appears when you
right-click on the list.
When import begins, a dialog
appears like the one shown at right.
Scan data is forwarded from the
mailbox to the client.
Once forwarding ends, the
document is loaded into the
application software and is deleted
from the mailbox.
Note • If importing one page at a time, documents that have pages not yet imported are shown in
the list with a [*].
• With the exception of DocuWorks, for most applications, the network scan driver expands
the compressed data and passes it to the application as a BMP file.
• It can be configured not to delete the document in the mailbox after forwarding. For how to
configure, refer to "Delete Documents After Retrieval" (P.324).
Changing Network Scan Driver Settings
To learn about fields in the displayed dialog box, click on [Help] and refer to the network scan driver’s
online help.
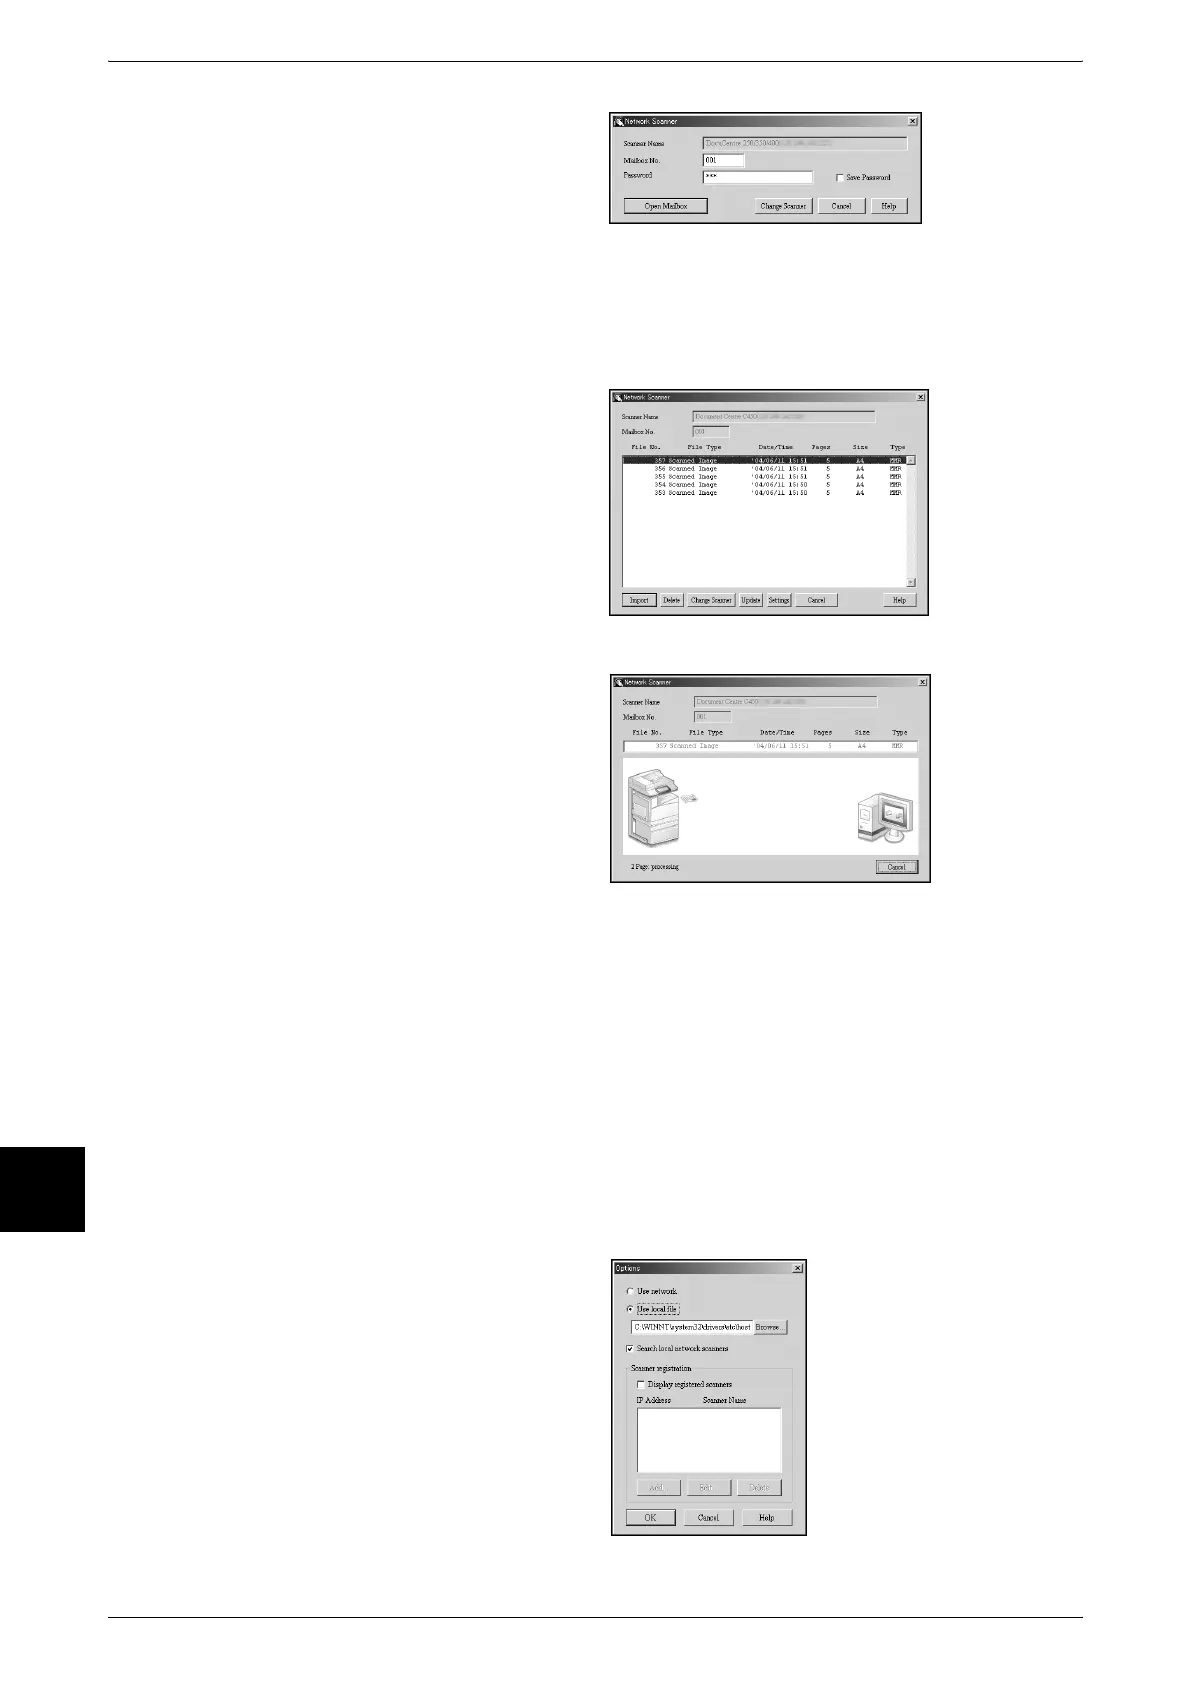
Configure the Display Method for the Scanner Name
You can change the display method
for the scanner name shown when
that scanner is selected.
To change the scanner name
display method, click on [Options] in
the scanner select dialog box and
configure the display.