3: Functions and features Model 2450 Interactive SourceMeter® Instrument
3-24 2450-901-01 Rev. B/September 2013
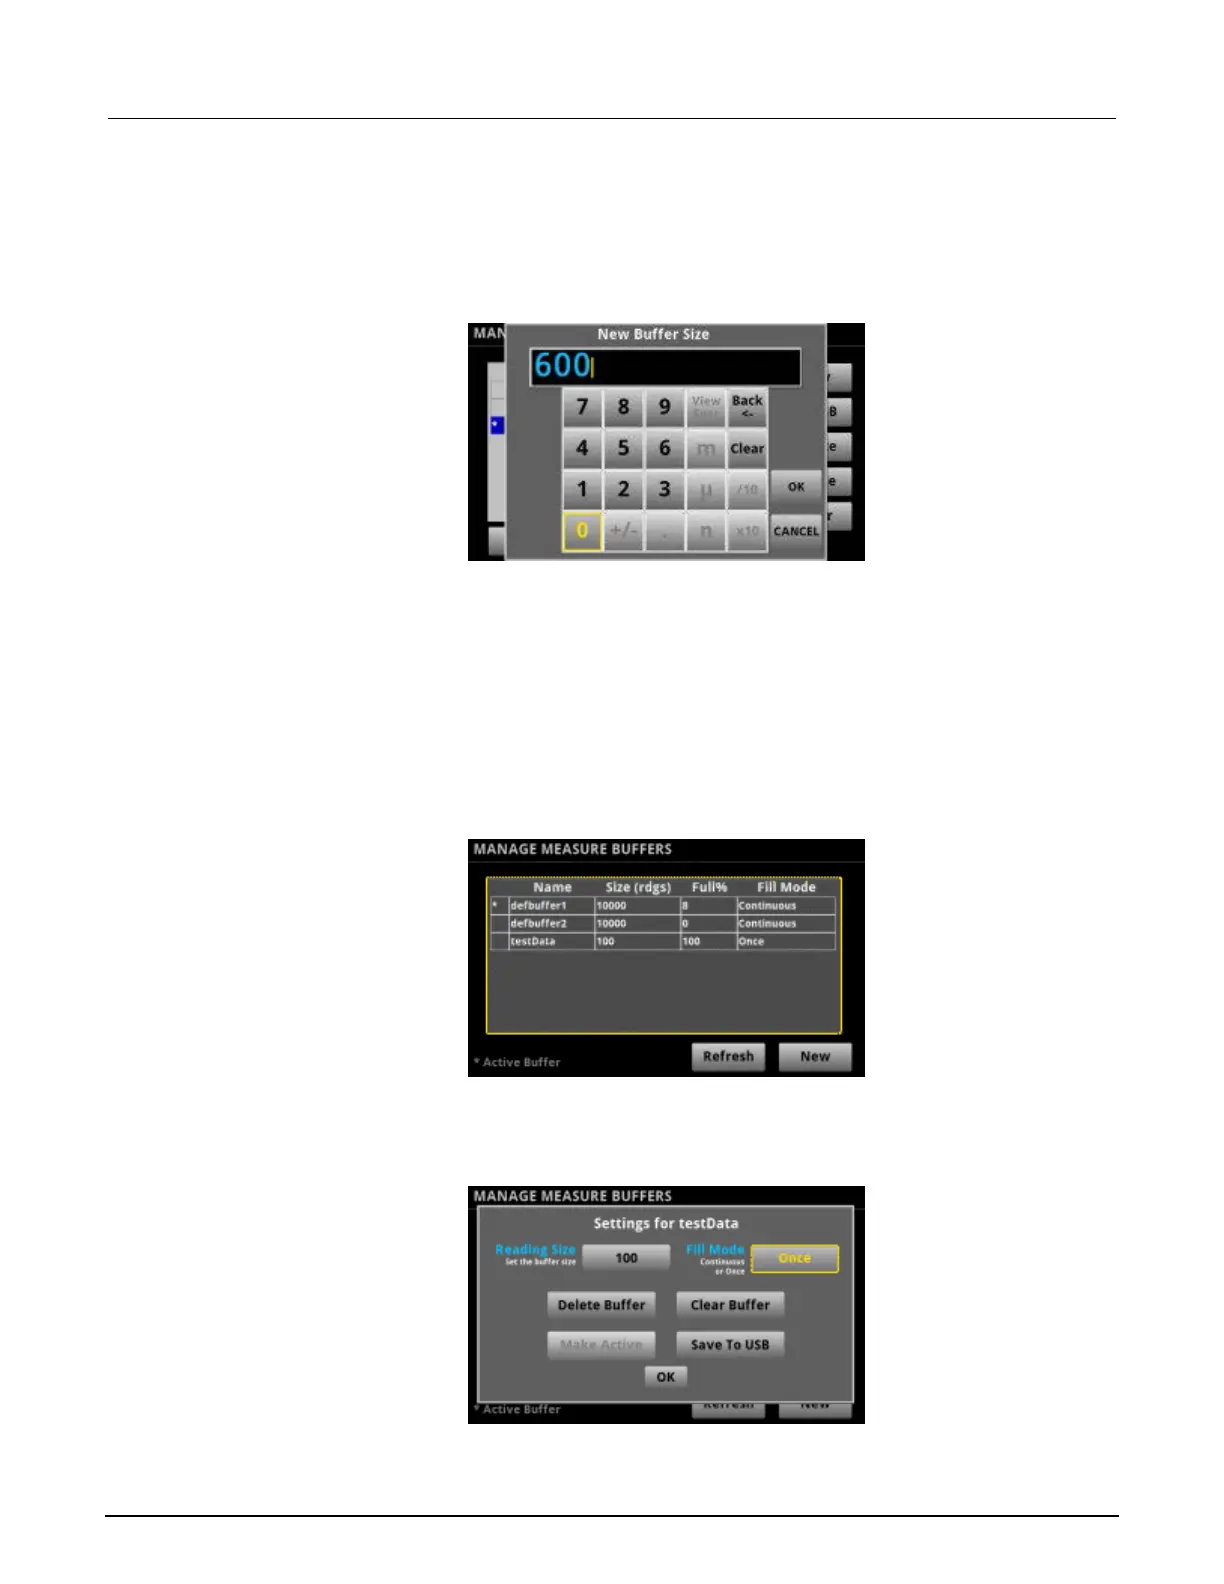
3. Select a reading buffer from the list. For example, touch testData to select it. The Settings for
testData dialog box is displayed.
4. Select the Reading Size button. The New Buffer Size screen is displayed.
5. Enter the new size for the buffer. For example, enter 600, as shown in the following figure.
Figure 75: New Buffer Size
6. Select OK. The MANAGE MEASURE BUFFER window is displayed, indicating the new buffer
size and that Full% = 0.
7. Press the HOME key to return to the operating display.
After you complete this procedure, the buffer that you resized becomes the active buffer. The new
active buffer name is displayed as the active buffer indicator on the HOME screen.
Using the front panel to set fill mode:
1. Press the MENU key.
2. Under Measure, select Data Buffers. The MANAGE MEASURE BUFFERS window is displayed.
Figure 76: MANAGE MEASURE BUFFERS window
3. Select a reading buffer from the list. For example, touch testData to select it. The Settings for
testData menu is displayed.
Figure 77: Settings for testData menu