Inserting Images into Printed Sets (Image Insert) (continued)
9-20
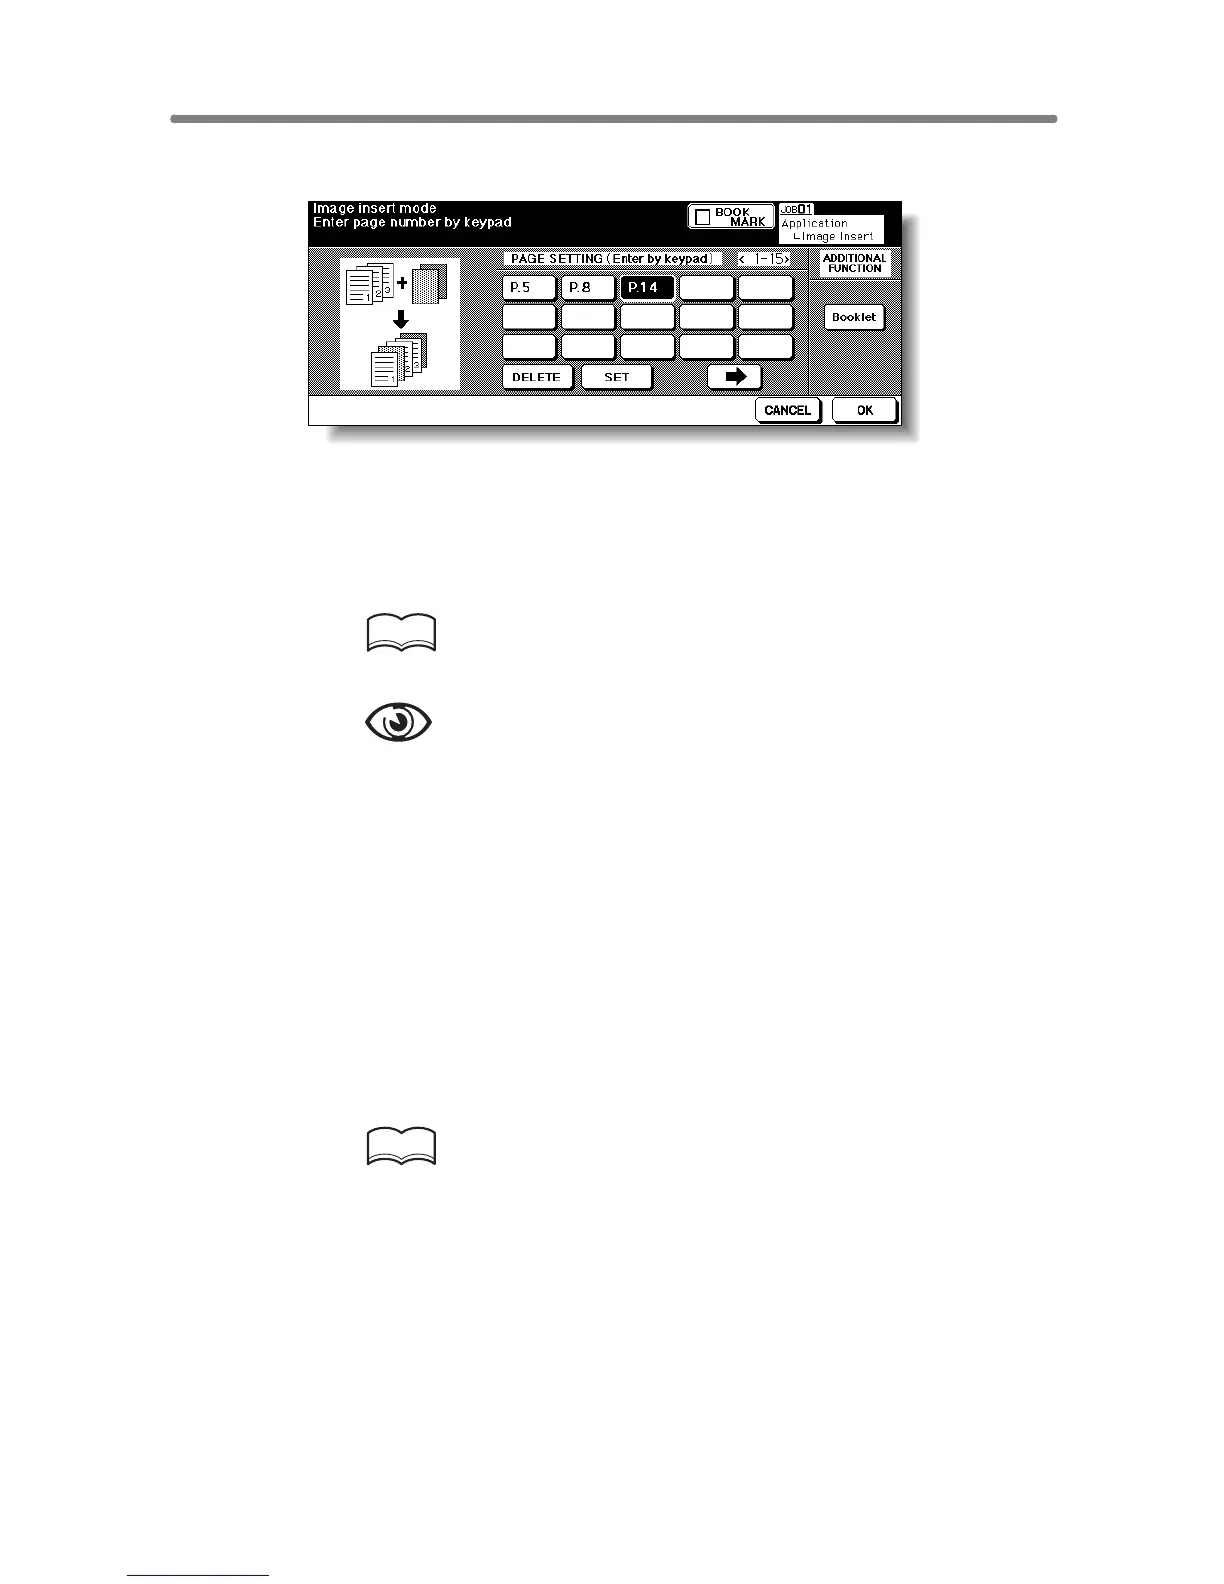
3. Use the control panel keypad to enter the page number.
Touch SET after each entry to move to the next key.
When setting more than 15 locations, touch the arrow key to move to the next
page.
To clear an incorrect entry, touch DELETE. The entered page number will be
deleted.
HINT
See p. 9-21 for detailed example.
OPTION
Touch Booklet on the Image Insertion No. Setting Screen to use this
function.
4. When all page number entries are made, touch OK.
The Application Selection Screen will be restored.
5. Touch OK on the Application Selection Screen.
The Basic Screen will be restored.
The STORE key on the Basic Screen appears highlighted to show that the
Store mode is automatically selected.
6. Enter the desired print quantity from the control panel keypad.
HINT
See p. 3-6 for details on setting print quantity.
7. Scan the document feeder images:
Position originals FACE UP in the document feeder.
If the number of originals exceeds 100, divide them into blocks not exceeding
100 sheets and load them from the block with the first page.
8. Press [START].
The originals positioned in the document feeder will be scanned into memory.