Printing Watermark onto Copies (Stamp) (continued)
9-59
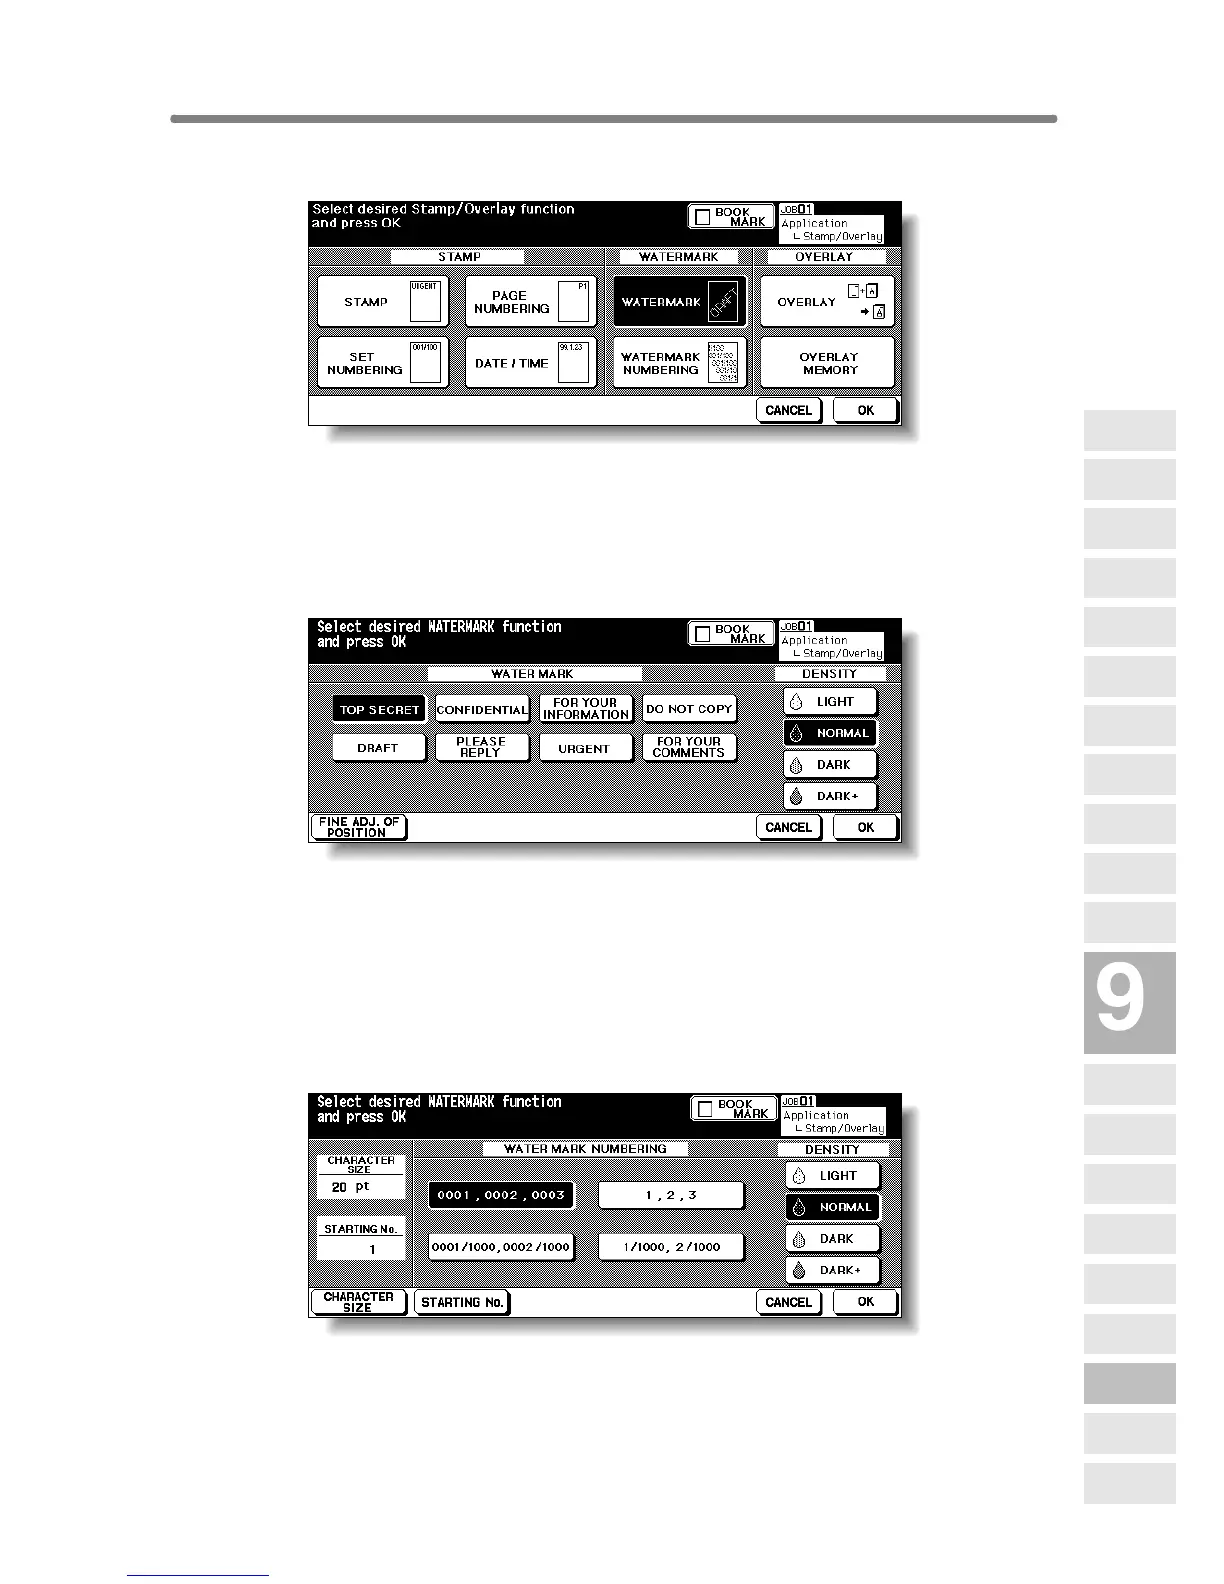
3. Touch WATERMARK or WATERMARK NUMBERING, as desired.
The subsequent screen will be displayed to allow you to specify the selected
watermark type.
4. When selecting WATERMARK: Specify the desired watermark
type and density.
Touch to highlight the desired watermark key and density key on the screen.
If fine adjustment of the centred watermark position is required, touch FINE
ADJ. OF POSITION to display the Fine Adjustment Setting Screen. See p. 9-
56 for details.
When selecting WATERMARK NUMBERING: Specify the desired
watermark numbering type, density, character size and starting No.
Touch to highlight the desired watermark key and density key on the screen.
Touch CHARACTER SIZE to select 20 pt or 36 pt.
Touch STARTING No. to designate the starting number, if required. See p. 9-
56 for details.
Applications
Reverse
Image
Non-Image
Area Erase
Program Job
Dual Page
Image Insert
OHP
Interleave
Booklet
Combination
Chapter
Sheet/Cover
Insertion
Application
Selection Screen
Repeat
Frame/Fold
Erasure
AUTO
Layout
Full-Image
Area
Image Shift
Reduce &
Shift
Stamp
Overlay
Overlay
Memory