[3] User Setting Mode (continued)
13-13
[2] User Density Level 2 Setting
Output copying samples from 16 density levels from Lighter to Normal or
Normal to Darker, then select the desired exposure and program it as
USER2.
The programmed copy density can be recalled by selecting USER2 on the
Basic Screen.
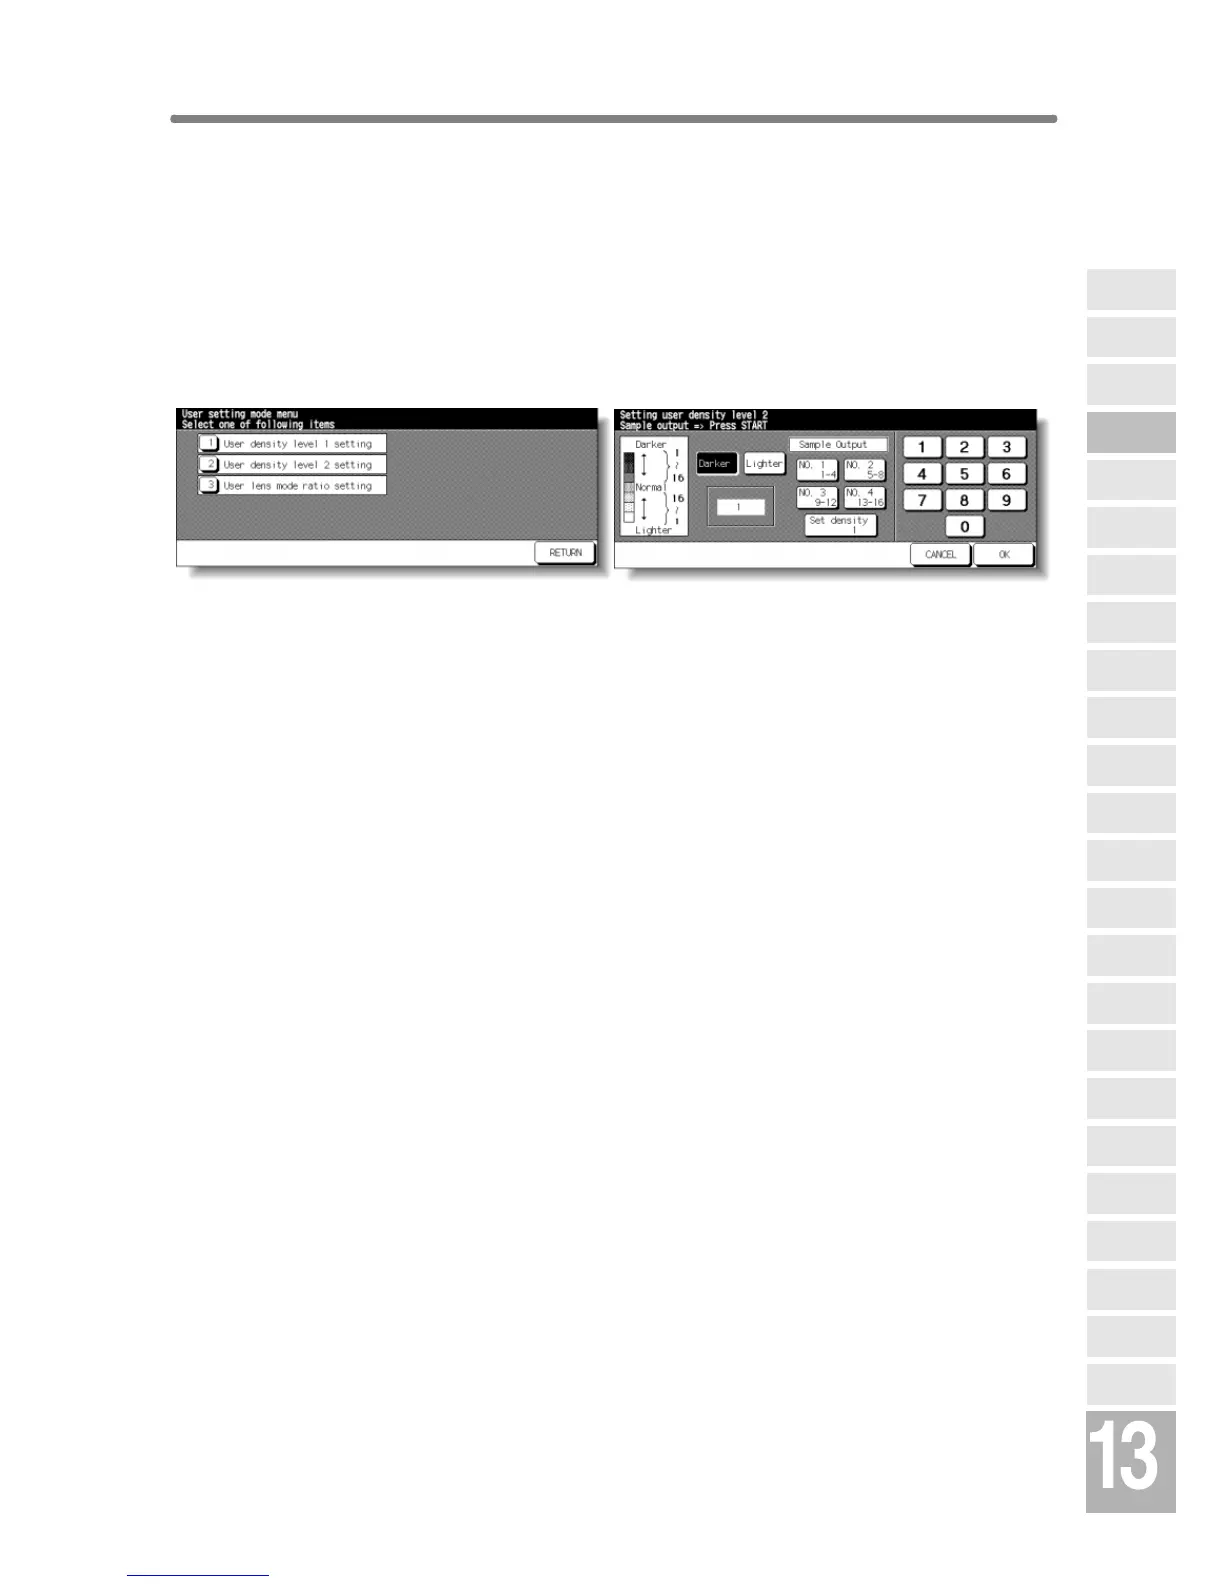
User Setting Mode Menu Screen User Density Level 2 Setting Screen
Procedure
1 Touch [3] User setting mode on the Key Operator Mode Screen to display the
User Setting Mode Menu Screen.
2 Touch [2] User density level 2 setting to display the User Density Level 2
Setting Screen.
3 Place the original on the platen glass.
4 Touch Darker or Lighter to select the density level to be programmed.
5 Touch No.1 1~4, No.2 5~8, No.3 9~12, No.4 13~16, or Set density ##, then
press [START]. The density level sample sheet will be output.
6 Select the desired exposure from the sample sheet(s), then enter the density
level No. by using the touch screen keypad.
7 Touch OK to complete the setting and return to the User Setting Mode Menu
Screen.
8 Touch RETURN to restore the Key Operator Mode Screen.
9 If no further changes are required, touch RETURN to restore the Basic Screen
to perform copying operations.
Key Operator
Mode
Non-Image
Area Erase
Scan
Transmission
HDD
Management
Centring
Adjustment
Timing
Adjustment
Background
Adjustment
Finisher
Adjustment
Side 2 Lens
Adjustment
Call Remote
Centre
Machine
Management
List Print
Memory
Switch
Power Save
Setting
Tray Auto
Select Setting
Control Panel
Adjustment
Weekly
Timer
Key Operator
Data Setting
Panel Contrast/
Key Sound
Paper Type/
Special Size
Lock/Delete
Job Memory
E.K.C.
User Setting
Mode
Copier Initial
Setting
System Initial
Setting
Key Operator
Mode
 Loading...