Reducing Images to Create Binding Margin (Reduce&Shift)
(continued)
9-50
1. Select the copy mode and paper size, as required.
2. Touch APPLICATION on the Basic Screen.
Please Be Reminded!
When starting a new copying job, be sure to close the RADF securely,
then press [AUTO RESET].
3.
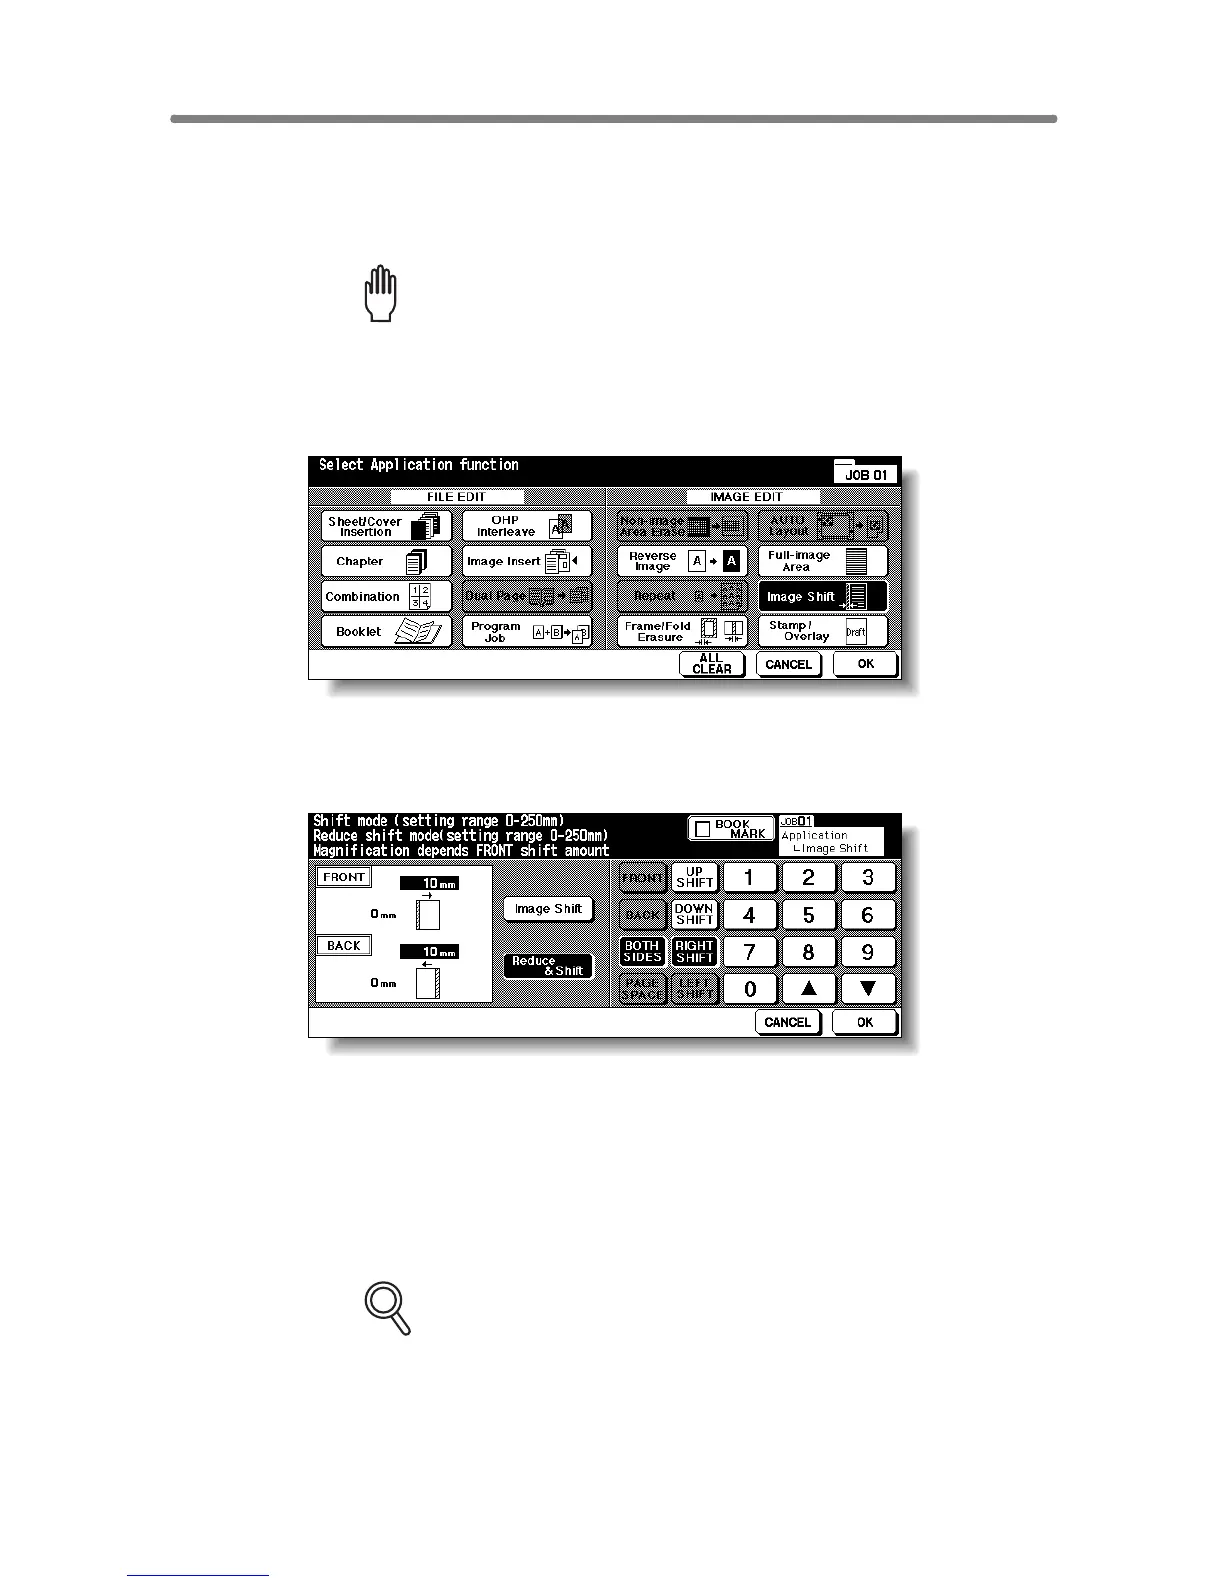
To uch Image Shift on the Application Selection Screen.
4. Touch Reduce & Shift on the Image Shift Setting Screen, then
specify the shift direction and amount.
Touch FRONT or BACK. In Reduce & Shift mode, the BOTH SIDES key
appears dimmed to show inactivity.
Touch the desired shift direction key to highlight it, then use the touch screen
keypad or up/down arrow key to enter the desired shift amount, from 0 mm to
250 mm in 1 mm increments.
The image display on the screen allows you to view the shift direction and
amount to be created on the printed sheets.
FOR DETAILS
The AMS will automatically determine the magnification ratio according
to the shift amount specified for the front page. The shift amount and
magnification ratio determined for the front page will be automatically
applied to the back page. If any positioning adjustment is required,
touch BACK and make direction and amount change.