4-6 824 Reference Manual 9/29/09
When changing from one ID to
another you will be prompted to save
your data if you have not already
saved it. If you do not save your data
at this point, any measurement
readings you have taken will be lost.
If this is your first time using the
System 824 and you have not set up
any ID’s, or have not taken any
readings that need to be saved, select
“No”.
The bolded SLM text on the SLM
view screen indicates that this is the
SLM view of the SSA instrument. Any
of the SSA displays can be active
while taking a reading.
Step 2 Press the
uordarrow keys to highlight the
SLM&RTA SSA item and press the
c key to
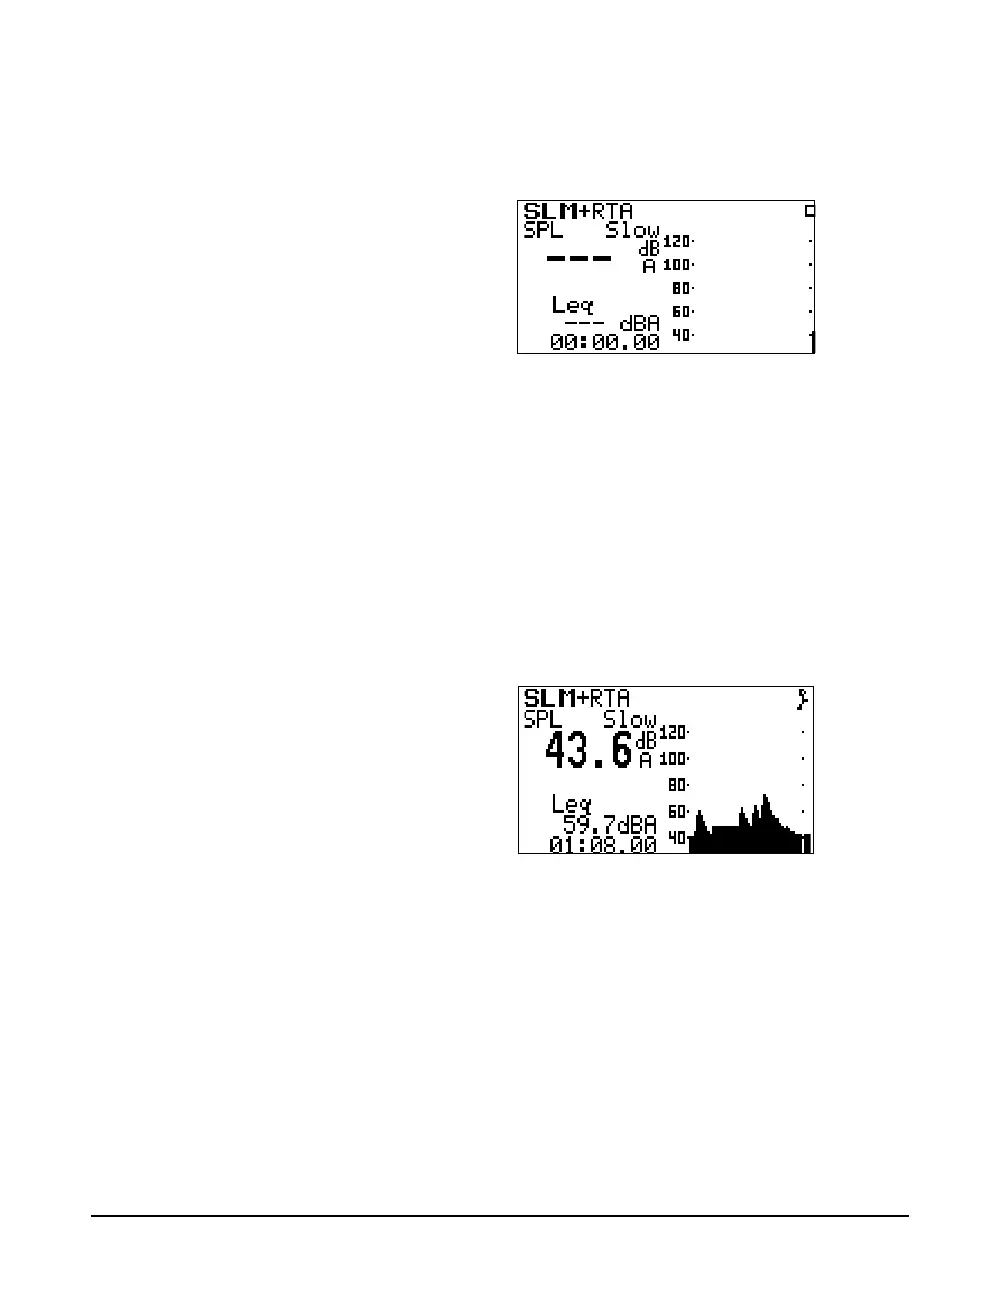
select it. The last used SLM+RTA display appears:
Step 3 At this point, if you want to view a display other
than the one shown, press the
V VIEW key. Use
the
u or d keys to highlight the desired
display. For this example, highlight SLM and
press the
c key to select it. The SLM display of
the SLM+RTA instrument shown in step 2 will
appear. The Sound Level Meter with Real-Time
Spectrum Analyzer is now ready to use.
The instrument display shows a
running symbol (upper right hand
corner) when the instrument is
actively taking measurements.
Step 4 To take a sample reading, press the
s RUN/
STOP key. A screen similar to the following
appears:
Let the instrument continue to take measurements
for about one minute. Make some noise and watch
the results on the graph.
Step 5 Press the RUN/STOP key to stop the
measurement.