ValueJet 1304 Service manual
AP-74109 Rev 1.1 4-64
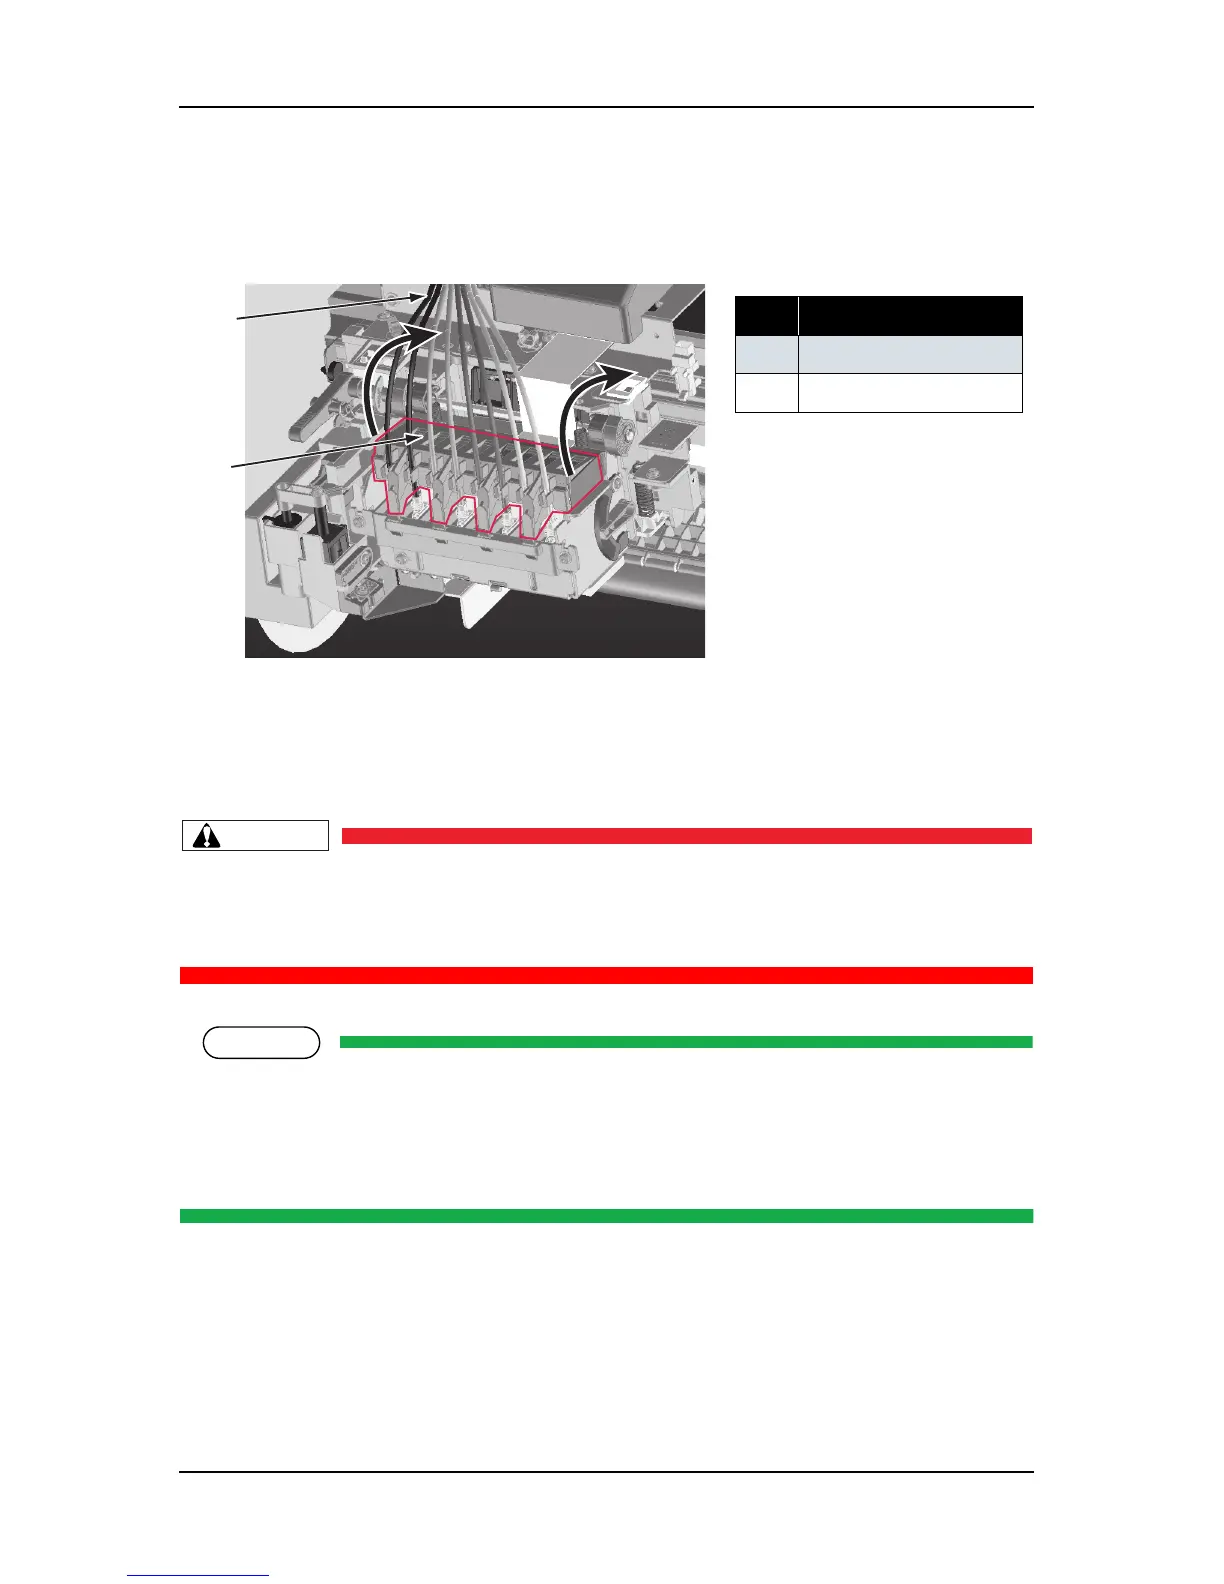
9. While rotating the damper fixing material, remove the eight ink tubes from the damper fixing material
hook.
10. Remove the damper fixing material.
11. Remove the eight damper assemblies connected to the print head that needs to be replaced, with a flat-
head driver.
• Do not press the transparent film on the damper assembly with your hand. Doing so may
discharge the ink filled inside the damper assembly.
• Be careful not to damage the transparent film on the damper assembly.
When removing the damper assembly, note the following.
• To easily remove the damper assembly, insert a flat-head driver between the carriage and the
damper assembly left protruding part, then pry out the damper assembly.
• To avoid residual ink leakage, place the removed damper on a rag.
表 4-72
No. Part name
1 Ink tube
2 Damper fixing material