Copying Using Special Paper (Multi-Sheet Bypass Tray) (continued)
3-31
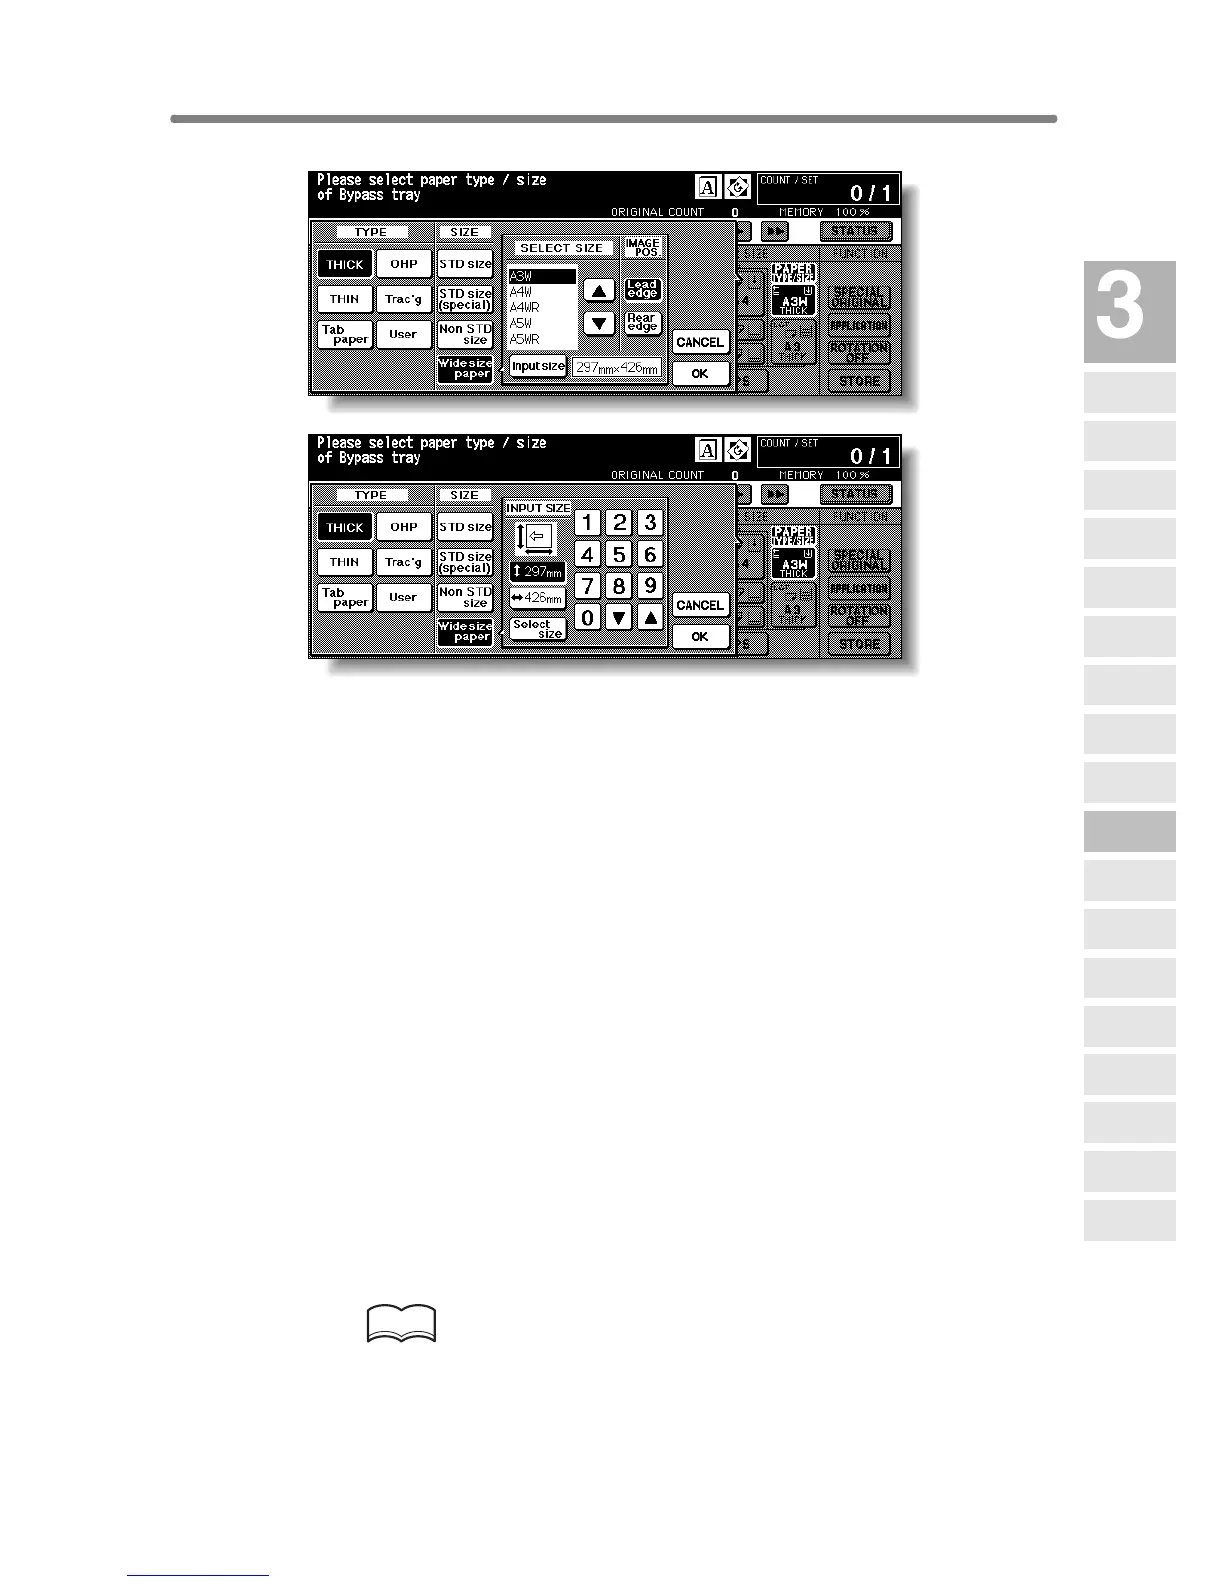
When Wide size paper is highlighted, the popup menu will appear.
Use arrow keys to scroll to the desired wide size, then specify the precise
dimensions of paper to be used, following the procedure below.
(1) Touch Input size. The Input Size popup menu will appear.
(2) Touch the vertical size key to highlight it. Use the keypad on the popup
menu to enter the vertical size, or use arrow keys to scroll to that number.
The entered number should fall within the range from the vertical size of
the standard size corresponding to the selected wide size, to a maximum
of 314mm.
(3) Similarly, touch the horizontal size key to highlight it, then use the keypad
on the popup menu to enter the horizontal size, or use arrow keys to scroll
that number.
The entered number should fall within the range from the horizontal size of
the standard size corresponding to the selected wide size, to a maximum
of 459mm.
(4) Touch Select size to return to the Select Size popup menu.
Touch Lead edge or Rear edge to select the image starting position.
6. Touch OK to return to the Basic Screen.
7. Select additional copy conditions, as desired.
HINTS
• See p. 8-12 to p. 8-13 for details on copying non-standard size or tab
paper originals.
• See p. 9-17 to p. 9-18 for details on copying onto OHP films.
Copying
Operations
Positioning
Originals
Setting Print
Quantity
Set Job During
Warmup
Stop
Scan/Print
Paper Size
Lens Mode
Density
1-1, 2-2
2-1
Multi-Sheet
Bypass Tray
Using
Memory
Output without
Finisher
Finisher
Output Mode
Binding
Mode
Shift Tray
Output Mode
Recalling
Previous Job
Check Mode
& Proof Copy
Interrupt
Mode
 Loading...