Storing/Deleting Image Data in HDD/PC (Image Store/Delete) (continued)
10-7
9. Position original(s) FACE UP in the document feeder or FACE
DOWN on the platen glass.
HINT
See p. 3-2 to p. 3-5 for details on positioning originals.
10. Press [START] to scan original(s).
When scanning originals is completed, the machine automatically begins
storing data in the HDD. If Store mode is used, touch to deselect STORE on
the Scanner Setting Screen after all originals are scanned, then press
[START].
When storing job is almost completed, SCANNER→HDD icon appears in the
message area, then the Basic Screen will be restored automatically.
FOR DETAILS
Key Operator can set the machine to restore the Job Name Entry
Screen when the storing job is completed, so that the data storing can
be continued. See p. 13-39 to p. 13-46 for details.
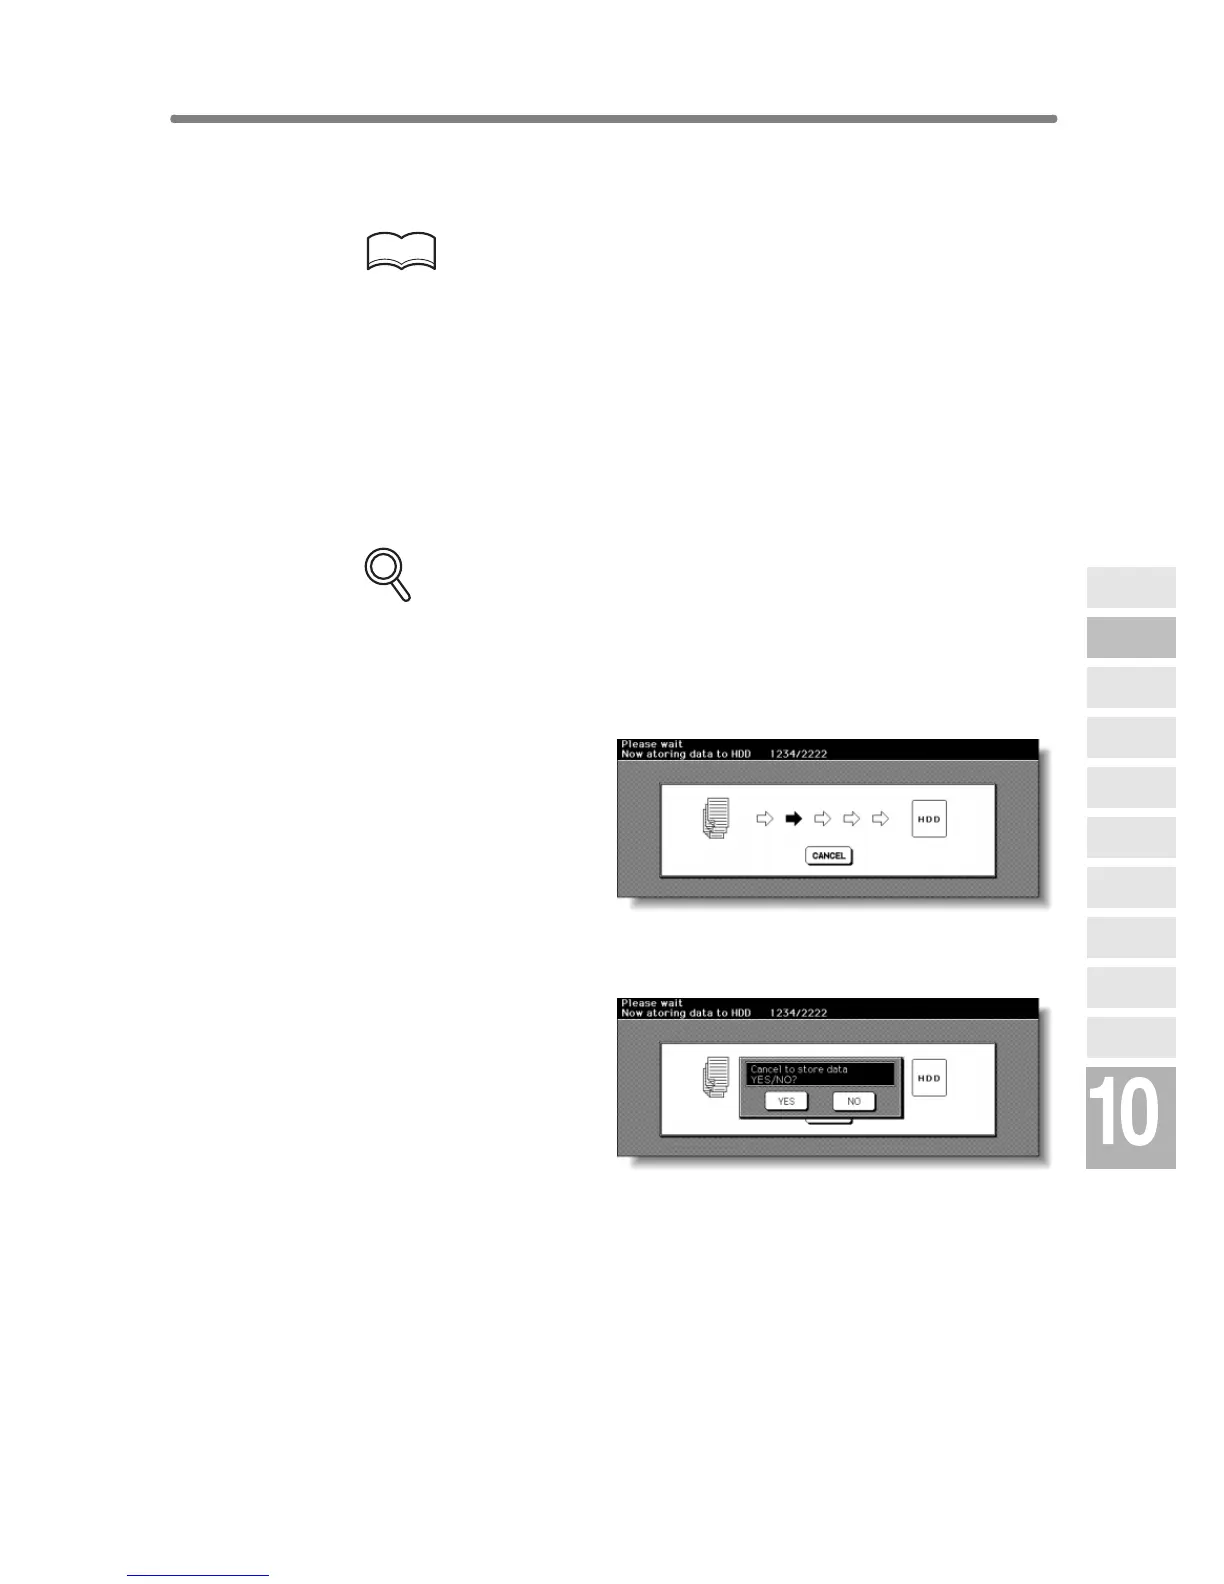
In this case, the Image Data Storing Screen shown below will be dis-
played while the image data is stored in HDD/PC.
On this screen, touch CANCEL to suspend the storing job, then touch
YES on the popup menu to delete the data, or touch NO to continue.
Network
Function
Job Status
Machine
Information
HDD Job
Information
Environment
Setup
To Use Web
Utilities
Image Edit
Image Recall
Image
Store&Output
Image
Store/Delete
Server
Functions