TM Palletizing Operator User’s Manual Product Version: 1.0 / Document Version: 1.0 116
Then, click or tap NEXT when done, or click or tap BACK to go back to the previous step
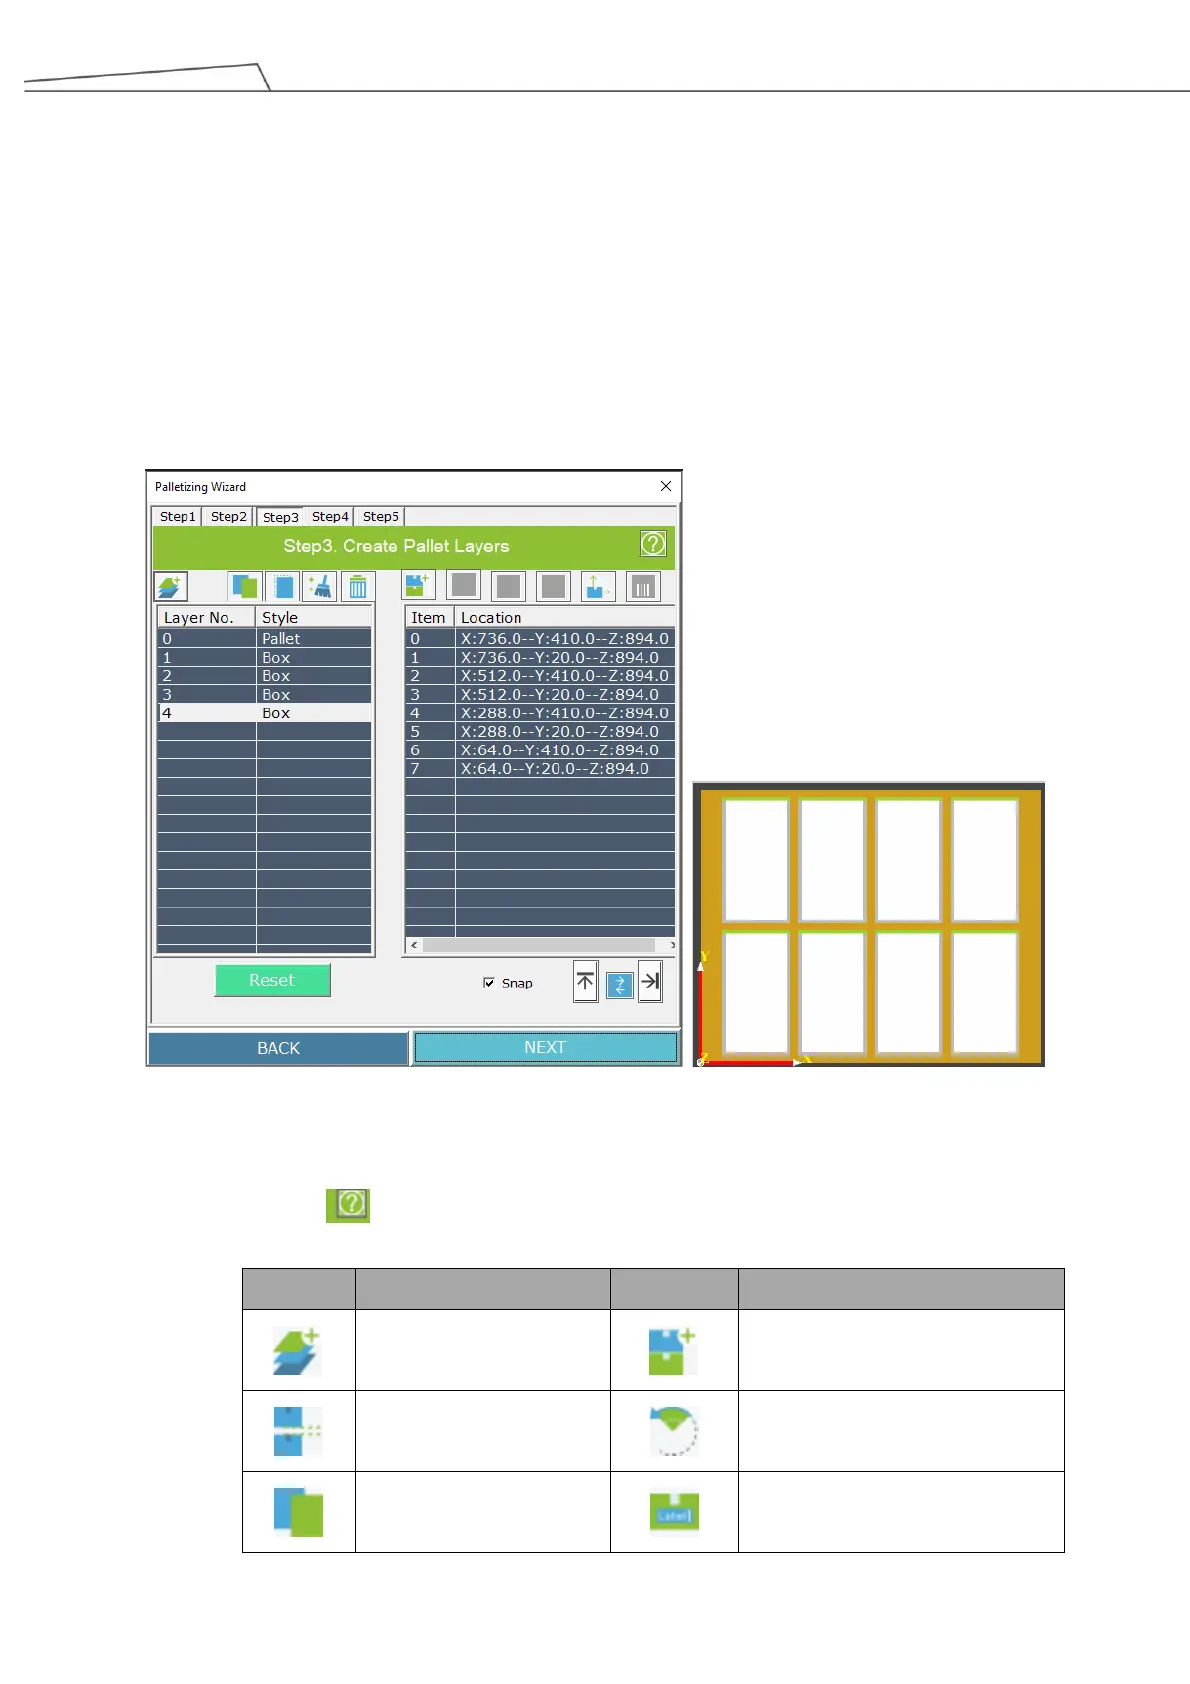
6.4.3 Step 3 – Create Pallet Layers
In Step 3, users will configure their pallet layers. The following shows an example about how to start
creating and arranging the layers and boxes.
1. Click or tap “Add Box Layer” and the pallet image will appear.
The following figure is based on an example of 4 layers.
2. Click or tap “Add Box” to arrange their boxes. Note that the images of boxes and pallet are based on
the configurations in previous steps.
Figure 99: Create pallet layers
For more details about the functional icons, see the table below.
Users may click to display these functional icons.
Add Z Direction Clearance
Rotate Box Before Placing