TM Palletizing Operator User’s Manual Product Version: 1.0 / Document Version: 1.0 148
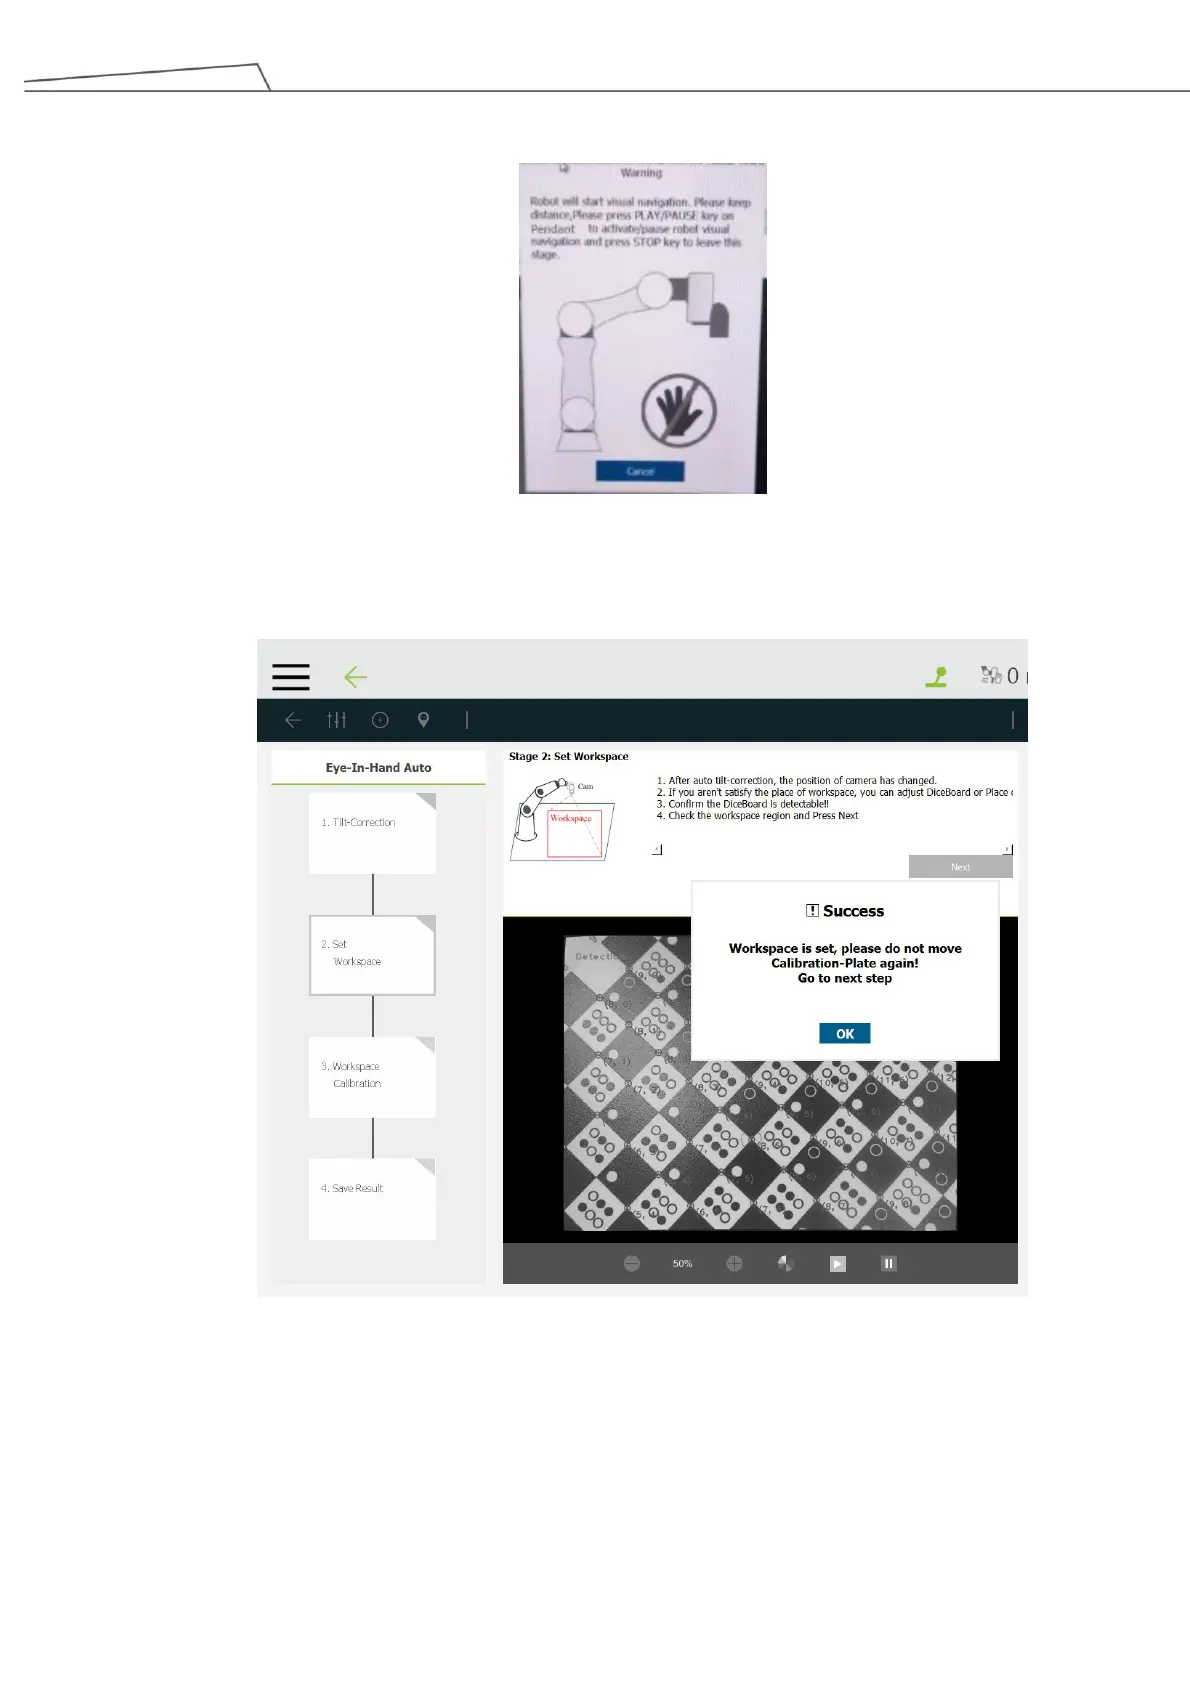
and the robot will start automatic tilt corrections and visual navigation.
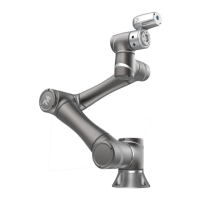
7. In “Step 2: Set Workspace”, the robot will automatically set the workspace. Make sure the Calibration
Board remains still. Then click “OK” to proceed when the message “Success” appears.
Figure 147: Set workspace
8. In “Step 3: Workspace Calibration”, press and hold the “Play/Pause” key on the Teach Pendant to
start visual navigation. The robot will automatically adjust itself to the initial position based on calibrated
workspace.