10 Setups
286 Xerox WorkCentre 7132 User Guide
8. Change the required settings.
9. Select [Close].
NOTE: By selecting [Delete
Mailbox], you can delete all
documents in the mailbox and all job
flow sheets created through the mailbox.
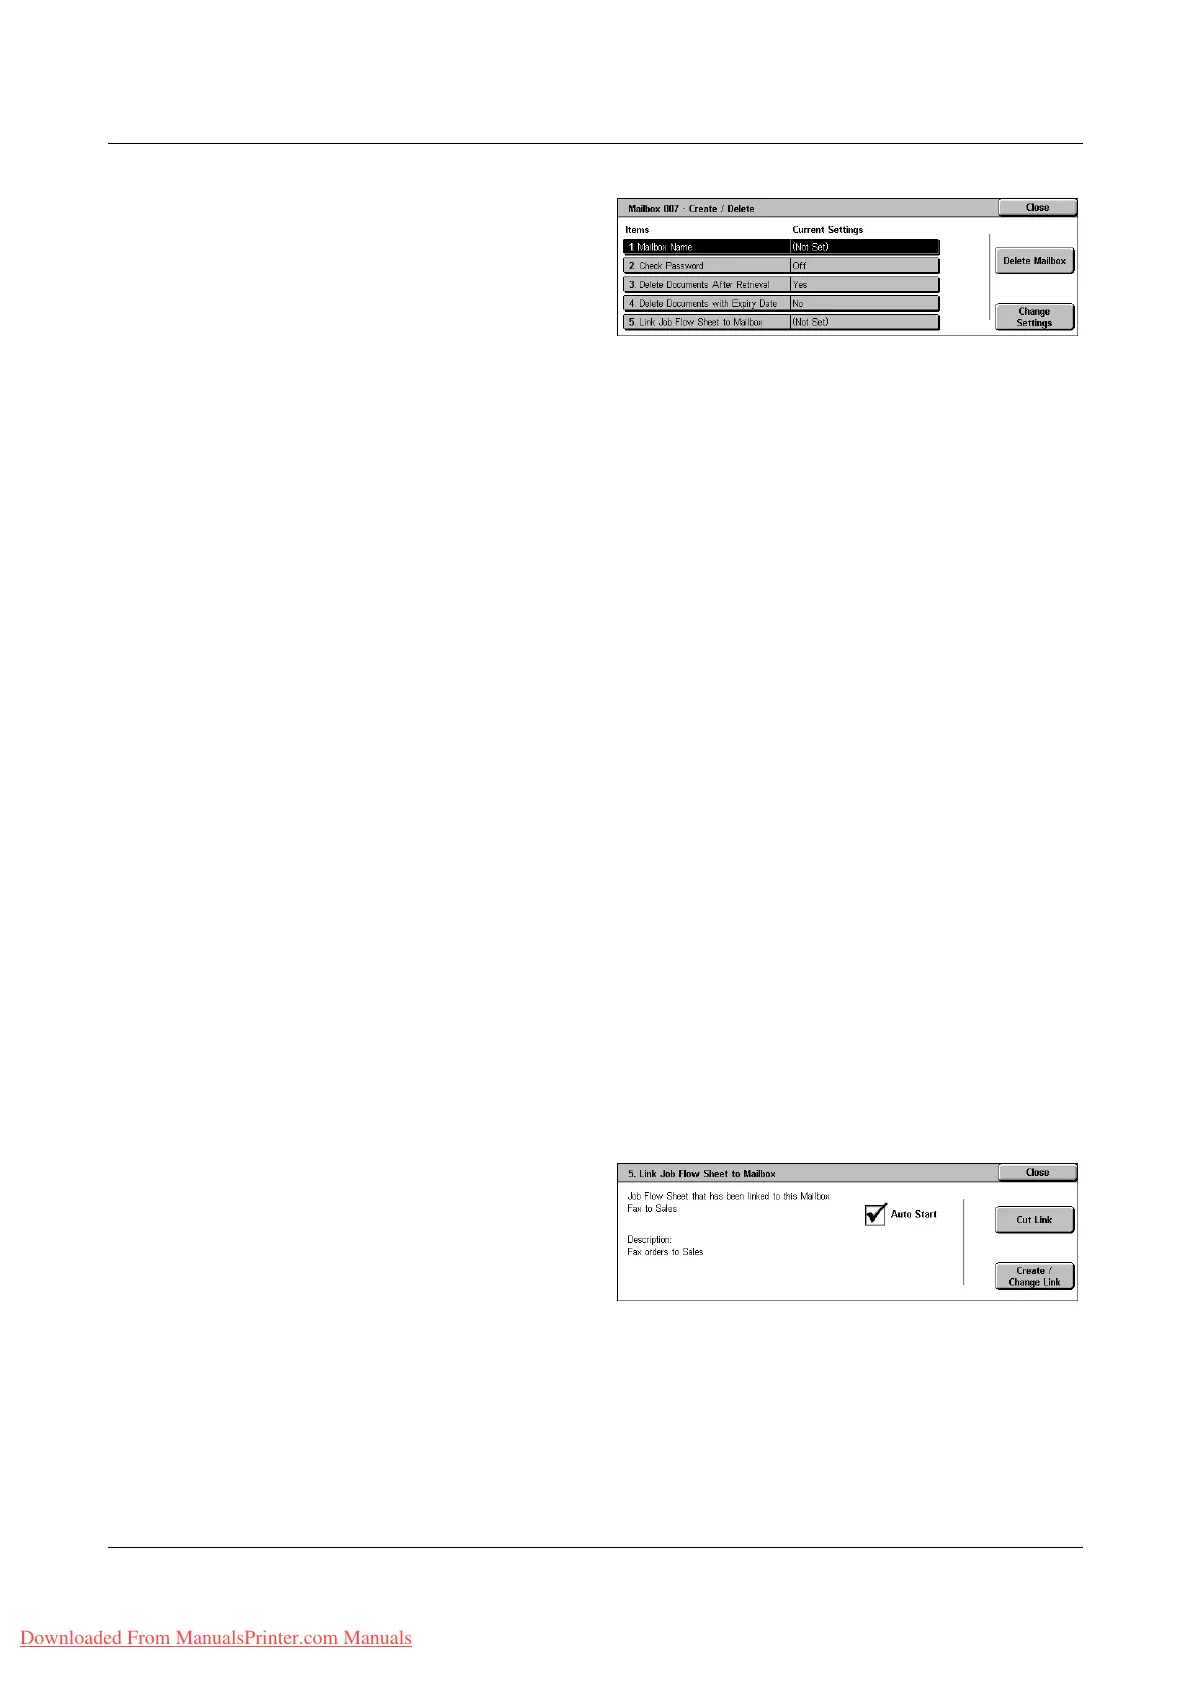
Mailbox Name
Specifies the mailbox name. Enter a name (up to 20 characters) to be assigned to the
mailbox.
Check Password
Checks the password for the target operation. Select an option for restricting access to
the mailbox through the password. If you select [Save (Write)], the password entry
screen appears when an attempt is made to edit any document in the mailbox. If you
select [Print/Delete (Read)], the password entry screen appears when an attempt is
made to print out or delete any document in the mailbox.
Delete Documents After Retrieval
Specifies whether to delete documents in the mailbox after they are printed out or
retrieved, or after they are transferred and printed out through a job flow sheet.
Delete Documents with Expiry Date
Specifies whether to delete documents in the mailbox after the preset time or period
elapses.
Link Job Flow Sheet to Mailbox
Displays the [Link Job Flow Sheet to Mailbox] screen.
[Link Job Flow Sheet to Mailbox] Screen
This feature allows you to link the mailbox to a job flow sheet that instructs how
documents in the mailbox are to be processed. For more information on a job flow
sheet, refer to Job Flow Sheets on page 287.
1. Select [Link Job Flow Sheet to
Mailbox] on the [Mailbox XXX –
Create/Delete] screen.
2. Change the required settings.
3. Select [Close].
Cut Link
Removes linkage with a job flow sheet if any linkage has been already made.
Downloaded From ManualsPrinter.com Manuals

 Loading...


