8-4
Lower unit (regular rotation model, L-transom model)
0
1
2
3
4
5
6
7
8
9
10
A
Do not apply grease, oil, or paint to the
trim tab.
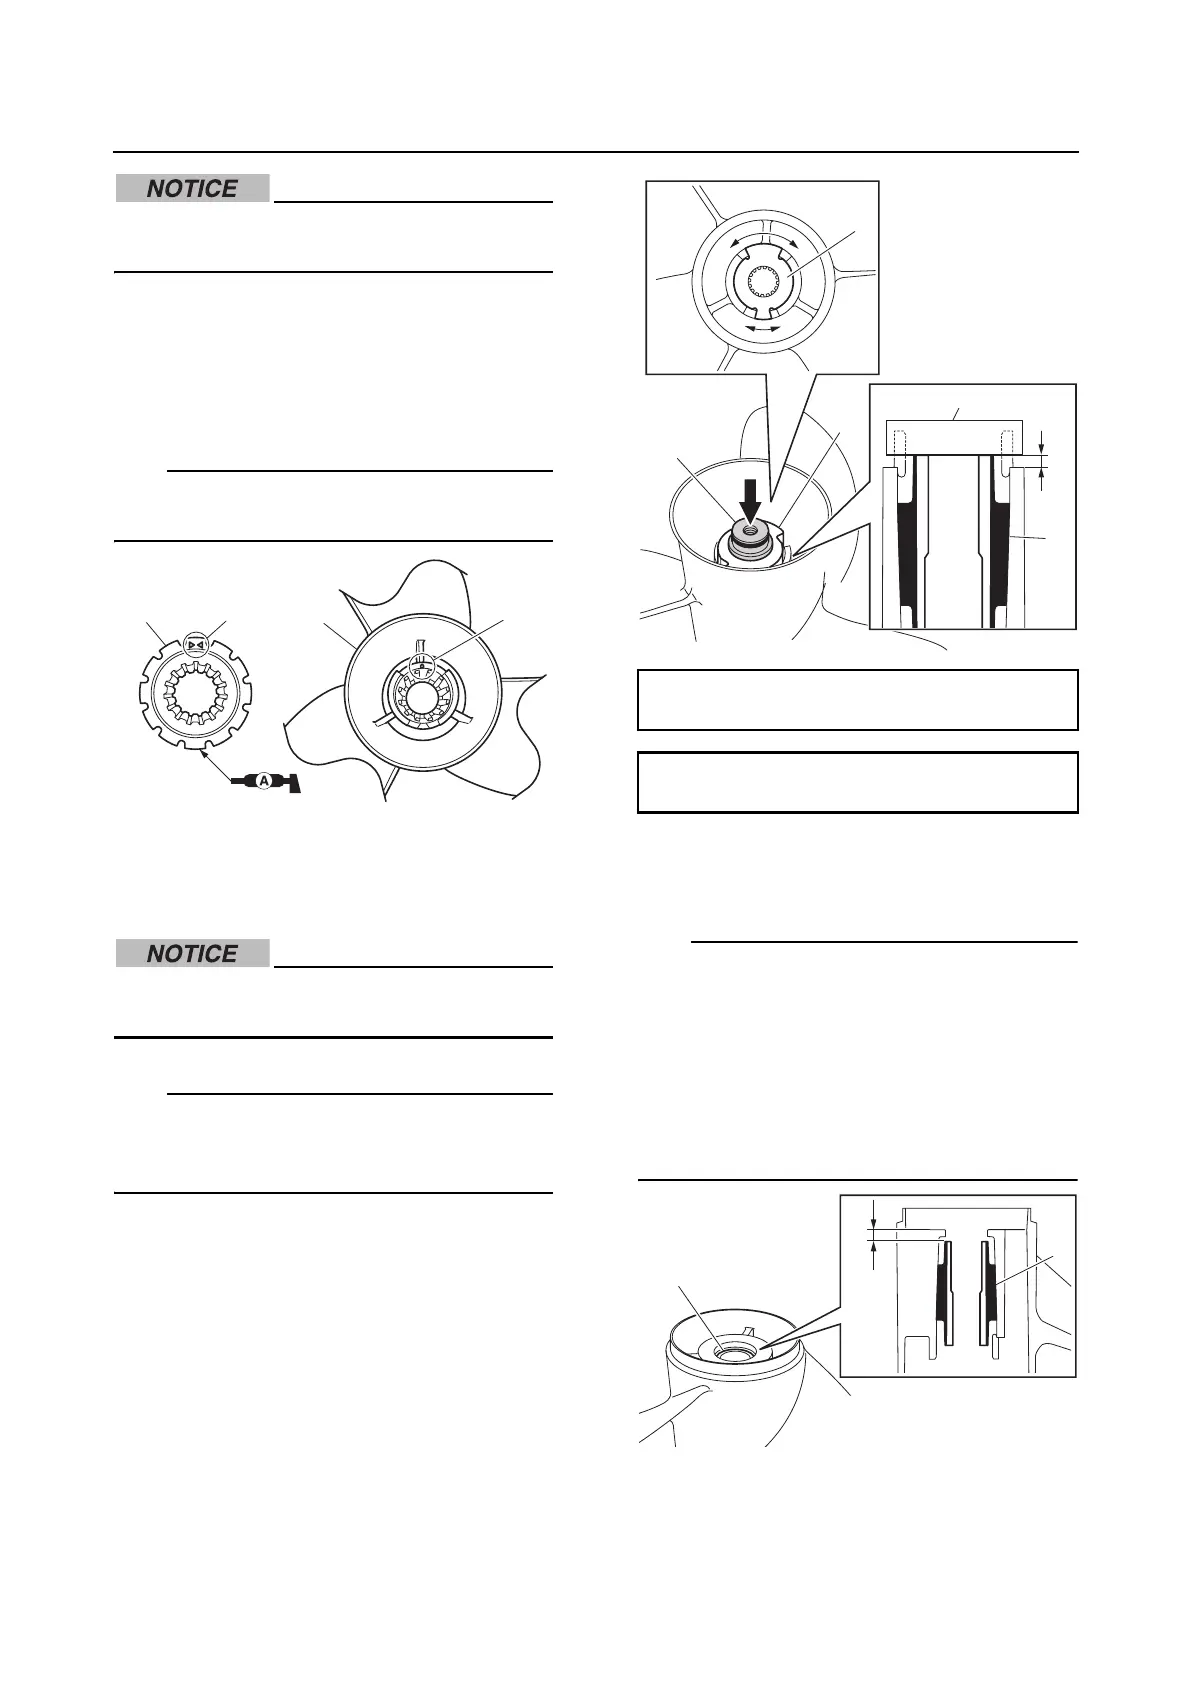
Assembling the propeller (SDS
propeller)
1. Place a new damper “1” in the propeller
“2”.
TIP:
Align the mark “a” on the damper “1” with the
mark “b” on the propeller “2”.
2. Install the damper “1” using the special
service tool “2” and spacer “3” to the
specified height “a”.
Be careful not to install the spacer in the
opposite direction.
TIP:
When installing the damper “1”, make sure
that the spacer “3” does not contact the pro-
peller boss.
3. Check the installation depth “a” of the
damper “1”.
TIP:
The damper “1” will be in the proper position
(the damper “1” is in contact with the spacer
“2”) after the propeller nut “3” has been tight-
ened to the specified torque. Therefore, when
installing the propeller to the outboard motor,
make sure to tighten the propeller nut “3” to
the specified torque. See step 4 in “Installing
the lower unit (X-transom model)” (8-30).
1
2
a
b
Needle bearing attachment “2”:
90890-06653
Installation height “a” (reference data):
4.0 mm (0.158 in)
1
2
3
3
3
a
1
1
a