3-16
Optional equipment
0
1
2
3
4
5
6
7
8
9
10
A
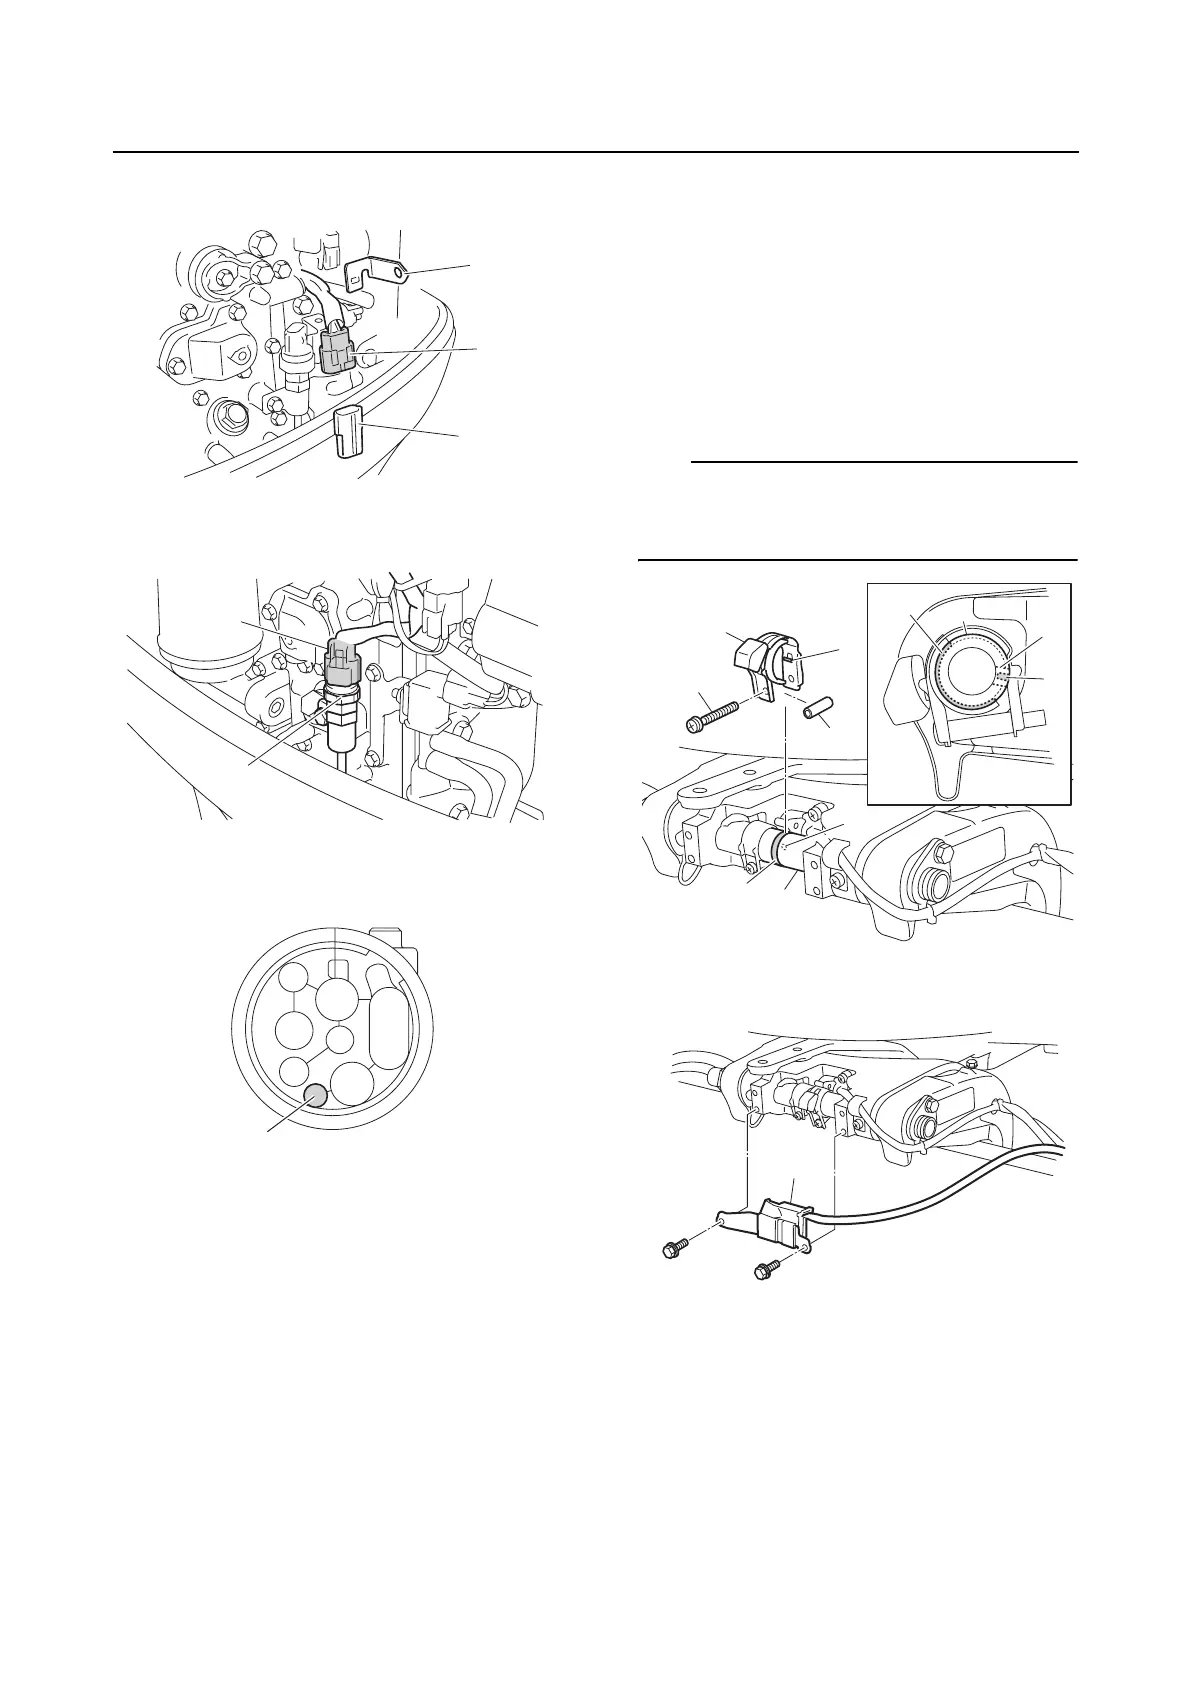
10. Remove the bracket “1” and cap “2” from
the speed sensor coupler “a”.
11. Connect the speed sensor coupler “a” to
the speed sensor “1”.
12. Install the rubber seal in the area “a” of
the rigging grommet.
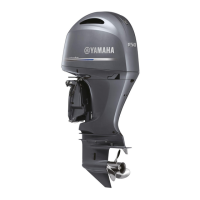
Installing the tilt limiter
The models with dual steering cable cannot
be fitted with a tilt limiter.
1. Disconnect the battery cable from the
battery.
2. If there is any grease, clean the surface
of through tube “1” to which the holder is
to be installed.
3. Install the holder “2” so that the protru-
sion “a” on the magnet lever is aligned
with the groove “b” in the through tube
“1”, and the protrusion “c” on the holder is
aligned with the hole “d” in the through
tube “1”.
4. Install the collar “3” and tighten the clamp
screw “4” temporarily.
TIP:
Tighten the clamp screw “4” to the extent that
the magnet lever can be moved manually to
adjust the tilt limiter.
5. Install the sensor “1” on the swivel
bracket.
6. Fasten the tilt limiter lead “1” using the
holder “2”.
1
2
a
a
1
a
a
b
c
d
1
1
2
3
4
c
1