7-51
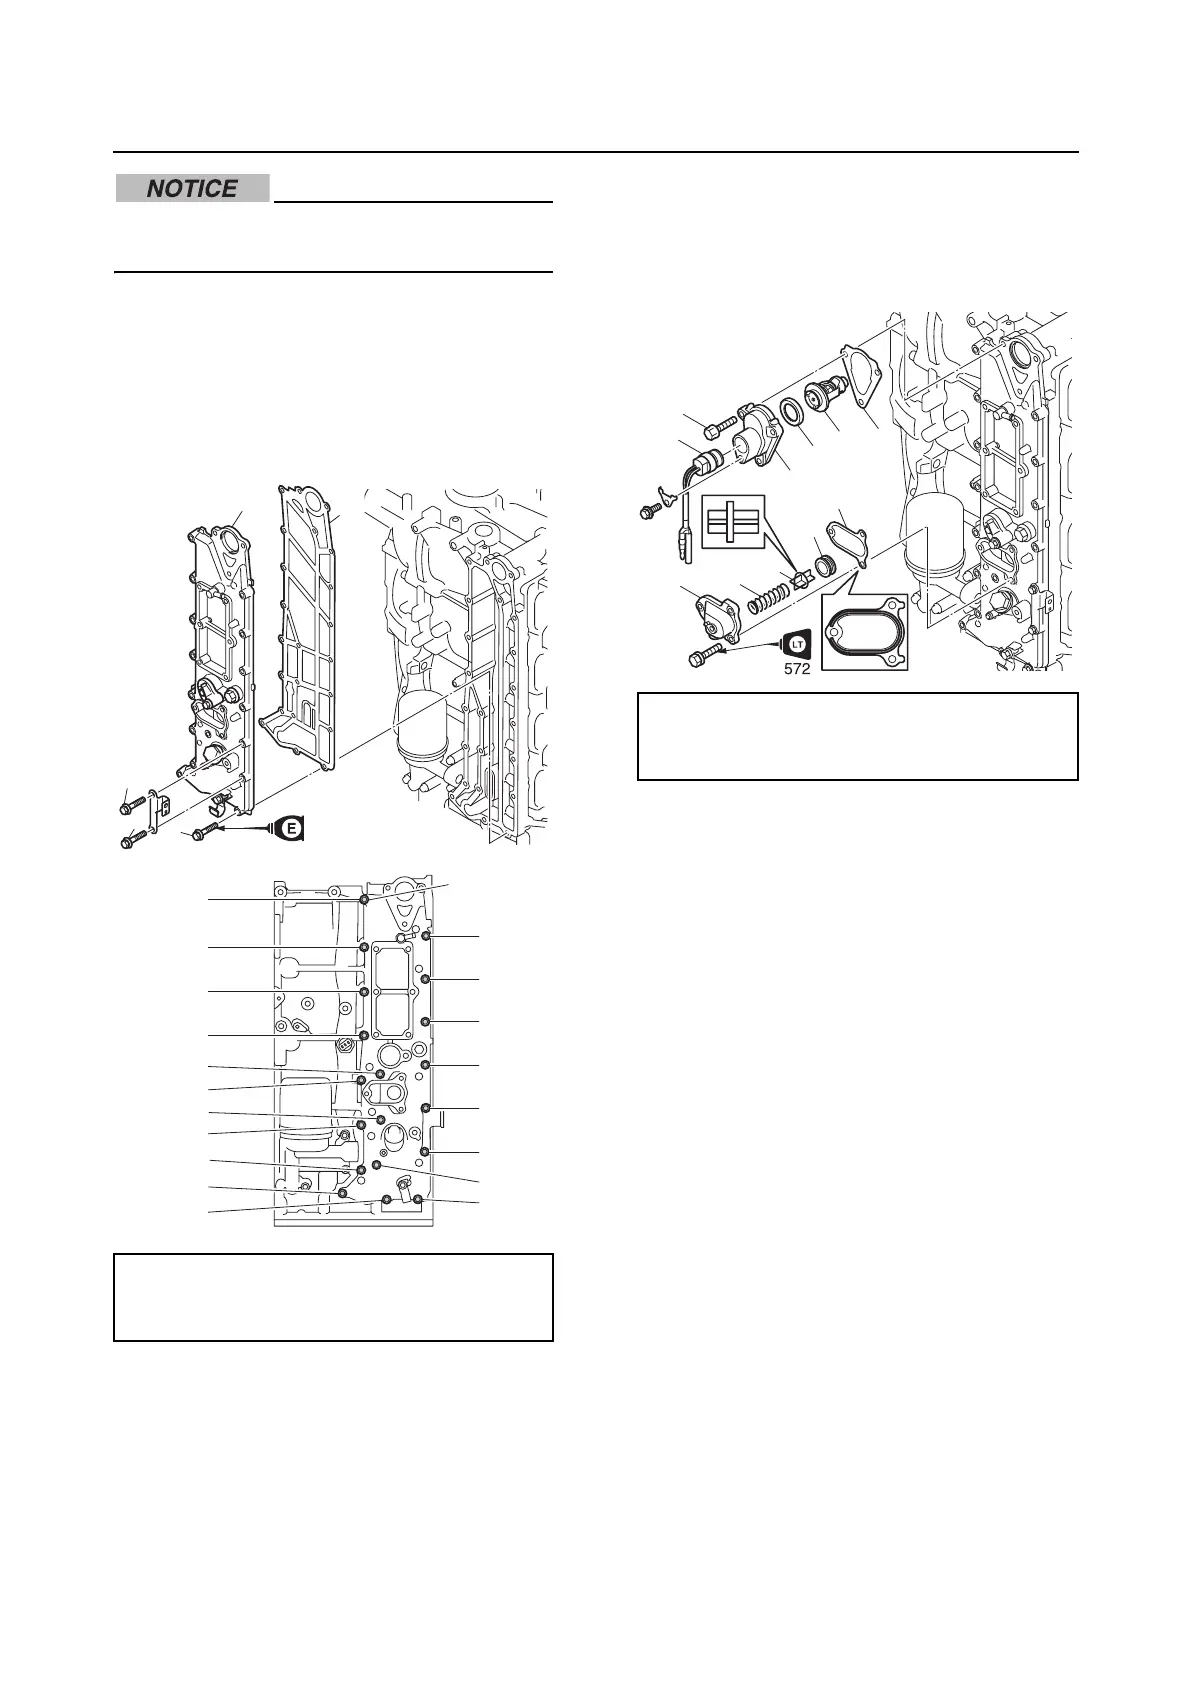
Exhaust cover
0
1
2
3
4
5
6
7
8
9
10
A
Do not apply grease, oil, or paint to the
anodes.
Installing the exhaust cover
1. Install a new gasket “1” and the exhaust
cover “2”, and then tighten the exhaust
cover bolts “3” to the specified torques in
2 stages and in the order [1], [2], and so
on.
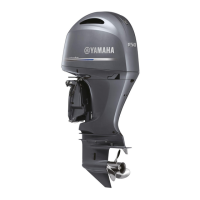
2. Install a new gasket “1” to the thermostat
“2”.
3. Install the thermostat “2”, a new gasket
“3”, and the thermostat cover “4”, and
then tighten the thermostat cover bolts
“5” to the specified torques in 2 stages.
4. Install the thermoswitch “6”.
5. Install the grommet “7”, the PCV “8”, the
spring “9”, a new gasket “10”, and the
cover “11”.
Exhaust cover bolt “3”:
1st: 6 N·m (0.6 kgf·m, 4.4 ft·lb)
2nd: 12 N·m (1.2 kgf·m, 8.9 ft·lb)
2
3
1
3
3
[15]
3
[10]
[5]
[1]
[6]
[11]
[16]
[12]
[17]
[8]
[13]
[4]
[9]
[14]
[19]
[7]
[3]
[2]
[18]
Thermostat cover bolt “5”:
1st: 6 N·m (0.6 kgf·m, 4.4 ft·lb)
2nd: 12 N·m (1.2 kgf·m, 8.9 ft·lb)
6
5
8
9
7
10
2
1
4
3
11