6-14
Fuel pump
0
1
2
3
4
5
6
7
8
9
10
A
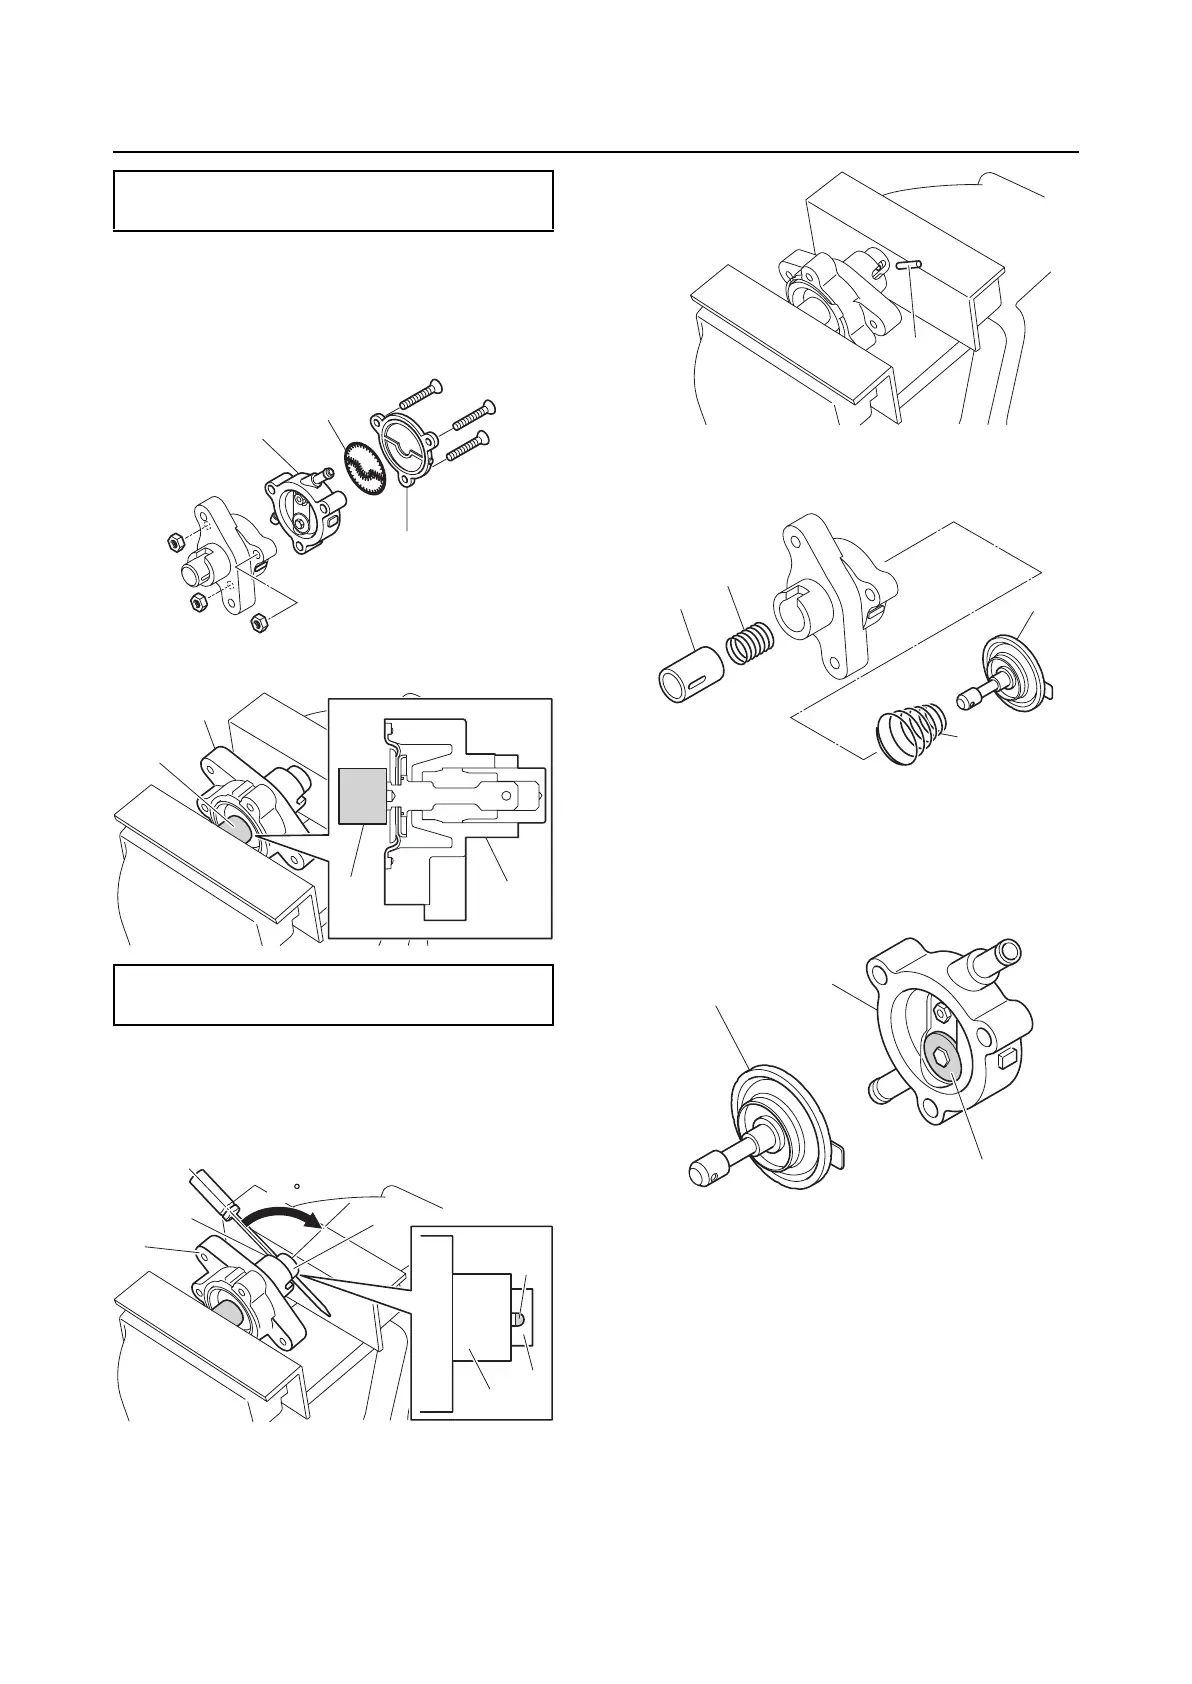
Disassembling the fuel pump
assembly
1. Remove the cover “1”, diaphragm “2”,
and fuel pump body 2 “3”.
2. Hold fuel pump body 1 “1”.
3. While holding fuel pump body 1 “1” in
place, insert a flathead screwdriver into
the hole “a” in the plunger “2” and turn it
90°.
4. Remove the pin “1”.
5. Remove the diaphragm “1”, plunger “2”,
and springs “3” and “4”.
Checking the diaphragm and valve
1. Check the diaphragm “1”. Replace if torn.
2. Check the valve “2”. Replace fuel pump
body 2 “3” if deformed or worn.
Assembling the fuel pump assembly
Before assembling the fuel pump assembly,
clean the parts and soak the valves and dia-
phragm in gasoline to obtain prompt opera-
tion of the fuel pump assembly.
1. Install the springs “1” and “2”, plunger
“3”, and diaphragm “4”.
Specified positive pressure:
50.0 kPa (0.50 kgf/cm
2
, 7.3 psi)
Small end bearing installer “2”:
90890-06528
3
1
2
2
1
1
2
90
1
1
a
a
2
2
1
2
3
4
1
1
2
3