6-13
Fuel pump
Removing the fuel pump assembly
Cover the fuel components using a rag to
prevent fuel from spilling out.
1. Disconnect the fuel hoses “1”, “2”, “3”,
“4”, and “5”.
2. Remove the fuel pump assemblies “1”.
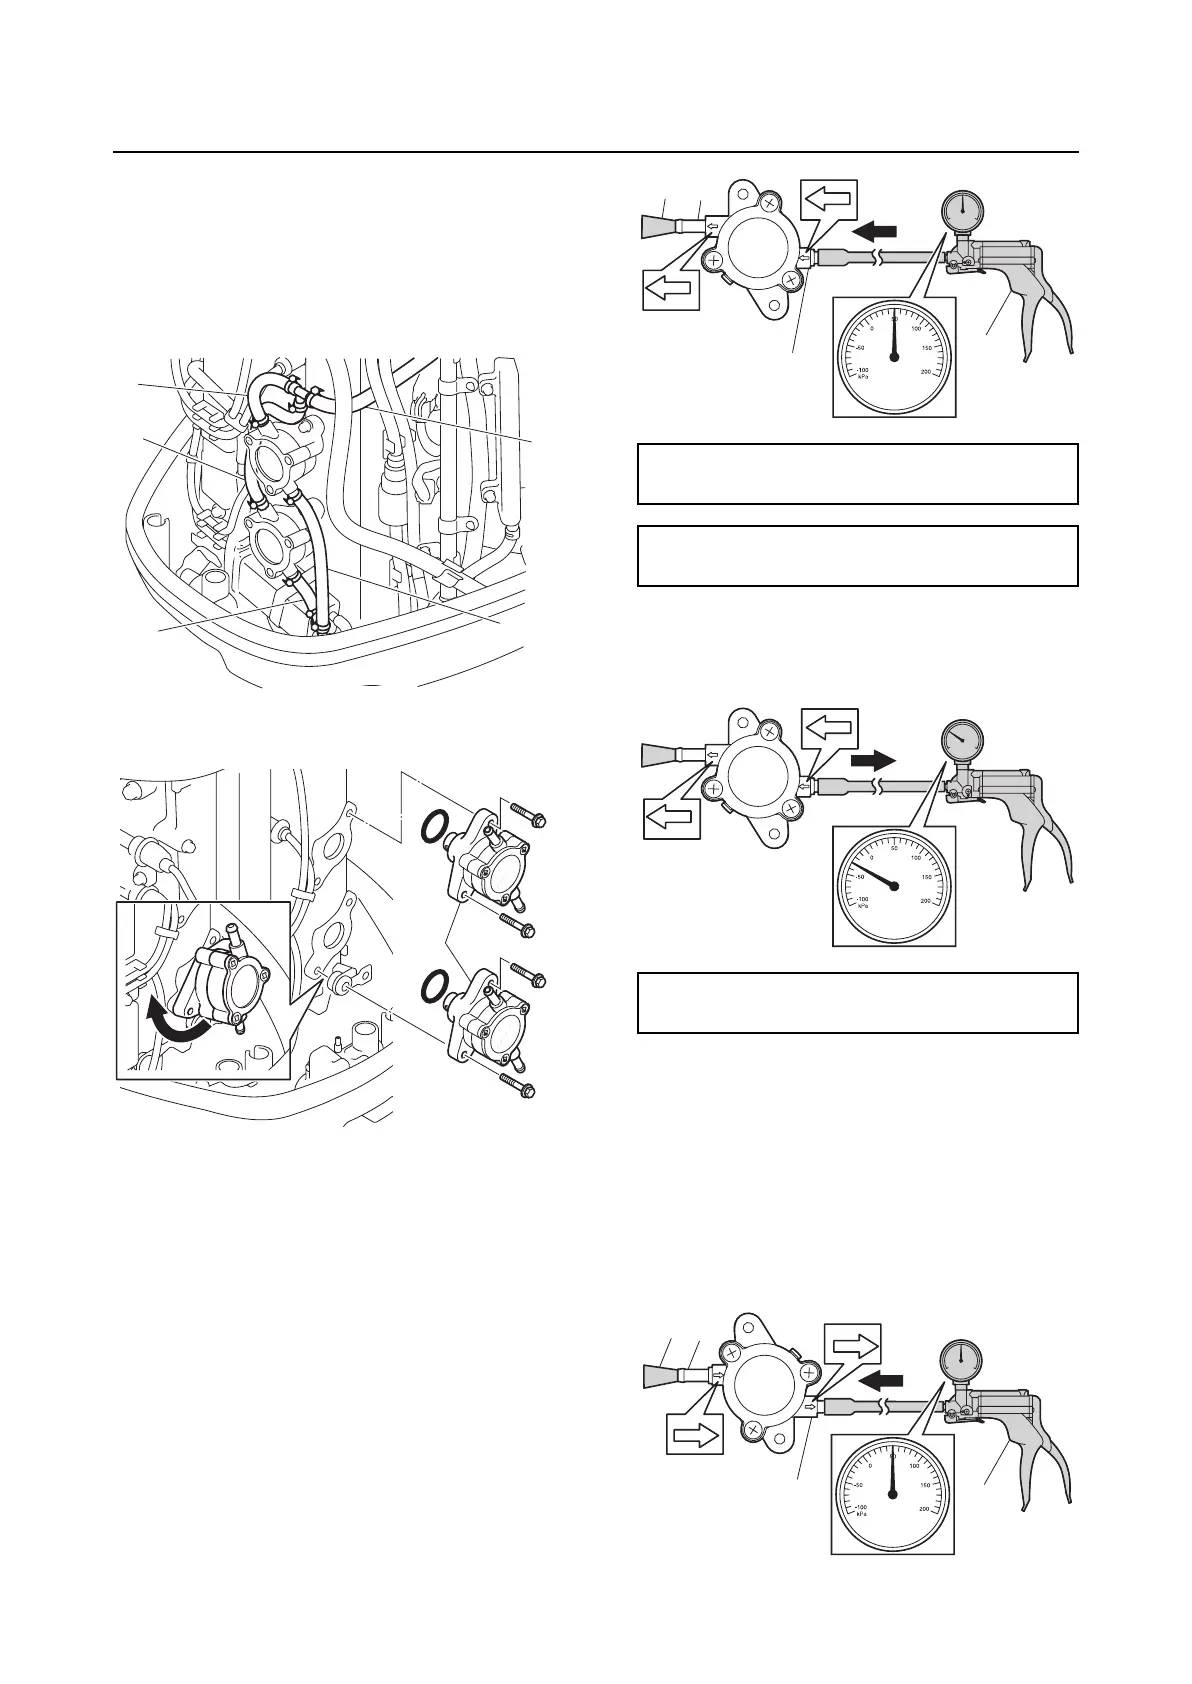
Checking the fuel pump assembly
1. Connect the special service tool “1” to
the fuel pump inlet “a”.
2. Block the fuel pump outlet “b” using a
rubber plug “2”, and then apply the speci-
fied positive pressure. Check that there is
no air leakage.
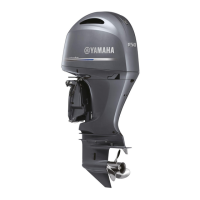
3. Apply the specified negative pressure,
and then check that there is no air leak-
age.
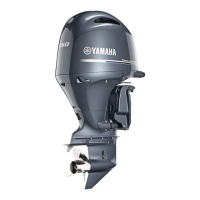
4. Connect the special service tool “1” to
the fuel pump outlet “a”.
5. Block the fuel pump inlet “b” using a rub-
ber plug “2”.
6. Apply the specified positive pressure,
and then check that there is no air leak-
age.
4
5
3
1
2
1
Vacuum/pressure pump gauge set “1”:
90890-06945
Specified positive pressure:
50.0 kPa (0.50 kgf/cm
2
, 7.3 psi)
Specified negative pressure:
30.0 kPa (0.30 kgf/cm
2
, 4.4 psi)
2
1
a
b
a
b
2
1