9-44
PTT cylinder
0
1
2
3
4
5
6
7
8
9
10
A
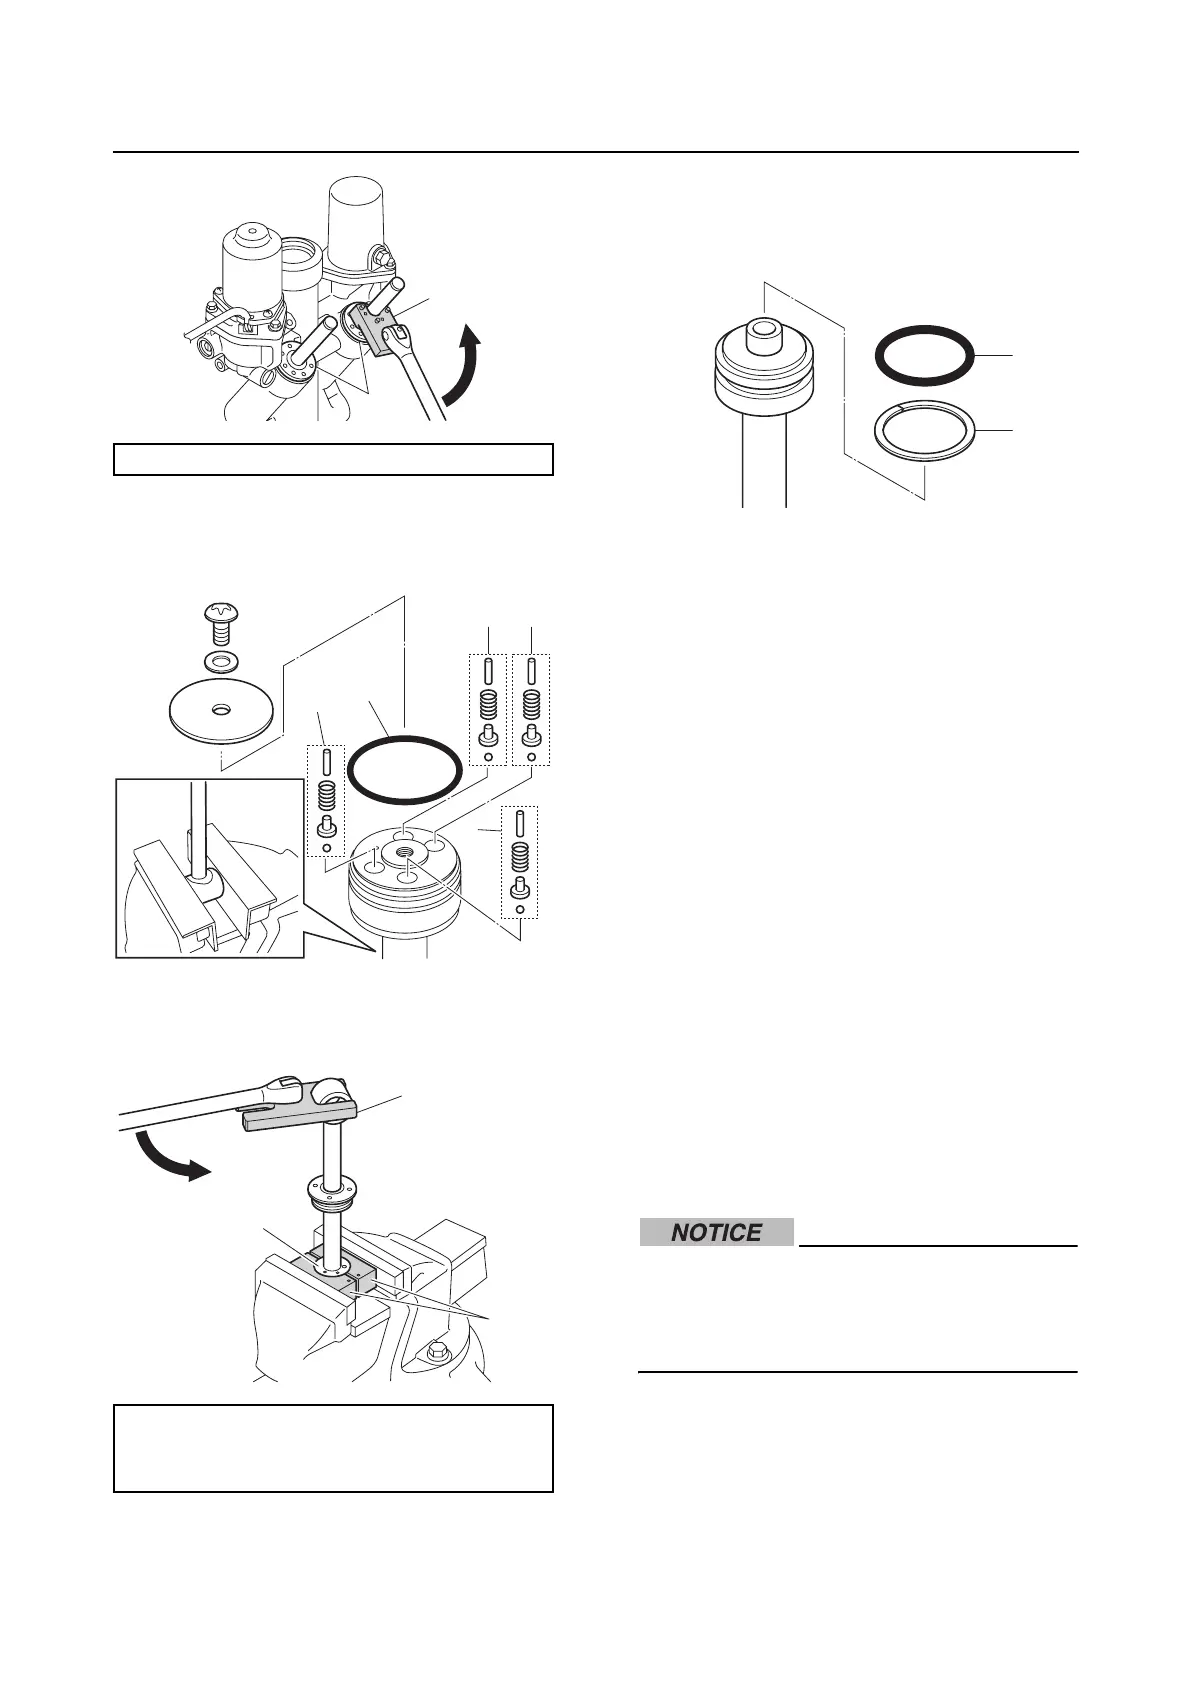
Disassembling the tilt ram
1. Remove the tilt piston absorber valves
“1” and O-ring “2”.
2. Remove the tilt piston “1”.
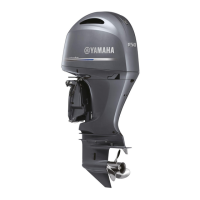
Disassembling the trim ram
1. Remove the O-ring “1” and backup ring
“2”.
Checking the tilt cylinder and trim
cylinder
1. Check the PTT body. Replace if corroded
or cracked.
2. Check the inner surface of the PTT body.
Replace if scratched.
3. Check the outer surfaces of the tilt piston,
trim pistons, and free piston. Replace if
scratched.
4. Check the backup rings. Replace if dam-
aged or worn.
5. Check the trim rams and tilt ram. Clean
using 400–600-grit sandpaper if there is
rust or replace if bent or corroded.
Checking the absorber valve
1. Check the tilt piston absorber valves.
Clean if there is dirt or residue.
Assembling the tilt ram
When assembling the PTT unit, do not use
a rag. Otherwise, dust and particles could
get on the PTT unit components, causing
poor performance.
1. Install a new dust seal “1” and new
O-rings “2” and “3” to the tilt cylinder end
screw “4”.
Trim & tilt wrench “2”: 90890-06587
Power tilt wrench “2”: 90890-06560
PTT piston vice attachment “3”:
90890-06572
1
2
1
1
1
1
2
1
2
3
1
2