7-46
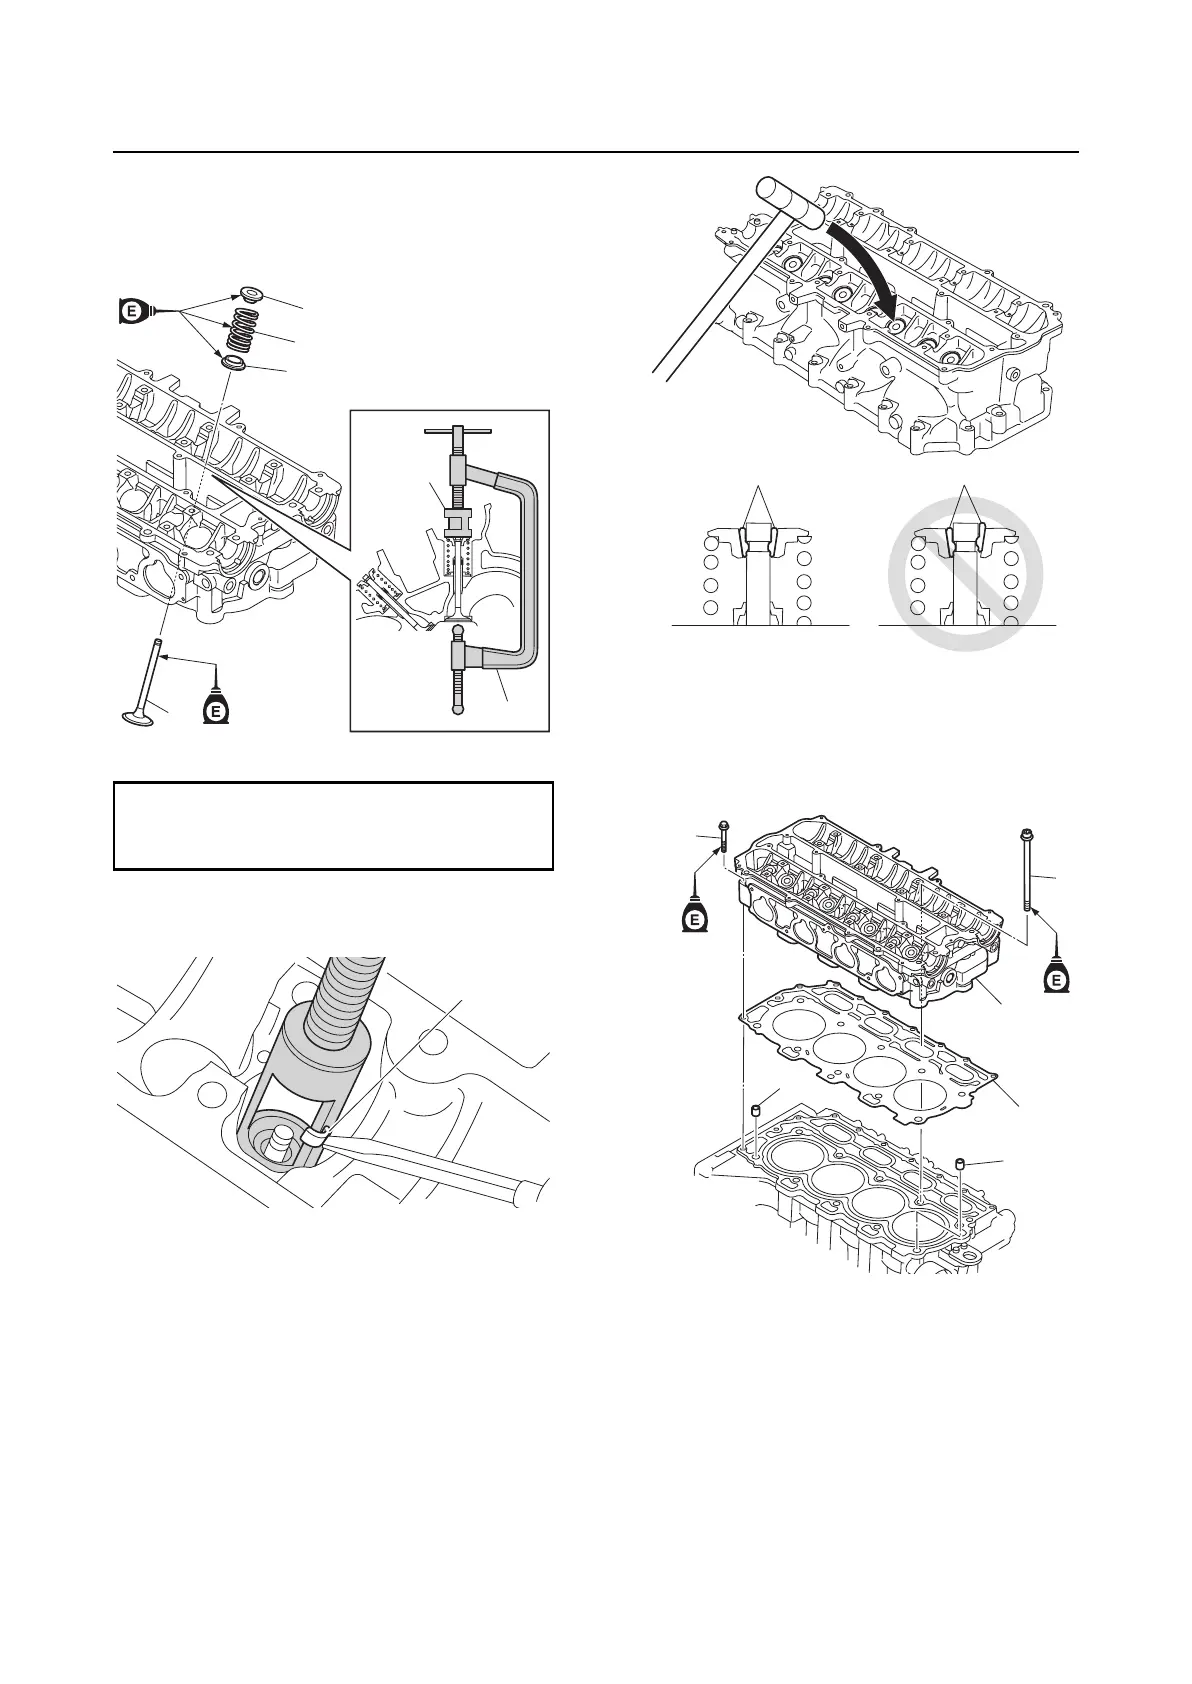
Cylinder head
2. Install the valve “1”, valve spring seat “2”,
valve spring “3”, and valve spring retainer
“4” in this order, and then install the spe-
cial service tools “5” and “6”.
3. Compress the valve spring, and then
install the valve cotters “1”.
4. Tap the valve spring retainer lightly using
a plastic hammer to seat the valve cot-
ters “1” securely.
Installing the cylinder head
1. Install the dowels “1”, a new gasket “2”,
the cylinder head “3”, and the cylinder
head bolts “4” and “5”.
2. Tighten the cylinder head bolts “1” to the
specified torques in 2 stages and in the
order [1], [2], and so on.
3. Mark the M10 bolts and cylinder head
with paint marks “a”, and then tighten the
M10 bolts 90° from the marks on the cyl-
inder head.
Valve spring compressor “5”: 90890-04019
Valve spring compressor attachment “6”:
90890-06320
1
2
3
4
6
5
1
1
1
3
2
1
1
4
5