7-18
Timing belt
Installing the timing belt
When the timing belt is not installed, do
not turn the crankshaft or driven sprocket.
Otherwise, the pistons and valves could
collide with each other and be damaged.
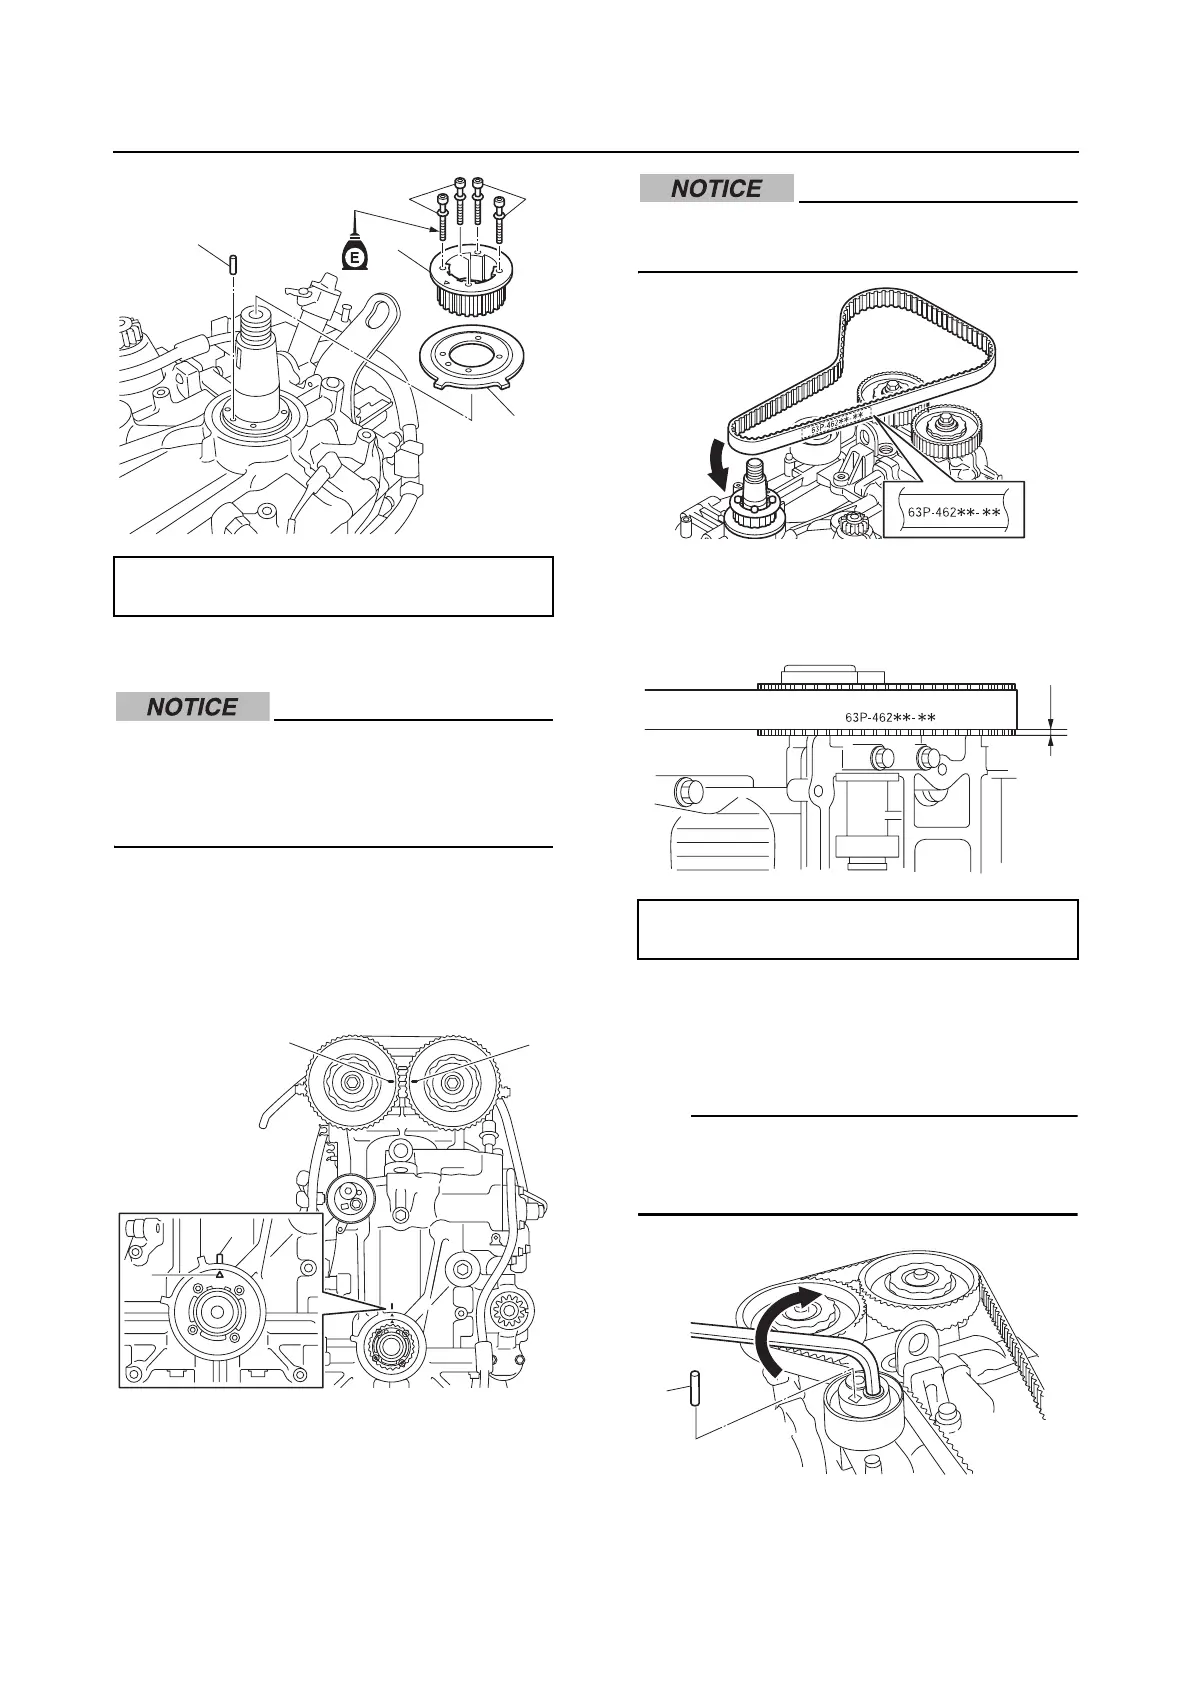
1. Check that the mark “a” in the drive
sprocket and the protrusion “b” on the
cylinder block are aligned. Check that the
“I” marks “c” and “d” on the driven
sprockets are aligned.
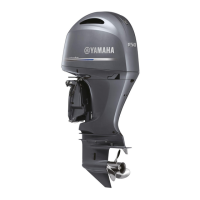
2. Install a new timing belt with its part num-
ber in the proper orientation, from the
drive sprocket side to the port and star-
board driven sprockets, in the counter-
clockwise direction.
Do not apply grease or oil to the timing
belt.
3. Adjust the timing belt to the specified
installation height “a”.
4. Turn the timing belt tensioner gradually
clockwise using a hexagon wrench, and
then remove the pin “1”.
TIP:
When turning the timing belt tensioner, apply
a force of 15 N·m (1.5 kgf·m, 11.1 ft·lb) or
less.
Drive sprocket bolt “4”:
7 N·m (0.7 kgf·m, 5.2 ft·lb)
1
2
3
4
4
a
b
d
c
Timing belt installation height “a”:
2.0mm (0.08in)
a
1