497
Drawing Audio Envelopes in the Track View
This method is only available in the Clips pane and Bus pane, and works for both
tracks and buses. Drawing an automation envelope for audio data overwrites any
preexisting envelope for the same parameter that occurs at the same time in the
same track or bus.
To Draw Audio Envelopes in the Track View
1. Right-click in the Clips pane in the track (or bus) you want to automate.
The Clips pane popup menu appears.
2. From the menu, choose Envelopes-Create Track Envelope-(name of the
control you want to automate). Notice the envelope’s color at the right side
of the menu.
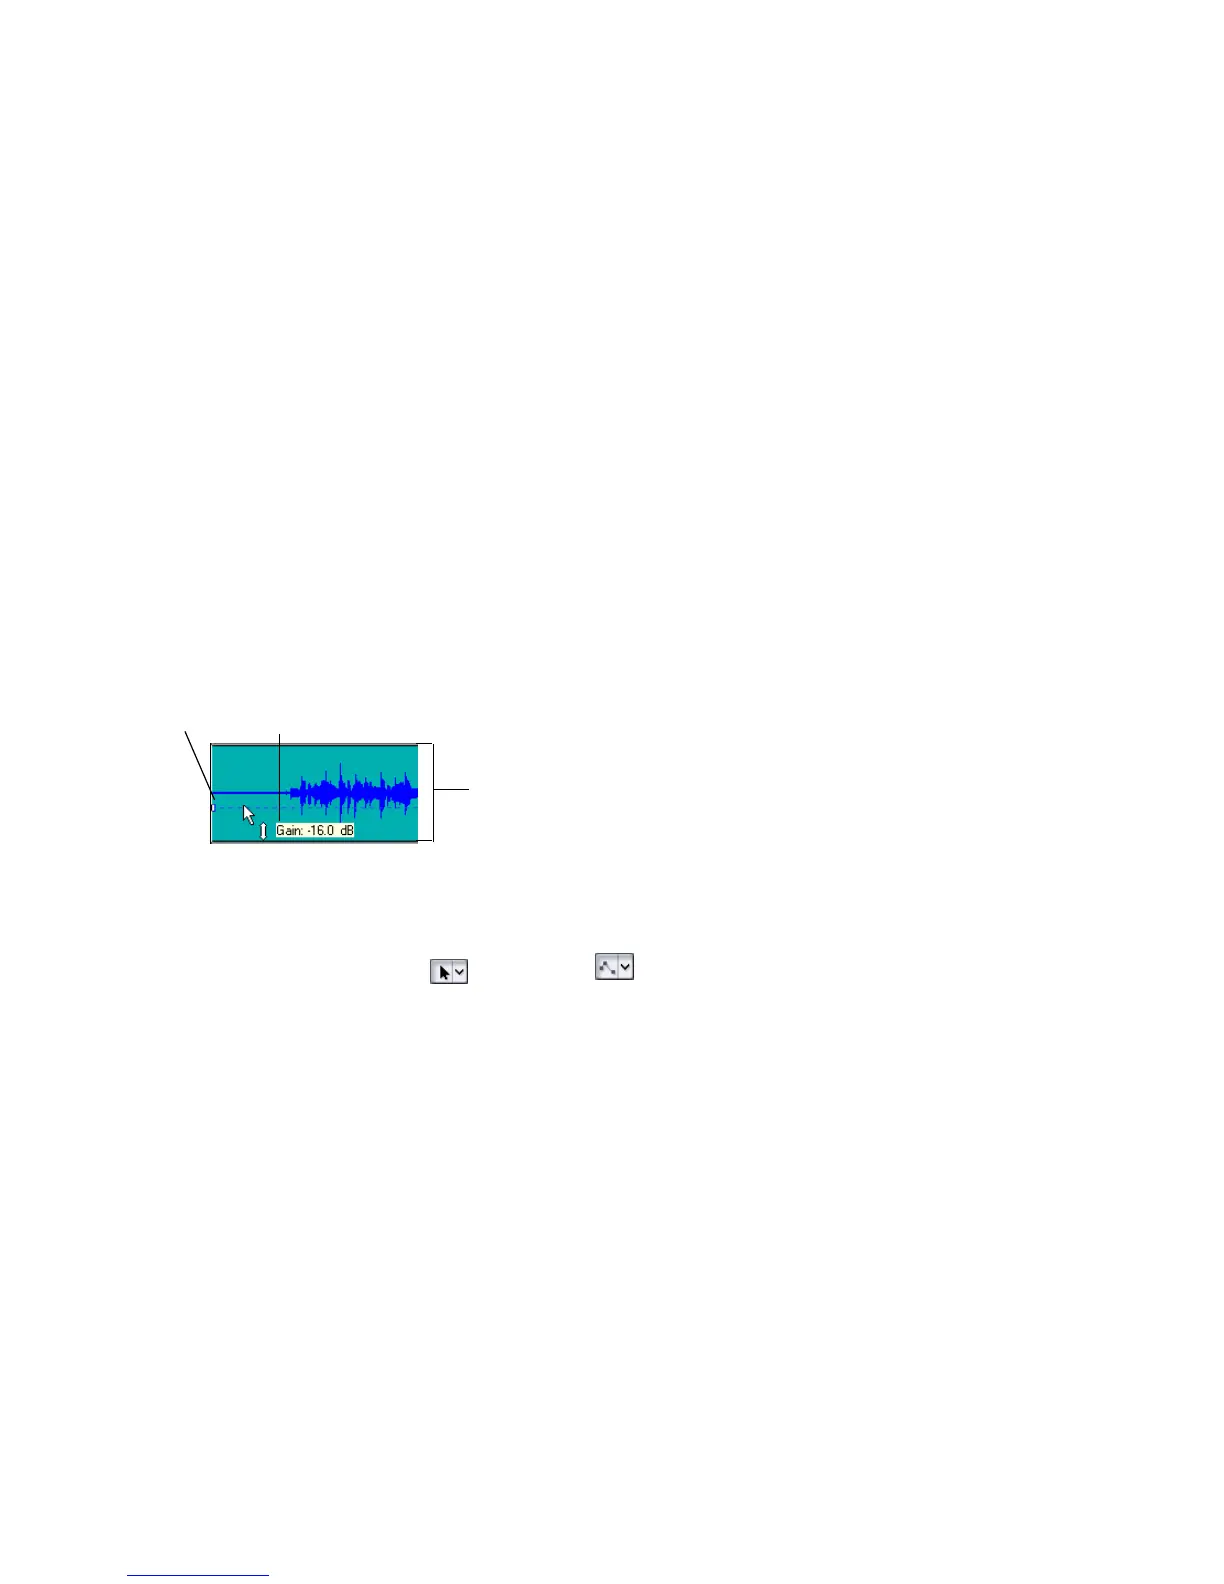
The envelope appears in the Clips pane as a straight, dotted line in the
envelope’s individual color, with a node (very small rectangle) at the
beginning. When you move the cursor over the envelope, a vertical, double-
ended arrow appears under it with the name and current value of the
envelope in a box next to the cursor. The envelope’s vertical position reflects
the current value of the parameter you are editing.
Note: An automated mute envelope changes the track’s mute status whenever
the envelope crosses the middle of its value range.
3. Using either the Select or Envelope tools, move the cursor over the
envelope until a vertical, double-ended arrow appears under it (notice that the
name and current value of the envelope appear in a box next to the cursor),
and right-click the envelope. If you use the Envelope tool, you can’t
accidentally edit any other data besides the envelope.
The Envelope Editing menu appears.
4. Choose Add Node from the menu.
A node appears on the envelope.
Note: A shortcut to add a node is to double-click the envelope.
5. Move the cursor over the node until a cross appears under it, and drag the
node in any direction you want.
6. Double-click the envelope to add another node.
7. Drag the new node in any direction you want and release the mouse.
Envelope value range
Envelope name and current value
Node