185
To Use Loop Recording
1. Choose the input for the track(s) you want to record, and arm the track(s) for
recording.
2. Set the loop start and end times in either the Loop/Auto Shuttle dialog box or
in the Loop toolbar.
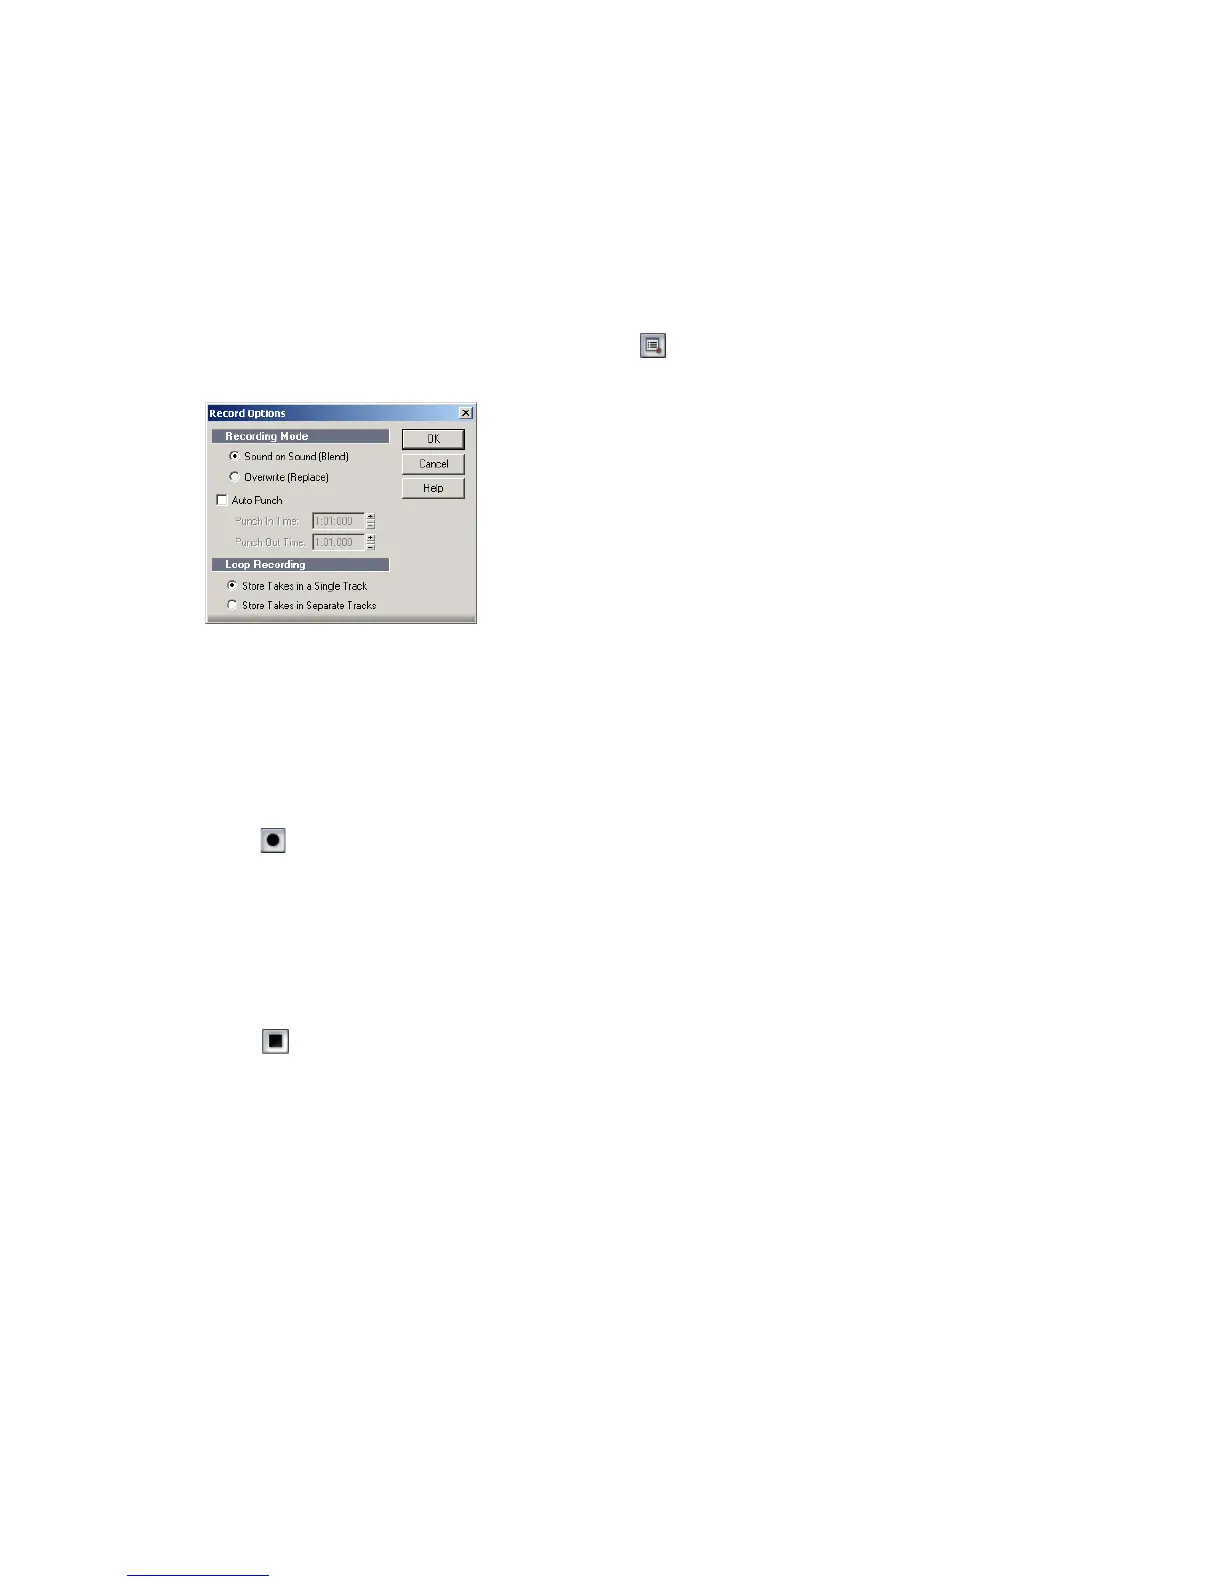
3. Choose Transport-Record Options, or click on the Record toolbar, to
display the Record Options dialog box.
4. Choose to stack all takes in a single track or to store them in separate tracks.
5. If you choose to stack all takes in a single track, choose either Sound on Sound
or Overwrite mode.
6. Click OK to close the Record Options dialog, and set the Now time to the point
in the project where you want to start recording.
7. Click , or press r, or choose Transport-Record. If your metronome count-in
is turned on, it will play the count-in measure.
8. Play or perform the material you want to record. At the end of the loop,
SONAR will return to the start of the loop and you can record the next take.
9. If you want to erase the most recent take while loop recording is underway,
choose Transport-Reject Loop Take or press Ctrl+Spacebar.
10. Click , or press the Spacebar, or choose Transport-Stop when you want to
stop recording.
The takes are stored in the manner you requested.
Punch Recording
Suppose you are happy with most of a track but want to replace one small
section—perhaps as small as a couple of notes. This is where punch recording
comes in handy, because it lets you record new material only within a specified
range of times.