186
For example, suppose you recorded a 32-bar keyboard solo but made some
mistakes in the 24
th
and 25
th
bars. With punch recording, you can play the entire
solo again, so you make sure you can get the feel you want. However, only the bars
you want to correct are actually recorded. That way, you don’t have to worry about
introducing new mistakes elsewhere in the recording.
To use punch recording, follow these steps:
• Enable punch recording.
• Set the start and end times of the punch.
• Start recording by pressing r or clicking the button on the Transport
toolbar.
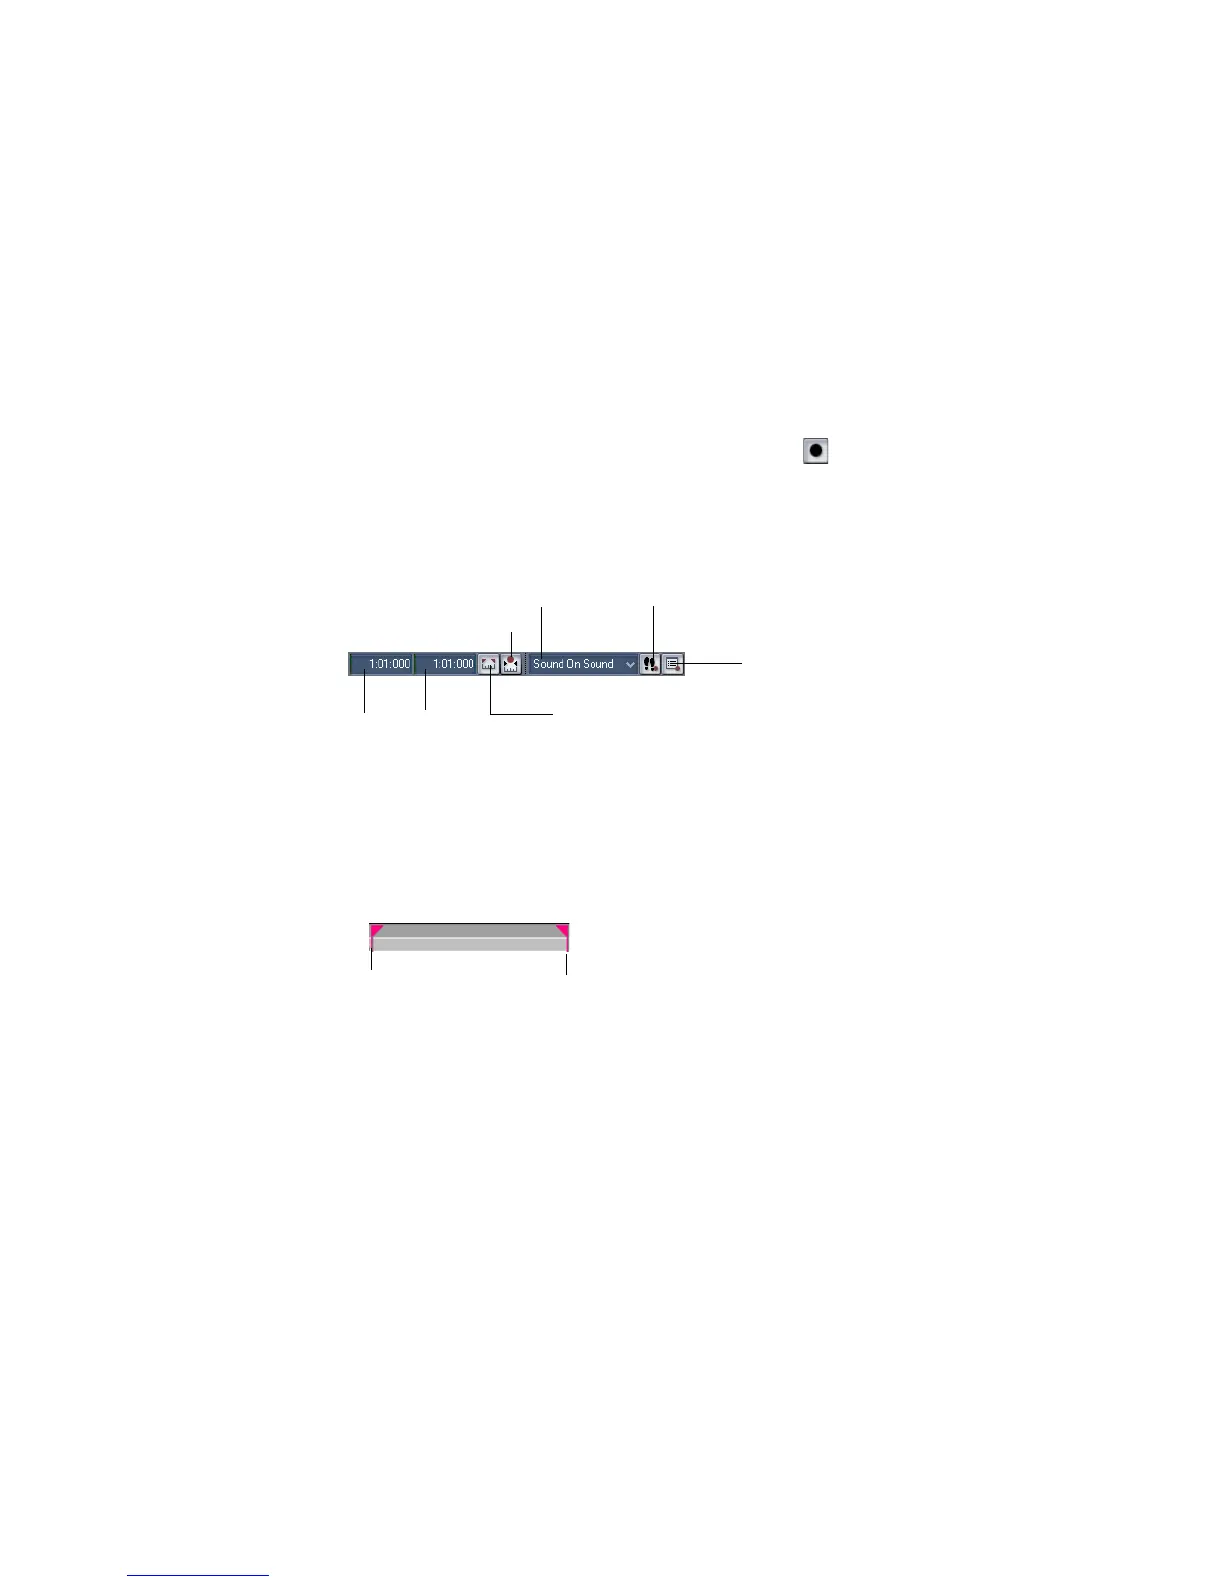
The Record toolbar shows the punch settings, as shown here:
When punch recording is enabled, the punch times are indicated by special
markers in the Time Ruler, which is at the top of the Clips pane:
After you punch record, choosing Edit-Undo both discards any new material you
recorded and restores the original material that had been deleted.
You can also combine loop and punch recording to record several takes of a punch.
Say you are working on that perfect take of a guitar solo and you need to hear a
couple of bars of the project as “pre-roll” before you punch in. By combining looping
with punch, you can have each take begin before you start to play and still have
the solo cut in at the appropriate instant.
Click here to set punch times
to the selection start and end
times
Punch In
Time
Click to open the Record
Options dialog box
Step record
Record mode
Punch
Out Time
Enable punch recording
Punch In
Punch Out