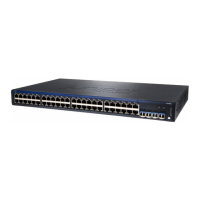
You can mount a QFX3500 device on four posts in a 19-in. rack or cabinet by using the mounting kits
provided with the device. Choose one of the following two mounting kits provided for the different
QFX3500 chassis configurations.
•
If your installation kit has two rails and your QFX3500 has mounting holes integrated as part of the
chassis, use “Two Mounting Rails Procedure” on page 330. This configuration aligns the management end
of the device flush with the rack. The adjustable rails allow for installation into racks having different
depths.
•
If your installation kit has four rails and the QFX3500 does not have mounting holes as part of the chassis
faceplate, use “Four Mounting Rails Procedure” on page 332. This configuration allows either end of the
device to be mounted flush with the rack and still be adjustable for racks with different depths.
(The remainder of this topic uses “rack” to mean “rack or cabinet.”) The front and rear rack rails must be
spaced between 28 in. (71.1 cm) and 36 in. (91.4 cm) front to back.
Before You Begin Rack Installation
Before you begin mounting a QFX3500 device in the rack or cabinet:
•
If replacing an existing QFX3500, remove previous rack-mount hardware. The mounting bracket and
mounting blade in this procedure is not compatible with other Juniper mounting kits.
•
Ensure that you understand how to prevent electrostatic discharge (ESD) damage. See “Prevention of
Electrostatic Discharge Damage” on page 242.
•
Verify that the site meets the requirements described in “Site Preparation Checklist for a QFX3500
Device” on page 95.
•
Place the rack in its permanent location, allowing adequate clearance for airflow and maintenance, and
secure it to the building structure.
•
Read General Site Guidelines, with particular attention to “Chassis Lifting Guidelines for a QFX3500
Device” on page 220.
•
Remove the device from the shipping carton (see “Unpacking a QFX3500 Device” on page 327).
Ensure that you have the following parts and tools available to mount the device on four posts in a rack:
•
ESD grounding strap (provided).
•
One pair of rear installation blades. These installation blades support the rear of the chassis and must
be installed (provided).
•
Eight screws to secure the chassis and rear installation blades to the rack (not provided).
•
Appropriate screwdriver for the mounting screws (not provided).
329

 Loading...


