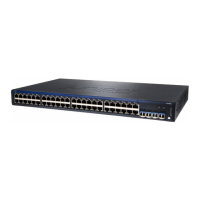
To install a power supply in a QFX5100 device, follow the instructions in “Installing a Power Supply in a
QFX5100 Device” on page 430. To remove a power supply from a QFX5100 device, follow the instructions
in “Removing a Power Supply from a QFX5100 Device” on page 432.
To install a fan module in a QFX5100 device, follow the instructions in “Installing a Fan Module in a
QFX5100 Device” on page 440. To remove a fan module from a QFX5100 device, follow the instructions
in “Removing a Fan Module from a QFX5100 Device” on page 442.
To install an SFP+ or QSFP+ transceiver in a QFX5100 device, follow the instructions in “Installing a
Transceiver in a QFX Series Device” on page 481. To remove an SFP+ or QSFP+ transceiver from a QFX5100
device, follow the instructions in “Removing a Transceiver from a QFX Series Device” on page 476.
To connect a fiber-optic cable to an SFP+ or QSFP+ transceiver in a QFX5100 device, follow the instructions
in “Connecting a Fiber-Optic Cable to a QFX Series Device” on page 488. To disconnect a fiber-optic cable
from an SFP+ or QSFP+ transceiver from a QFX5100 device, follow the instructions in “Disconnecting a
Fiber-Optic Cable from a QFX Series Device” on page 486.
RELATED DOCUMENTATION
AC Power Supply for a QFX5100 Device
Cooling System and Airflow in a QFX5100 Device
Management Panel of a QFX5100 Device
Determining Interface Support for the QFX5100 Device | 137
Installing a Power Supply in a QFX5100 Device
The QFX5100 is shipped from the factory with two power supplies. Each power supply is a hot-removable
and hot-insertable field-replaceable unit (FRU) when the second power supply is installed and running.
You can install replacement power supplies in the two slots next to the fan modules without powering off
the switch or disrupting the switching function.
•
Before you install a power supply in a QFX5100 device, ensure that you have taken the necessary
precautions to prevent electrostatic discharge (ESD) damage (see “Prevention of Electrostatic Discharge
Damage” on page 242).
•
Ensure that the airflow direction of the power supply is the same as the chassis. Labels on the power
supply handle indicate the direction of airflow. See Cooling System and Airflow in a QFX5100 Device for
more information.
To install a power supply in a QFX5100 device (see Figure 141 on page 431 and Figure 142 on page 431):
430
 Loading...


