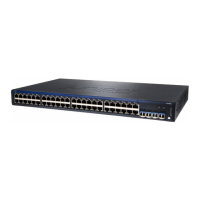
Connecting DC Power to a QFX5110
The QFX5110 is shipped from the factory with two 650 W power supplies. Each power supply is a
hot-removable and hot-insertable field-replaceable unit (FRU) when the second power supply is installed
and running. You can install replacement power supplies in the two slots next to the fan modules without
powering off the switch or disrupting the switching function.
WARNING: A DC-powered QFX5110 is intended for installation only in a restricted
access location.
NOTE: The battery returns of the DC power supply must be connected as an isolated DC return
(DC-I).
Before you begin connecting DC power to the switch:
•
Ensure that you have taken the necessary precautions to prevent electrostatic discharge (ESD) damage
(see “Prevention of Electrostatic Discharge Damage” on page 242).
•
Ensure that you have connected the switch chassis to earth ground.
CAUTION: Before you connect power to the switch, a licensed electrician must
attach a cable lug to the grounding and power cables that you supply. A cable with
an incorrectly attached lug can damage the switch (for example, by causing a short
circuit).
To meet safety and electromagnetic interference (EMI) requirements and to ensure
proper operation, you must connect the chassis to earth ground before you connect
it to power. For installations that require a separate grounding conductor to the
chassis, use the protective earthing terminal on the switch chassis to connect to the
earth ground. For instructions on connecting earth ground, see Connect the QFX5110
to Earth Ground.
On DC systems, you can also ground the chassis using the DC protective earthing
terminal on the DC power supply as an alternate method. This method is useful if
you are unable to access the chassis ground point by using the two-holed grounding
lug, see Alternate Method to Ground QFX5110-48S-DC and QFX5110-32Q-DC Systems.
•
Install the power supply in the chassis. For instructions on installing a power supply in a QFX5110, see
Installing a Power Supply in a QFX5110.
271
 Loading...


